Sieg Super X3 Mill
On this page
Some time ago, I bought several Digital Read-Out scales with the intention of mounting them on the mini-lathe and mini-mill. Other projects and time constraints delayed these efforts, and I already had mechanical dial indicators mounted on both machines, so I could get along without the DROs.
After I got the Super X3 mill, the need for the DROs rose to the top of my priorities.
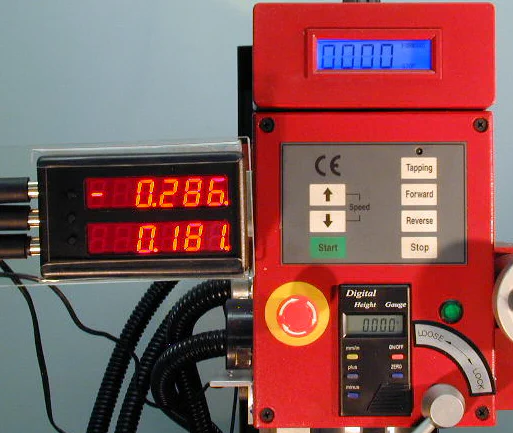
I used a 6" scale for the Y-axis and a 12" scale for the X-axis, which are sufficient to cover the full range of motion of the table. The Super X3, has a factory built-in DRO for the Z-axis.
Therefore, since I only had two axes to cover, I chose to use a 2-axis LED display unit from Zietlow Design.
This is a very nice unit, sent to me a few years ago to do a review, but it was sitting in a drawer waiting for me to do the DRO conversion on the mini-lathe.
Now that the SX3 mill has become the more urgent project, I decided to use the display. I have not heard back from a recent email that I sent to Zietlow Design, so I’m not sure if these display units are still available.
Digital photos don’t do justice to the display - it actually has a deep red color and much more contrast than the photo.
Update 4/15/07 - I have confirmed that Zietlow Design is no longer manufacturing the DROs referenced here and on their web site.
As usual, it took longer than originally anticipated to complete this project. The main source of delay was trouble in getting steady, reliable readings, and this problem ultimately was traced to the way the interface cables connect to the DRO.
Other authors, have mentioned this problem, so I was not surprised when I ran into it.
The X-axis DRO Mount
The X-axis DRO is mounted onto two small aluminum blocks super-glued to the back of the table. Originally, I decided to use the mounting blocks because it was easier to drill and tap them than to try to drill and tap holes in the back of the table.
Also, if the original mounting concept did not work out, I would be easy to relocate the mounting blocks as needed and I would not have the “extra” holes in the table.
My poor old mini-mill has about 20 “extra” holes from various abandoned project ideas. As it turned out, the blocks also provided extra clearance needed for the readout slide.
I discovered later that another advantage of the glued-on blocks was that they break free if the DRO is run past the end of the scale. This happened once during the initial testing of the setup, and probably saved me from destroying the DRO.
When properly adjusted, this should not be a problem since the 12" DRO will cover nearly the full range of motion of the table - minus about 1/4" at either end.
I mounted a length of 1" aluminum “L” bracket above the DRO as a chip shield. U-channel might have been a better choice, but I did not have any on hand and could not find it at the local Home Depot.
Initially, I super-glued the bracket in place, but after it got knocked loose a few times, and after I was pretty satisfied that I would keep it where it was, I drilled & tapped 6-32 mounting holes and screwed it in place with phillips head screws.
Normally for a situation like this, I like to use the cap screws because they are a lot easier to work with in hard-to-reach situations. The tip of the hex wrench holds the screw in place while it is getting started into the thread.
Unfortunately, in this case, the cap head screws did not provide enough clearance for the slider on the DRO. I could have solved this problem, had I anticipated it, by using thicker mounting blocks for the scale.

Another “L” bracket holds the DRO readout unit in a fixed position relative to the X-axis table movement. The DRO scale is attached to the table and moves along with the table past the fixed readout head.
Since the mounting screws for the DRO head are on the back side, I decided to mount the DRO with the back side facing outward from the table, so that I could access the mounting screws.
This orientation also provides protection for the relatively fragile digital display on the front of the DRO. The mounting blocks provided sufficient clearance for the slider.
The L-bracket just slips under the heads of the screws, which are then tightened down. There was no special reason that I mounted it that way, except that I began this process using a shorter DRO and its mounting screws were closer together.
The bracket was made to fit that DRO and when I got the longer DRO I did not feel like making a whole new L-bracket, so that’s how it happened. Someday, maybe I’ll make a wider bracket.
Probably not. :)
The base of the L-bracket is screwed to an aluminum base plate that is super-glued to the Y-axis dovetail casting. Here again, it was easier to drill and tap the separate aluminum base than to drill and tap the dovetail casting.
The mounting hole for the L-bracket is milled out to a slot to allow the bracket to slide in and out to align it with the DRO scale.

To the right of the L-bracket, you can see another “Z” shaped bracket that supports the data cable where it plugs into the DRO.
This bracket, and a similar one on the Y-axis DRO, ultimately solved the problem of the cables making intermittent connections that resulted in erroneous position readings.
I also made several custom cable clamps from aluminum and used them to restrain the cables at various strategic locations.
The Y-axis DRO Mount
I made the Y-axis DRO mount first, and it seemed to me that the most direct way to mount the DRO was in a horizontal orientation on the left side ledge formed by base of the mill.
The ledge is adjacent to the side of the Y-axis table, making it relatively easy to attach the DRO, while the table above provides protection and chip shielding.

I mounted the DRO on an aluminum block about 3/4" high and a little longer than the DRO scale. The block brings the DRO up to a convenient height to attach the slide to the Y-axis slide by means of custom L-bracket.
A simpler solution would have been to use two separate riser blocks - one for each end - and superglue them to the mill base. I did not want to use superglue in this situation since it would ruin the paint job if I ever needed to remove them.
Using two separate blocks would have required drilling and tapping at least four holes, instead of two, so I decided to go with the elongated riser block.
Unlike the X-axis mounting, in this situation it is the slide that is fixed and the readout that moves. This was simply a result of what was most expedient in each case.
A special offset L-bracket is screwed to the base of the DRO slider, using the standard screws that come with DRO.
The other end of the bracket extends past the side of the DRO slider so that it can be accessed to screw it to the side of the Y-axis dovetail slide.
This effort took several attempts to get it right, and the result is a little ugly, but it works. Hmm… looks like I ended up with a few extra holes in the side of the dovetail slide.
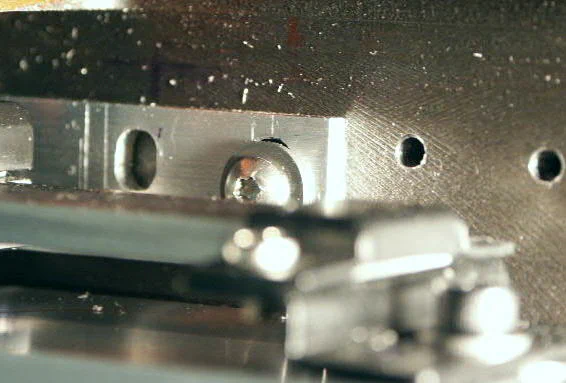
Here again, the clearance between the bracket and the end of the slide was insufficient to use a cap screw. I tried using a phillips head screw, but it was difficult to get it started in this hard to reach area.
I ended up using a torx head screw since it would stay on the torx driver while getting it into position.
Had I planned better and left a little more clearance, a cap head screw probably would have been a better choice - and at least would have been more consistent.
Due to its location under the table, it was hard to get a photo of this bracket, so my apologies for the somewhat blurred image.
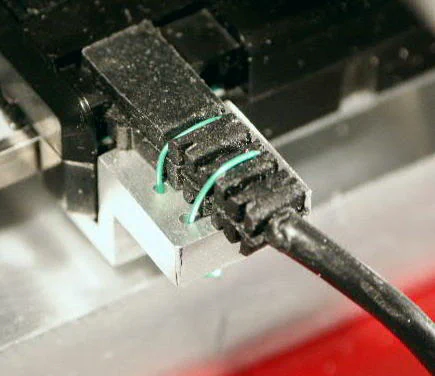
Here’s a closer look at the tie-down for the DRO data cable. Basically, the cable connector rests on a custom-machined Z bracket, with #30 wire-wrap wire used to keep the connector from moving.
The bottom side of the Z bracket is super-glued to the metal plate on the back of the DRO slider.
Y-axis Chip Shield
Early testing showed that in spite of its protected location beneath the table, the Y-axis DRO still got showered with metal chips. I’ve been experimenting with a chip shield to enclose the table, but that’s a story for another day.
I decided to make a chip shield to enclose the Y-axis DRO as much as possible. It’s hard to enclose it completely, due to the need for the readout housing to slide along the scale.
Acrylic plastic sheet is a good material for projects like this, and I have a fair amount of experience with cutting, bending and gluing it.
It has the additional benefit in this application that it is transparent, so you can see if chips are building up inside the shield or the DRO cable becomes twisted or snagged.
Another important benefit is that the shield protects the data cable from getting caught on tools or other objects on the workbench when the table is moved.
Years ago, I made a neat gadget for bending acrylic sheet. The principle was good, but I needed a bigger version to handle bends big enough for this application, so I Supersized it. More about that in another article…
Here’s a photo of the finished chip shield:
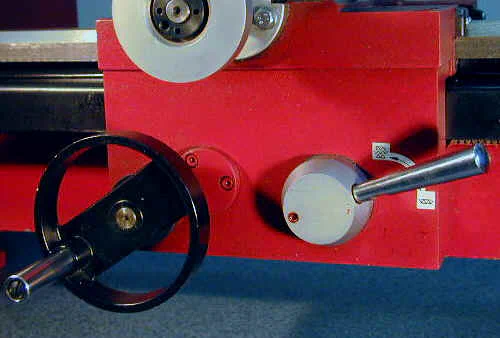
The chip shield is held in place by two custom-made 6-32 thumbscrews. Originally, I just used some long flat-head bolts, but I wanted to be able to remove the chip shield quickly and conveniently when necessary to remove stray chips.
The chip shield also limits the table from its last inch or so of possible range, so there may be times when it is desirable to remove it to gain back that inch.
Spacers between the surface of the chip shield and the side of the mill base prevent the mounting screws from cracking or breaking the plastic.
They are glued in place so that they stay attached to the shield - thus keeping them aligned and preventing them from getting lost when the shield is removed.
I intentionally made the heads of the screws relatively small in diameter so that they can be quickly spun off between thumb and forefinger.
