Shop Tour
If you go back and read my home page you will see that my original plan for mini-lathe.com was to tell you about my home machine shop.
Over the years since I began mini-lathe.com in 2000, I’ve shown bits and pieces of the shop, but I’ve never done a complete virtual tour.
I’ve learned a lot about shop organization over the years, and I have some ideas that I’d like to share with you.
Although it was a tough decision, I decided to make this a separate “for fee” component of mini-lathe.com.
Mini-lathe.com is supported primarily by subscription fees to the Premium Content section, which has provided a modest but steady revenue stream since I introduced it around 2002.
As of 2014, the cost for a “All Topics” subscription to Premium Content is still $29.99 - the same price as in 2002. I’d like to keep Premium Content affordable for those new to the hobby, but the costs of running mini-lathe.
com have steadily increased over the years. Thus, I’m hoping that this new topic will produce some additional support revenue. If I had $20 for every hour that I’ve spent developing mini-lathe.
com, I’d have a pretty big wad of money. Of course, I’d soon spend it on new tools for the shop! ;-)
When visitors stop by my shop, I show them around and explain why things are set up the way they are. I like to think that, by now, I have a pretty well organized shop, with a lot of innovations that make work go more quickly and smoothly.
Through this page, I’ll take you on a comprehensive tour of the shop, showing and explaining a lot of details that I hope will help you - especially if you’re new to home machine shops - set up your own shop in a way that will be safe, efficient and fun to work in.
So, let’s get started.
Shops of the Past
My shop hasn’t always been as nice and as well-equipped as it is today. In this section I’ll give you a little of the history of how it evolved. If you find it boring, skip on to the next section.
My dad was a very active ham radio operator and he taught me at a young age how to use hand tools to repair and make things.
One of his favorite ways to keep me occupied so that I wouldn’t endlessly pester him with questions, was to have me sort out a bucket of nuts, bolts, washers and other hardware into bins of things that are alike.
Thus I learned about Phillips-head screws, lock washers, Nylock nuts and dozens of other factoids that have been useful throughout my life.
Even now, when the weather is gloomy and I have nothing better to do, I’ll sit down and continue that process where I last left off.
Somehow, there’s always more hardware left to be sorted.
I don’t have any pictures of my shop adventures from those days, but, by the time I was in high school, living in the DC suburbs of Northern Virginia, my dad had helped me build a small darkroom in the basement of our home.
It was pretty rough and crude, but dad used it as a project to teach me the basics of building construction, wiring and plumbing - more skills that have served me well throughout my life.
As my interests turned to science and microscopes, the darkroom doubled as a laboratory. I did some studies on planaria - those little flatworms with arrow-shaped heads that will grow two heads if you slice the original head down the middle - and fed them hamburger meat.
The smell of rotting hamburger meat was not real popular with my mom, even though she otherwise was a great supporter of my nascent scientific pursuits.
At one point I got interested in blood-typing, as in A, B, O and AB blood types, and discovered that my own blood is type AB-, the rarest of all blood types.
My interest piqued, I talked my way into a visit to the blood bank at a local hospital. The folks in the lab were so enthusiastic about my studies that they gave me a bag of whole blood with which to continue my experiments.
And (I’m not lying here, folks) the bag of blood was stored in the family refrigerator for about a year. See what I mean about my mom?
Those of you under 60 may find that story hard to believe, but remember, this was America back in the days when we carried pocket knives to school and me and my buddies used to shoot .
22 rifles in my buddy’s basement after school. The bullets were safely captured by a foot-square bullet trap. From Sears, of course.
Well, a few of the bullets actually missed the trap and were embedded in the cinder-block wall.
Hell, they’re probably still there.
During my senior year of high school, I became interested in high-speed photography. Inspired by the classic “milk drop crown” photographs by Harold E.
Edgerton of MIT, with some help from my dad I built a high-voltage tube power-supply to power an electronic strobe flash. I used a photocell mounted on a lab stand to trigger the flash when the milk drop went by.
Here’s some photos of that setup.
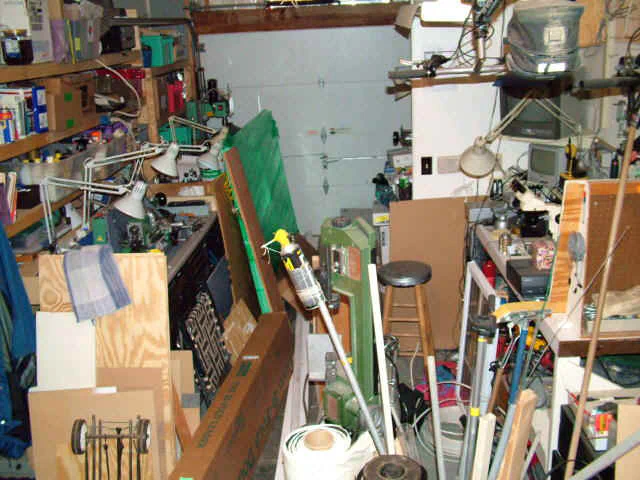
Everything on Wheels
We’ve been in our house for about 18 years. We raised four kids here, and they have all moved on now and three of them have kids of their own.
We were thinking about moving to an “upscale” neighborhood, and even put a down payment on a lot, but then decided to renovate the house we’ve been living in.
All my life, I have dreamed of having a nice shop, but it was always out of reach. So I’ve worked out of unfinished basements, spare rooms in apartments and unheated garages for many years.
Now, finally, at age 55, it looks like I’ll have that “dream shop” that we all hope someday to have. Now I worry about whether I’ll live long enough to enjoy it!
Until now, mini-lathe.com has been operating out of our garage. It’s a small one-car garage that has never held a car for as long as we have lived here.
It has not been too bad as a shop, except that everything is behind something else, and all of my tool benches are on wheels so that I can move them around to get to what’s behind them.
Well, then there’s the fact that it’s only about 34 degrees in there during the winter. And that cold concrete floor makes my legs ache.
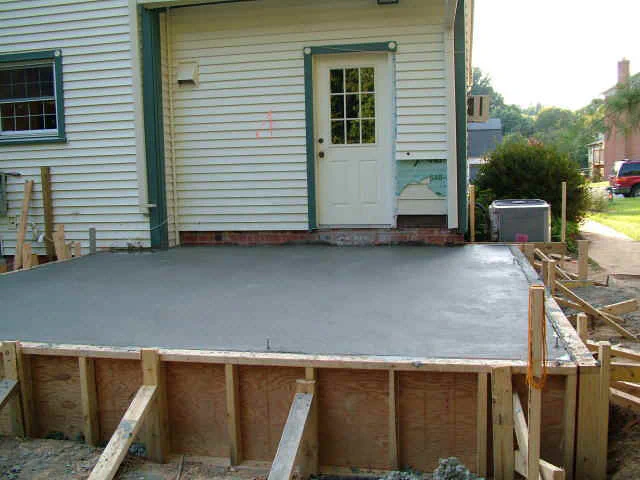
The new shop is an addition to the back of the garage. An added benefit is that I will now be able to park a car in the garage. Here’s a few photos of the new shop under construction:
Here’s the poured concrete foundation. Looks like it will support a 24x80!
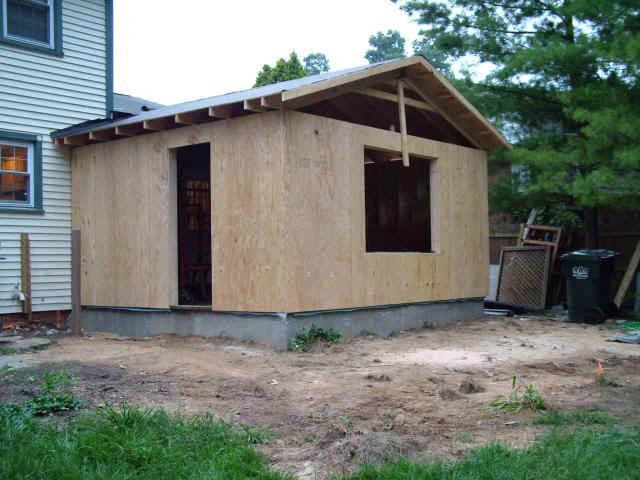
Here it is a few weeks later, framed in:
And a shot of the interior…
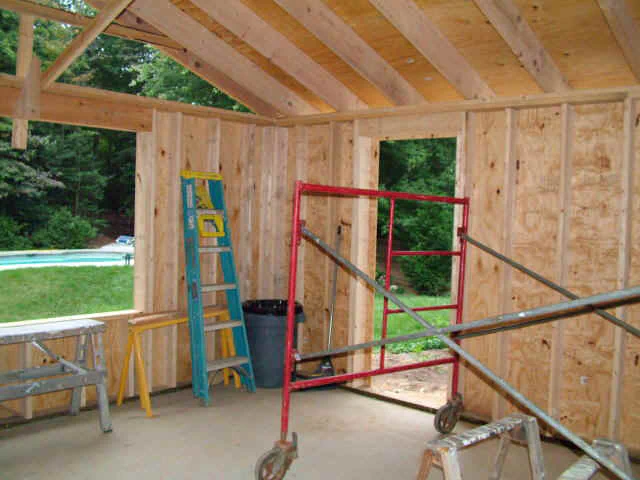
So, I’ll keep you posted. Once the construction is done, I’ll get everything moved in there and can start working on some new project articles. Been thinking about maybe gettin’ a bigger lathe.
.. and mill… and…
Update: 01/20/05
As I had hoped, the interior construction of the new shop was pretty much completed by mid-December.
However, while I am now moved in to the new shop, I had to temporarily store a lot of stuff from the garage in the shop while the garage gets refinished - so the shop is still pretty crowded.
I purchased a few wire-rack shelves with casters from Lowes to store stuff and still be able to roll it around until I decide where things will go.
Even so, I have been able to use the lathe, mill, and other power tools, so this is a big improvement over the last several months when I was totally dead in the water.
Here are some photos of the shop right after the interior was finished but before I moved all the machinery in.
I’ll post some updated photos in a few days showing the current status of the shop, but the following photos make it easier to see the layout.
The shop is 15’x15’. It seemed big when I was planning it, but I’m already wishing I had made it about 5’ longer (or 8’)! My wife says that it would be plenty big if I’d get rid of some of the junk I’ve been saving for 40 years.
She may be right. But I use that stuff!
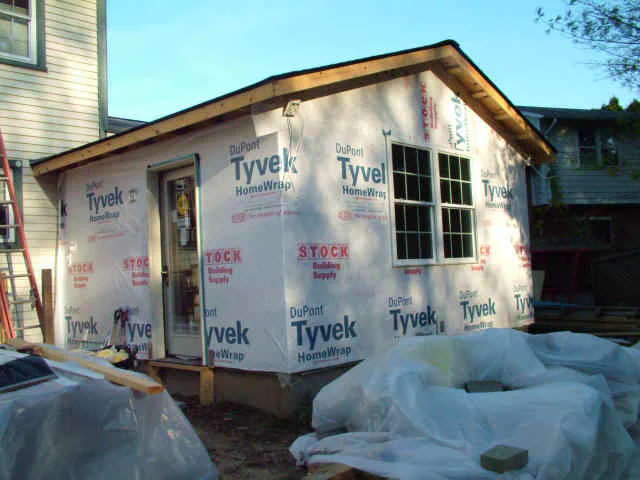
The outside is still just wrapped in Tyvek. The shop is just one small part of a much bigger home renovation project, so our contractor has been working according to priorities we set.
Next on the list is an outside storage shed for the mower and garden tools that used to be stored in the garage. This will free up more space when it’s done.
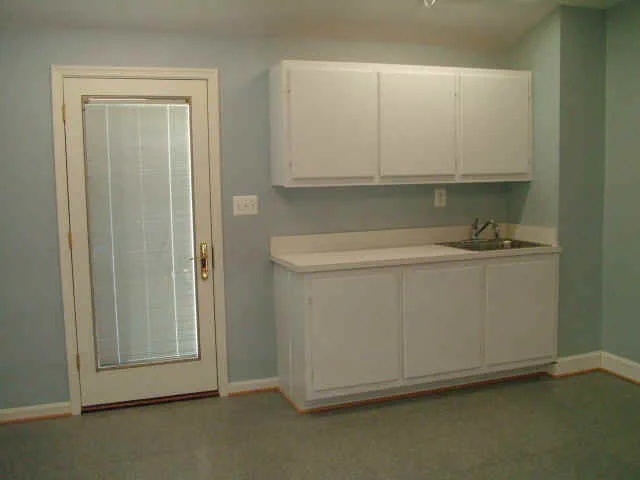
Well, I was able able to move into the new shop in January. Unfortunately, the next project was to build an outside storage shed and to refinish the garage.
While these projects were underway, much of the stuff that had formerly been stored in the garage had to be temporarily stored in the new shop. So there was not much room to work, and not much shop work got done.
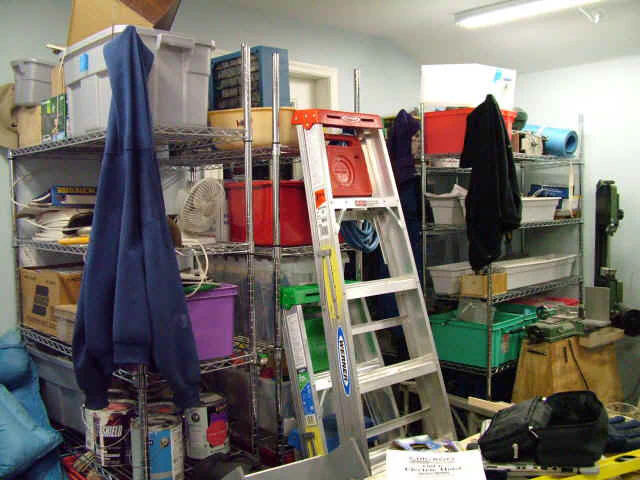
Shelves of excess junk still take up a lot of room. Eventually there will just be two shelves.
Now the garage is done and the storage shed is available for storage. All that remains to be done is the exterior siding on the shop and the storage shed, and that is underway at the moment.
My spare time has been limited during January and February. We had a few snowstorms, so snow removal became a consumer of what otherwise might have been shop time.
It also took time to move all the “outdoor” stuff into the new shed. Wiring the shed also took some time, since that was not included in the construction contract.
The most important tools including the lathe, mill, bandsaw, drill press and grinder are all operational now, and the electronics bench, while crowded with stuff, is usable.
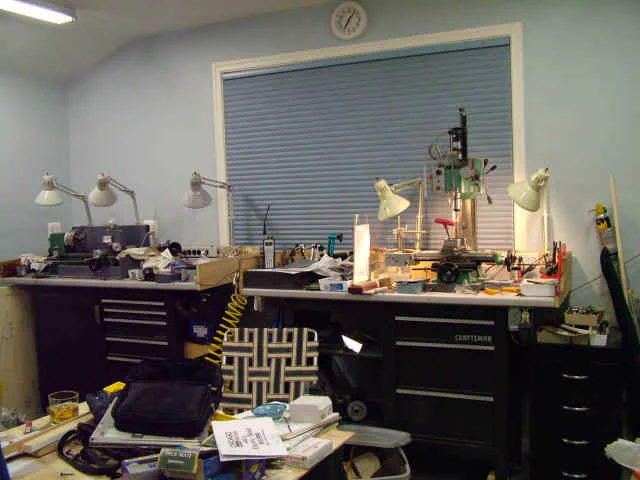
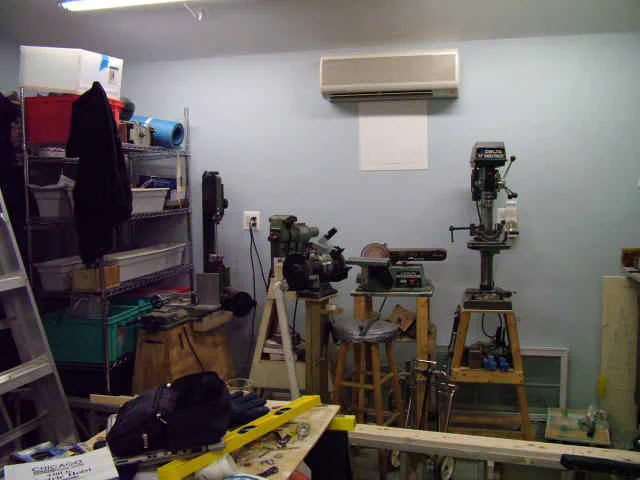
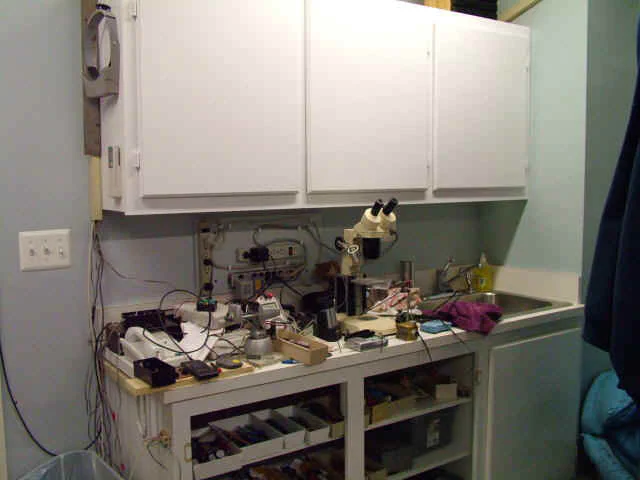
The fun part is that I got a new C6 lathe and X3 mill from Sieg. These arrived in January, but I have not been able to set them up yet.
At the moment, they sit in the garage on furniture dolleys until I can build some benches and move them into the shop.
Update: 03/28/05
The exterior is nearly complete - siding and gutters are now done - all that’s left is the exterior lights and planting some grass. It’s been a long process, but the final result looks good.
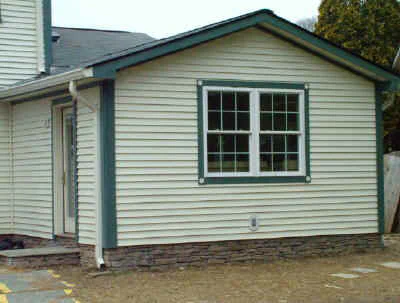
Made some progress on the interior over the weekend. Finally, it’s beginning to feel like home. For the first time in nearly a year, I can get to my tools and do some work.
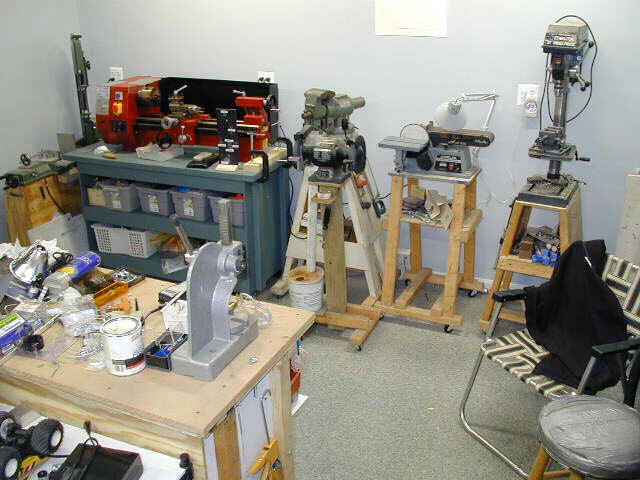
One nice thing about having everything on wheels is that you can try out different arrangements with relative ease.
It’s also handy when you need extra room to work on a long workpiece that extends through the lathe spindle or from the vise - or just need to sweep the swarf.
Some of those old, primitive, unpainted 2x3 and 2x4 stands are scheduled for upgrade in the next few months. But they have served their purpose until now.
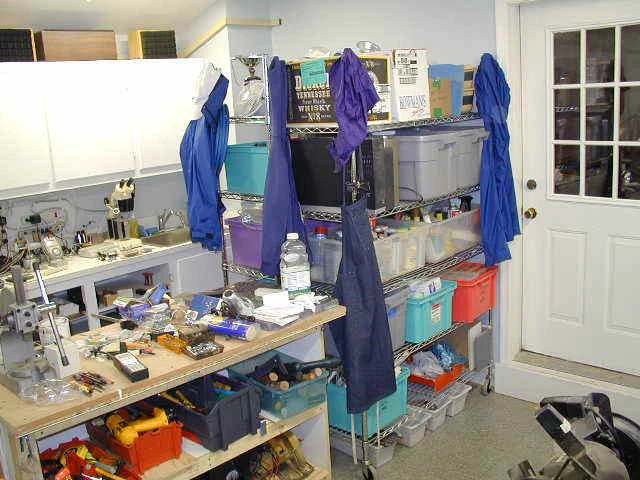
I finally got down to just 2 rolling wire racks. As you can see, they also serve as coat racks at the moment. I cleared everything off of two of the four racks onto the floor, then moved two of them into the basement.
This forced me to fit everything that I really needed in the shop onto the two remaining shelves. Anything that looked like outdoor stuff that would not freeze went out to the new outdoor shed.
Some stuff went to the “bulk storage” shelves in the garage; the rest went to the basement.
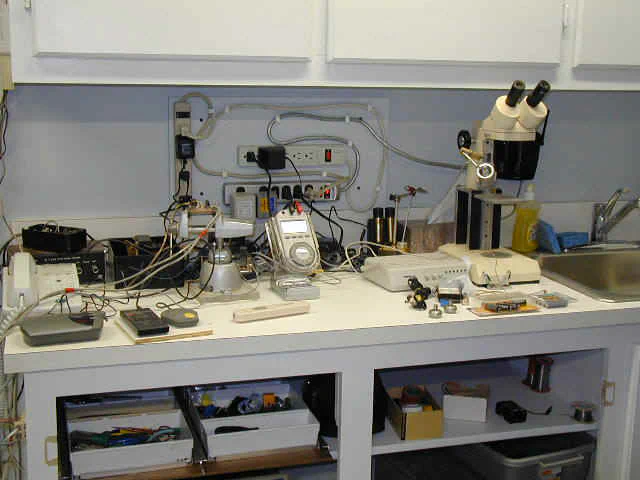
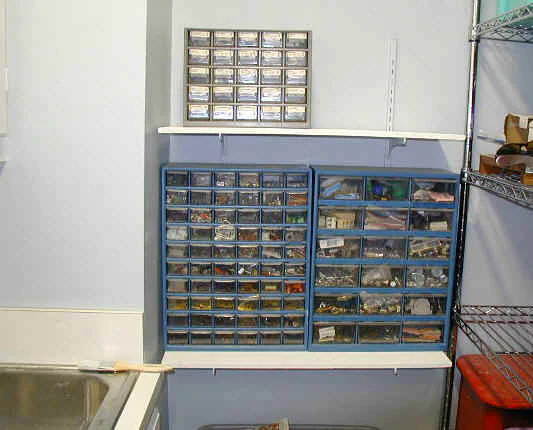
Even the electronics bench is cleaned up a little. Still too much stuff on the countertop. Some of it needs to be mounted on the wall or elsewhere. I got the small-parts bins mounted, too.
At this point, I’m working on some of the finer points and applying a few things I learned, both good and bad, from prior shop experiences. A small breakthrough was figuring out a way to make shelves work sort of like drawers.
Generally, I like drawers better than shelves - they are further along the evolutionary curve. Effective drawers, though, have to be the right length and depth, and must provide unobstructed access to the whole length of the drawer.
They have to be deep enough to hold the things you store there, but not so deep that space is wasted or things have to be stacked on top of each other.
The best ones, of course, use ball-bearing double slides. They glide out easily to the full length of the drawer. Trouble is, they’re expensive, and for the DIY-er, time-consuming to install.
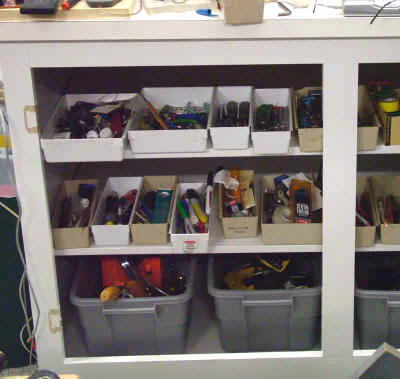
Check the photo above, and you will see that I removed the cabinet doors to provide easier access to the contents. In this case, the contents are stored in Rubber Maid drawer inserts.
I’ve used these for many years (I’m not sure they still make ’em, but someone does). They’re convenient for small stuff, and versatile because they come in various sizes and link together with an overlapping lip that joins each tray to its immediate neighbors.
As they are laid out above, though, the trays are not linked, since I needed to be able to pull each one out individually - like a drawer. Pull it out too far and in the blink of an eye you dump the contents on the floor.
Not good.
Like the Grinch, I puzzled over this until my puzzler was sore. Well, OK, maybe not that hard, but after a while I had a promising idea.
I know I tried this, or at least thought about it, somewhere in the hazy past of my shop experience, but it emerged as a good compromise in the current situation.
Here’s what I did:
- Cut some 1/4" plywood (or, later, 1/4" Masonite) to 10" x 19"
- Cut some 1/2" aluminum “C” channel to 18" long - the depth of the shelves
- Glued the channel with the “C” facing sideways on either side of the plywood/masonite
- Rubbed some paraffin canning wax (wax, not kerosene, for you Brits!) on the edges for lubrication
- Glued some aluminum “L” angle onto the plywood/masonite to enclose the drawer inserts and add stiffness
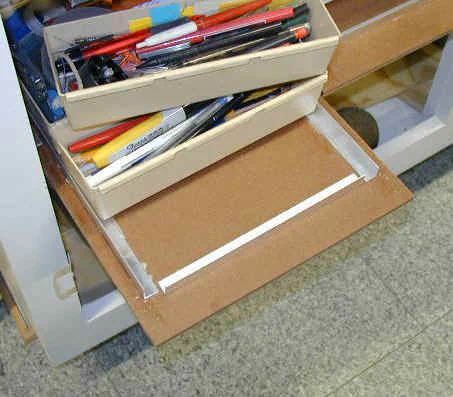
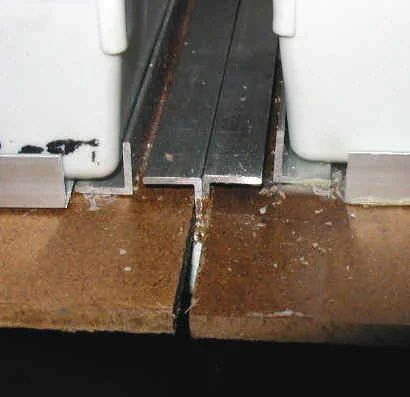
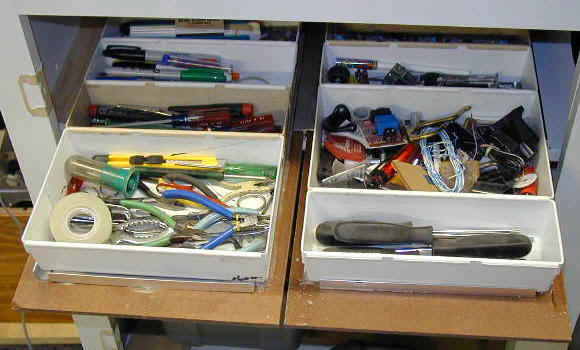
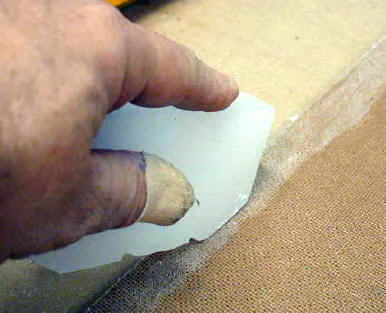
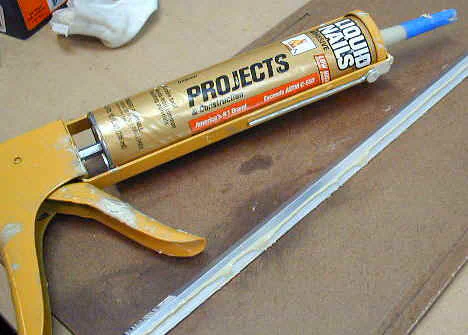
The glue to use for this application is Liquid Nails. It is easy to apply and dries fairly quickly to a strong grip. I formed a short tip from masking tape around the plastic tip on the tube.
This makes a finer bead and, after the glues dries in the tape tip, you can just peel it off to get down to fresh glue at the end of the plastic tip.
Otherwise, the glue dries in the plastic tip and getting fresh glue out can be a sticky problem.
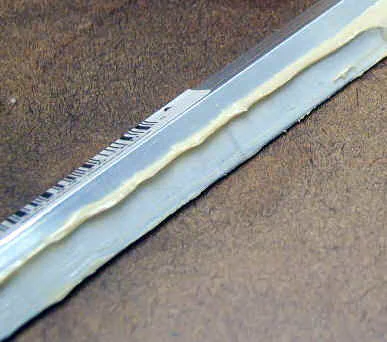
The net result is a sliding panel that supports a chain of the drawer inserts. Years ago, I made a set of drawers from pine and used paraffin wax to lubricate the sliding surfaces.
Now, some 30 years later, those drawers still slide as slick as the day I made ’em. It’s a little harder to find canning wax now, but my wife found some in the local grocery.
