SIEG Digital Readout (DRO)
Introduction
From time-to-time, I have an opportunity to get an early look at new products that are in development at the Sieg factory. This is a good arrangement since I get to inform my readers of what’s in the pipeline, while Sieg gets some early feedback on how the new product works in actual practice.
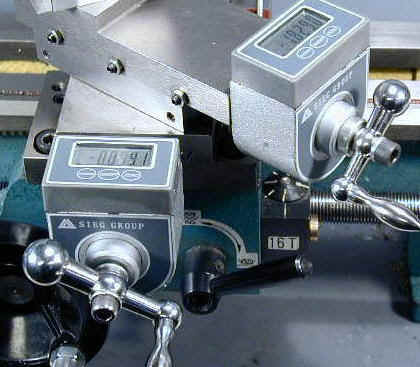
Currently in development is a digital readout that replaces the standard cross-feed and compound dials.
I receive a fair number of emails to the effect of “I’m interested in buying a minilathe, but I’ve heard that the handwheel dials do not read accurately in inches, what do you recommend?” or “I’m interested in buying a minilathe but I want to work with metric units, what do you recommend”.
My answer is that either of these factors is easily overcome simply by measuring carefully, using the system of your choice (metric or inch), as you approach the final dimension you are trying to attain.
At the heart of the matter are the following facts:
Most (but not all, see below) of the Sieg minilathes sold in the U.S., have cross-slide and compound lead screws with a metric thread of 1 mm pitch. The handwheel dials have forty divisions representing approximately, but not exactly, one-one-thousandth of an inch (0.001″). The divisions actually represent 0.000984″.
Advancing the dial for one full revolution actually moves the cross-slide by 0.0394″ instead of the expected 0.040″.
This deviation is pretty small and can be ignored most of the time, but purists find it hard to live with. Better would be leadscrews cut to an inch rather than a metric thread pitch. Then the dials would read exactly in thousandths of inch, within the accuracy to which the leadscrews are manufactured.
If this is important to you, you can purchase a 7×14 minilathe from Micro-Mark (P/N 82710, $574.95 as of 12/03) that has True-Inch™ dials and leadscrews. These lathes are manufactured by Sieg for Micro-Mark as the exclusive U.S. distributor.
On the Micro-Mark 7×14 lathe, the leadscrews are 0.050″ per turn (20 TPI) and the handwheels are graduated in 50 divisions of 0.001″. Micro-Mark also sells a conversion kit (P/N 82545, $69.95 as of 11/03) that will fit any of the other Sieg 7×10 and 7×12 minilathes to convert them to True-Inch™ measurements.
Always at the forefront in mini-lathe offerings, I would not be surprised if Micro-Mark offered these new digital readouts as a standard feature or accessory for their lathes in the not-to-distant future.
It turns out that the digital dial conversion kit under development at Sieg also uses 20 TPI threads. This will make the inch-unit crowd happy, but might not, it would seem, be as appealing to metric aficionados. But wait – there’s more to the story.
With the digital readouts you can have your choice of units for display purposes. Then it occurred to me: since the readouts are driven by a tiny computer, they can automatically do the math to read with equal precision in either inches or millimeters, just like a digital caliper does.
After all, distance is absolute – it is only by historical precedent that we choose to divide it up one way or the other and with a computer it’s a simple matter to convert from one set of units to the other.
Well, the manual that came with the units does not discuss this matter, so we’ll see what the test results show a little later in this article. Now let’s get on with the installation.
Unpacking and Cleanup
Sieg has made formed foam packing standard for their products in the last few years and it does a good job of protecting the components from damage during the trip from Shanghai to the ultimate purchaser.
The individual parts are wrapped in plastic and those, like the leadscrews, that are subject to rust, are covered with the Sieg trademark red packing grease.
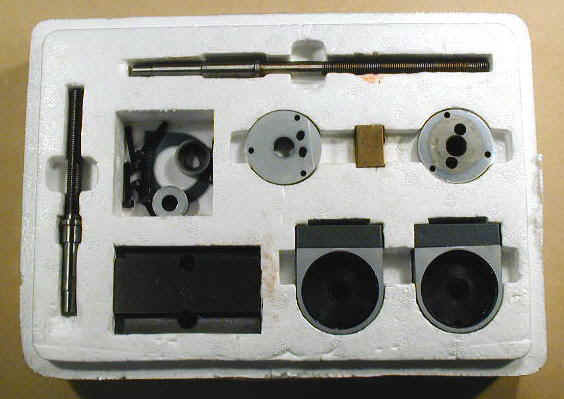
Included in the package are the following components:
- 2 digital readout units
- 2 replacement leadscrews (20 TPI) – compound and cross-slide
- Replacement compound base (with 20 TPI internal thread)
- Replacement brass leadscrew nut (20 TPI) for cross-slide
- Replacement mountings for the digital readouts
- Assorted screws, bushings, etc. for assembly
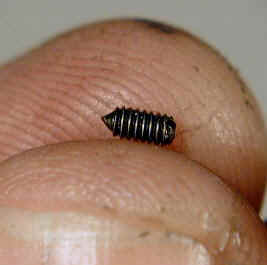
When opening the small bag of accessories, watch out for two tiny set screws. I did not see these at first and lost one of them. Fortunately I discovered that a 1-72 setscrew works as a replacement.
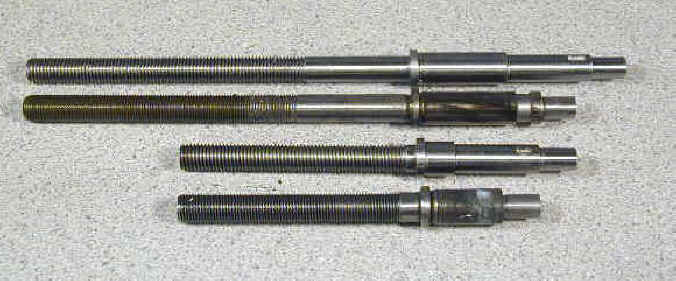
The photograph below shows the new and old leadscrews side-by-side. The new ones are longer to accommodate the extra width of the DRO units, and have a coarser thread – 20 TPI versus 1mm pitch for the originals.
The new ones also have a little groove milled into them, that engages with the tiny set screw so that the DRO encoder shaft turns with the leadscrew. There is no groove for the half-moon springs as they are no longer needed.
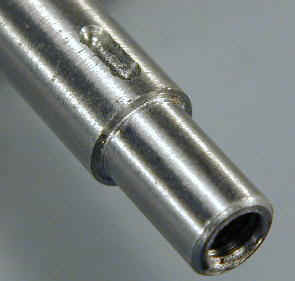
After removing the plastic bags, the next step, of course, is the Ritual Cleansing of the Red Grease. My favorite solvents for this task are WD-40 or Kerosene, but I hear reports that others have used mineral spirits with good results.
I haven’t tried mineral spirits myself, but if I did, I would be careful to keep it (them?) away from plastics and painted surfaces. Cleanup is a quick and painless process since only the two leadscrews and the compound base need this treatment.
Installing the Cross-Slide Components
I followed a slightly different sequence than is laid out in the Sieg instructions:
First, remove the compound:
- Crank the compound all the way back until the leadscrew disengages
- Remove the handle and bushing
- Remove the dial – cup your hand around it to catch the little half-moon spring
- Remove the mounting bracket
- Remove the leadscrew
- Carefully slide the top half of the compound off of the bottom half and set it aside
- Remove the two locking screws that hold the compound base to the cross-slide
- Lift off the bottom half of the compound and set it aside
Now remove the cross-slide from the carriage:
- Remove the pillow block that supports the main (power feed) leadscrew
- Turn the carriage handwheel to move the carriage all the way to the right
- Disengage the carriage handwheel from the rack and slide the cross-slide all the way to the end of the carriage being careful not to drop it off the end of the ways (note: the serial number stamped on the end of the ways creates a raised area of metal which may impede the movement of the cross-slide all the way to the end. If so, take a small flat file and
- carefully smooth down the raised edges of the numbers)
- Crank the cross-slide all the way back until it disengages from the cross-slide leadscrew
- Remove the cross-slide handwheel
- Remove the dial – watch out for the little half-moon spring
- Remove the screws that hold the leadscrew bushing (bracket) in place
- Remove the leadscrew bushing (bracket)
- Remove the leadscrew
- Slide the cross-slide off the back side of the carriage
- Remove the brass nut and replace it with the new one – leave it a little loose for now
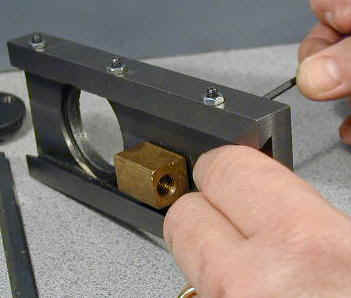
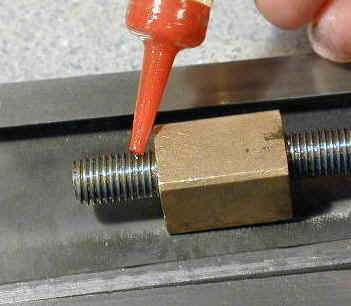
Thread the leadscrew into the brass nut (its a left-hand thread, so turn it counterclockwise) and put a few drops of oil on the threads. Run it in and out a few times to clean up any tiny burrs left from manufacturing – this will make it easier to engage when it is hidden underneath the cross-slide later on. Remove the leadscrew and set it aside.
- Make sure that the pilot holes in the gib are lined up with the tips of the adjusting screws
- Slide the cross-slide back into place (you may have to loosen the gib screws)
- Readjust the gibs, if necessary, so that the cross-slide is snug, but not binding
- Insert the new 20 TPI leadscrew and engage it with the nut (turn counterclockwise)
Apply a few drops of light oil to the leadscrew threads. White lithium grease is OK too, but I have converted to using oil on the dovetails and leadscrews.
The new leadscrews will be a little rough at first until the tiny burrs left on the threads by the manufacturing process are smoothed out. Work the cross-slide using the handwheel about 4-5 times and you will probably notice a significant improvement.
When installing the mounting brackets you must be careful that the leadscrew does not bind. Keep the two mounting screws for the brass nut loose for now. Remember that the leadscrew has a left-hand thread, so you must turn it counter-clockwise to get it to engage with the brass nut.
Before you tighten the mounting bracket, make sure that the leadscrew turns freely, then gradually tighten each of the mounting screws while continuing to check for any binding.
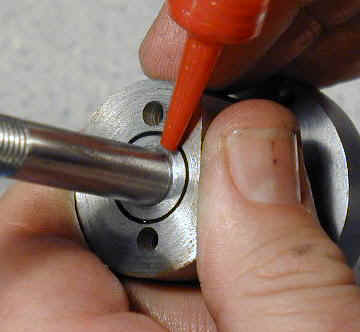
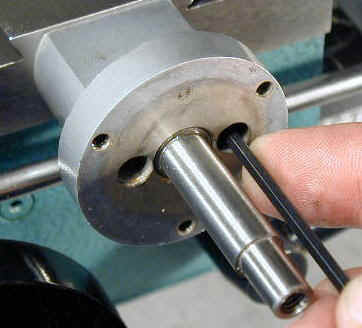
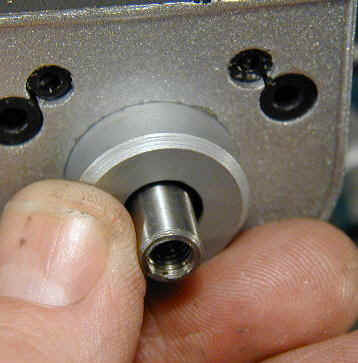
Start the tiny set screw (fixing screw) into the threaded hole on the side of the DRO shaft sleeve. This is easier to do before mounting the DRO on the lathe. A screw-starter (available at most computer stores or Radio Shack) will make this feat a lot easier.
Once started, use a flat-tip jeweler’s screwdriver to advance the screw just enough to keep it in place (if you advance it too far, it will prevent the DRO shaft sleeve from sliding over the leadscrew shaft.)
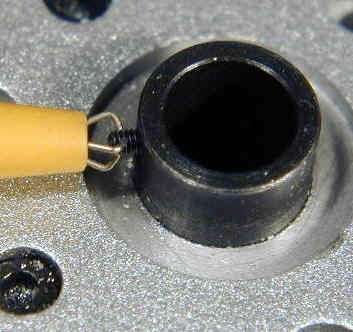
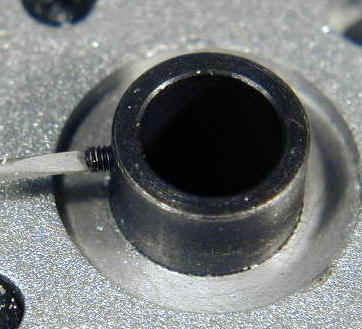
The next step is to mount the DRO assembly to the bracket. I found that when I did this that it caused the leadscrew to bind. I could see that as I tightened the mounting screws for the DRO assembly that it canted back slightly, causing the leadscrew shaft to bind.
I tried drilling out the mounting holes to #16, hoping that a little more latitude would solve the problem, but it didn’t. I ended up leaving the screws just snug to minimize the binding. (At least at first, I did. Later when I ran the accuracy tests, this looseness caused problems.
I drilled out the mounting holes to #14 (0.182) and that solved the binding problem, which in turn solved the accuracy problem.) Hopefully, by the time these units go into production Sieg will have made the holes a little bigger, based on this finding.
Update 12/1/03
After reading the review, Sieg indicated that they will enlarge the mounting holes to resolve this problem.
End of Update
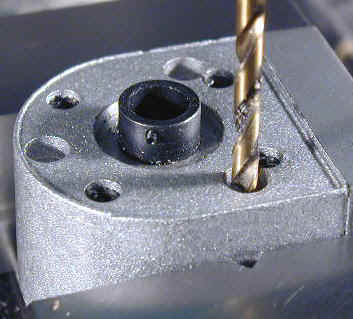

Enlarging the mounting holes to #14
If the DRO assembly is properly seated on the bracket, you should be able to see the the little groove extending past the end of the DRO collar. Turn the shaft and collar until the set-screw is lined up over the groove, then gently tighten the set screw until it is snug.
Do not overtighten or you could strip the thread. Turn the shaft by hand – you should be able to turn it without any appreciable binding. If not, first try loosening the mounting screws for the DRO assembly and moving the unit until the binding is eliminated. If you still experience binding, you may need to remove the DRO and readjust the bracket mounting screws.
- Press the bushing into the recess on the DRO unit
- Use a small amount of lighter fluid or alcohol on a cloth to remove any oil or grease from the DRO face
- Press the label into position (save this step until you have everything working as desired)
The next step is to install the bushing and then the label. I recommend that you leave them off until you are satisfied that everything is working properly. The bushing is press-fit into a recess on the front of the DRO unit and is tricky to remove once it is in place.
If you need to remove it, fold a piece of thin cardboard around the bushing to protect it from marring, then grip it and gently work it loose with a pair of pliers.
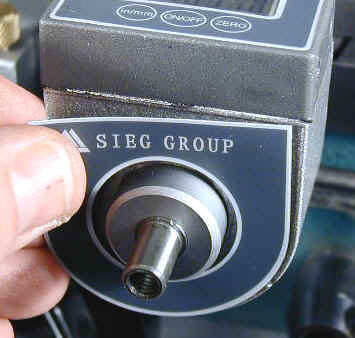
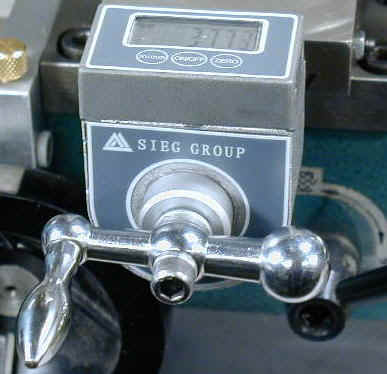
The last step is to install the handle. I found that it was a lot easier to tighten the handle retaining screw if I used appropriately sized split washers on both sides of the handle.
Of course, on my own lathe, I was compelled to install the roller handles that I made a long time ago.
Installing the Compound Components
The first step is to remove the compound base and replace it with the new one. Then the leadscrew and digital readout are mounted to the new compound base. Finally, the bushing, label and handle are installed. Basically, the process is pretty similar to that for the cross-slide, except for the way that the leadscrew is installed.
On the compound, the leadscrew is a standard right-hand thread, so it is advanced by turning it clockwise. It engages with threads that are cut into the body of the compound.
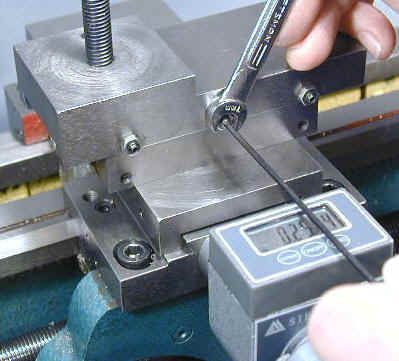
- Install the new replacement bottom half of the compound on the cross-slide
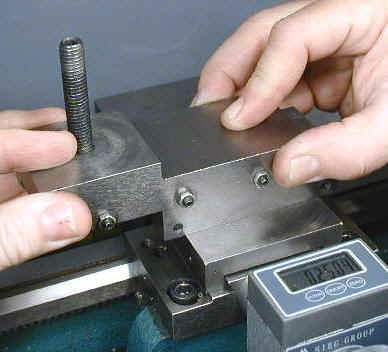
- Loosen the gib screws on the top half of the compound slide
- Carefully slide the top half of the compound onto the bottom half
- Position the slide to that the three gib screws are positioned over the bottom half
- Tighten each of the gib screws until just snug, then back off 1/4 turn and tighten lock nut
- Place a few drops of light oil on the dovetails and gibs
- Slide the compound back and forth by hand – it should be smooth without binding or slop
- Repeat adjustment of gib screws as needed until above condition is met
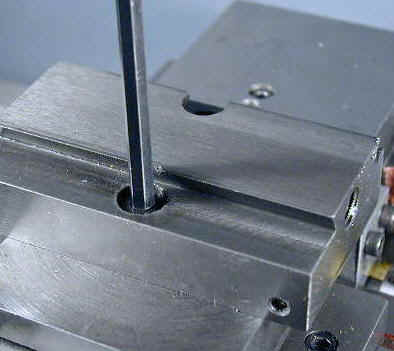
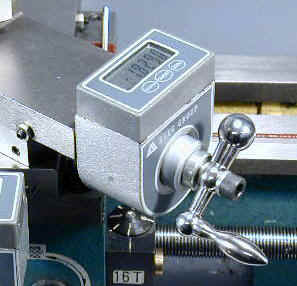
Since the compound, except when cutting short tapers, is usually only moved a small amount at a time, I like to keep the compound gibs a little tighter than the cross-slide. This helps to minimize chatter by keeping the compound more rigid.
Now we are ready to install the leadscrew and bracket:
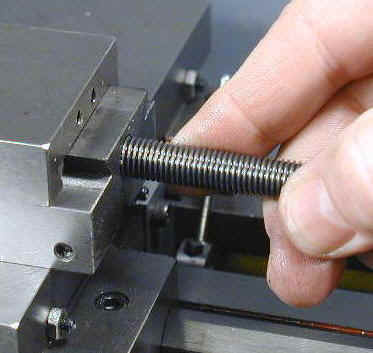
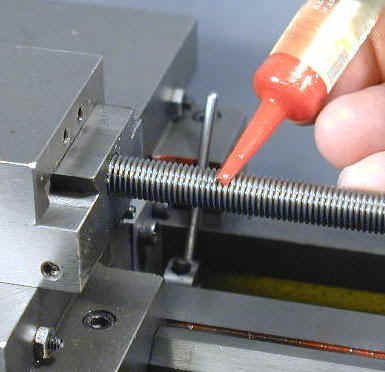
- Start the leadscrew into the thread on the compound base – turn clockwise
- Place a few drops of oil on the leadscrew threads
- Screw the leadscrew in about half way
- Slide the top half of the compound out until the end lines up with the shoulder on the leadsrcrew
- Install the DRO mounting bracket using the two screws from the original bracket
- Place a drop or two of oil in the space between the shaft and the bracket
- Make sure that the leadscrew can turn freely as you tighten the mounting screws (see comments below)
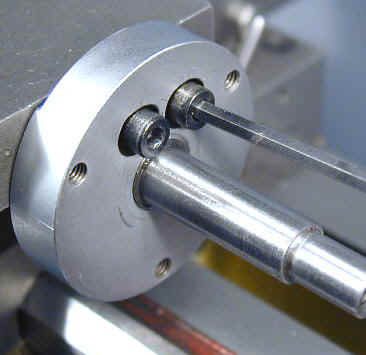
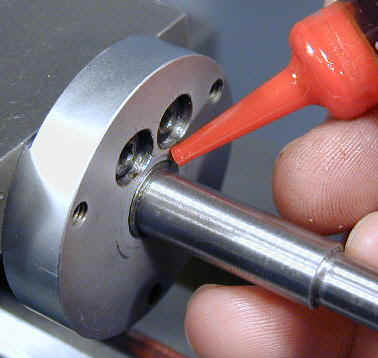
When installing the DRO mounting bracket you want the leadscrew to turn as freely as possible. Snug up the mounting screws and turn the leadscrew shaft by hand to make sure that there is no binding.
Adjust the position of the bracket as needed until the shaft turns as freely as possible. The mounting holes are actually small ovals to allow for some freedom of positioning. On the unit that I reviewed, I could not find any position that would completely eliminate binding.
it was necessary to enlarge the ovals by milling them out with a 3/16″ diameter end mill – that solved the problem.
- Use a screw starter to install the tiny set screw into the shaft collar – make sure it does not extend into the collar
- Slide the DRO unit onto the shaft and tighten it in place with the three mounting screws (see comment below)
- Align the set screw with the shallow groove and tighten it down snugly
- Press the bushing into the recess on the DRO unit
- Use a small amount of lighter fluid or alcohol on a cloth to remove any oil or grease from the DRO face
- Press the label into position (save this step until you have everything working as desired)
- Install handle washer and handle
- Run the compound back and forth a few times to clean up any burrs on the leadscrew thread
As on the cross-slide DRO, I found it necessary to enlarge the mounting holes to #14 to get the unit to mount without binding the leadscrew shaft. On the compound leadscrew I could not see the end of the shallow groove for the set screw to tell when it was lined up.
I used a jeweler’s screwdriver to apply very gentle torque to the set screw while rotating the leadscrew shaft. This enabled me to feel when the tip of the screw engaged with the groove and get them lined up.
Accuracy Testing
In order to determine how accurate the units are, I compared the reading of the Sieg DRO on the cross-slide with the reading from a linear digital scale attached to the cross-slide. The digital scale is actually a modified HF digital caliper, capable of reading to the nearest 0.0005″ – a setup I originally made to test the Zietlow Design DRO.
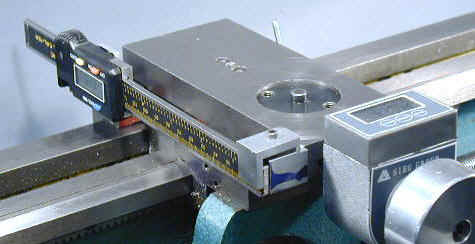
The test procedure I used is as follows:
- Advance leadscrew by a full turn to take up any backlash (slop) in the leadscrew nut
- Zero the scale readout and the Sieg DRO readout
- Advance leadscrew in increments of 0.100 as read on the linear scale
- Record the reading from the Sieg DRO
Here are the results:
| Scale | DRO |
|---|---|
| 0.100 | 0.1004 |
| 0.200 | 0.2004 |
| 0.300 | 0.3008 |
| 0.400 | 0.4004 |
| 0.500 | 0.5006 |
| 0.600 | 0.6005 |
| 0.700 | 0.7008 |
| 0.800 | 0.8005 |
| 0.900 | 0.9010 |
| 1.000 | 1.0010 |
I thought that these results were pretty impressive: the two units track very closely over the range of one inch, with a maximum difference of only 0.0010 (1 part in 1000, or 0.1%) over that range.
Just for fun, I ran this test the other way: that is, I ran the cross-slide through a range of 1 inch stopping at intervals of 0.1000 as measured to the nearest tenth on the Sieg DRO. In every case, the last two digits of the scale readout were 00, indicating that the two measurements were in agreement to within 0.0005.
Another test I performed was for reproducibility of readings. I was concerned about what effect, if any, backlash might have on the readings. Since the readout is driven by the leadscrew shaft, and the leadscrew can be turned by small amounts when reversing direction without moving the cross-slide, the reading will change when the cross-slide is not actually moving. Well, the bottom line is this: as long as you take up the backlash, the readings are accurately repeatable. Here’s what I did:
- Position the cross slide about midway in its range of travel
- Advance the cross-slide 1 full turn to remove any backlash
- Zero the scale and Sieg DRO
- Advance the cross slide by about 1/2″
- Withdraw the cross slide by about 1″
- Return cross-slide to the 0.0000 reading on the DRO
- Check the scale reading
I repeated this basic test over a range of motion. As long as I removed all of the backlash and approached the reading by advancing the cross-slide, the scale reading was consistently 0.000. Stopping at any scale reading that was a multiple of 0.100, the DRO was always the same within 0.001 or less.
What you can’t do is this: Advance the cross-slide, zero the reading, then reverse the cross-slide direction and stop at a new reading. In that scenario the reading will not be accurate, since the backlash has not been taken up.
That’s entirely reasonable, though, since if you were to begin a cut now, the tool would be pressed back until the backlash was taken up. The moral is this: always take up the backlash before zero-ing the DRO, taking a reading or beginning a cut.
The same is true, of course, if you are making a boring cut and the direction of the cross-slide on each successive cut is towards the front of the lathe.
Now on to the question I posed earlier: does the DRO computer accurately convert inches to millimeters? For this test I did not use the linear scale, but simply set the DRO at increments of 0.1000 using the Inch mode, then toggled the display to MM mode and recorded the metric reading for the same position.
Since 1-inch is equal to exactly 25.4mm (by definition of international standards bodies) it is easy to compare the measured readout to what should be the exact readout. Here are the results:
| DRO Reading in inches | DRO Reading in mm | Calculated Reading in mm | Variance |
|---|---|---|---|
| 0.1000 | 2.541 | 2.540 | 0.000 |
| 0.2000 | 5.081 | 5.080 | 0.001 |
| 0.3000 | 7.620 | 7.620 | 0.001 |
| 0.4000 | 10.161 | 10.160 | 0.000 |
| 0.5000 | 12.700 | 12.700 | 0.001 |
| 0.6000 | 15.240 | 15.240 | 0.000 |
| 0.7000 | 17.780 | 17.780 | 0.000 |
| 0.8000 | 20.321 | 20.320 | 0.001 |
| 0.9000 | 22.862 | 22.860 | 0.002 |
| 1.0000 | 25.400 | 25.400 | 0.000 |
The good news is that the DRO accurately computes the metric equivalent of the current position. This feature eliminates all concern about the small error inherent in the stock dials. Note that the largest deviation observed, 0.002mm, corresponds to 0.000,078 inches – not something to worry about.
Operation
Operation is pretty self-explanatory as there are only three control buttons:
- in/mm – Selects between inch and metric readout
- ON/OFF – Toggles power (or the display at least) on and off
- ZERO – Sets the current reading to all zeros
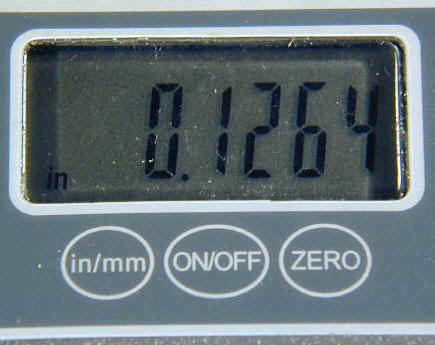
The display digits are LCD (liquid crystal display) about 5/16″ high by 1/8″ wide. Although a little narrow, they are have good contrast and are easily readable from a wide range of angles and up to 2-3 feet away; farther, in any case, than my arms can reach to work the lathe controls.
One thing that I didn’t notice until I got the unit installed and started playing with it is that the readouts have a true 5-digit display; that is, they read out the to the nearest one-ten-thousandth (0.0001″). This is an improvement over those found on the low-cost digital calipers that read only to the nearest one-half thousandth (0.0005″).
That’s not to say that all of your work will automatically become precise to that degree, since many other factors determine the overall accuracy. However, with careful technique, I would bet that getting a workpiece to within a half-thousandth (0.0005″) would be easier with these readouts than without them. (Yep – I tested it, and it is.)
One of the digital readouts was reading erratically when I first tested it. I tried pushing all of the buttons but the condition persisted. (See the Conclusion section for more on this.) This led me to explore how the battery is replaced, which was not explained in the instructions that came with the unit.
In fact, simply removing and reinstalling the battery solved the problem – apparently by rebooting the little internal computer.
As you are probably well-aware from using other LCD devices, the batteries last for a very long time – typically a year or two – and I would expect that to be true for these units as well.
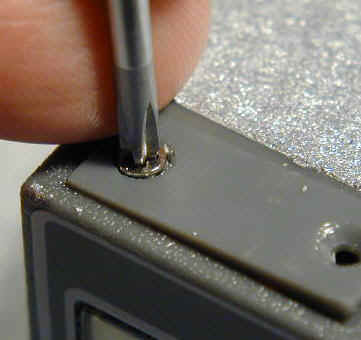
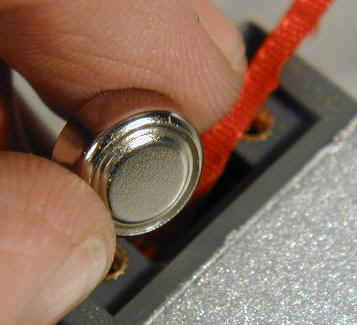
The battery lives (and dies) under a small plastic cover on the right side of the display unit. It is accessed by removing two small cross-head screws and prying off the small plastic cover with a thin-bladed jeweler’s screwdriver.
A length of red ribbon underneath the battery is provided as a convenient means of removing the battery from its slot. Just be sure when replacing the battery that you position the ribbon under battery or you will have an interesting challenge the next time you need to remove it. We will skip the details of how I know that.
Conclusion
I don’t have any pricing information at this time, so I can’t offer an opinion on whether or not this accessory is a good value. It does offer a real advantage for those who want a precise readout in inches, or who want the flexibility to switch between inch and metric units with equal accuracy. I also liked having the readout down to a ten-thousandth for those times when real precision is called for.
Another benefit is that when facing diameters larger than 0.040″ (the range of the stock dials) you no longer have to worry about counting rotations of the handwheel, since the DRO reads the actual position relative to where it was zeroed.
And for those who have eyesight limitations, the large digits are quite easy to read, even from 2-3 feet away. If you do count turns of the handwheel, the 20TPI leadscrew pitch makes things much more convenient: every 2 turns of the handwheel is 1/10 of inch.
I experienced mild frustration when trying to mount the units without any binding. Hopefully, Sieg can determine the cause of this and fix it before the units are shipped in volume. (After reading the review Sieg has stated that they will enlarge the holes.)
As I mentioned, one of the readouts was erratic. I noticed that it would start working after a while and then continue working for the rest of the day. However, the next morning, the display would be blank and would not respond to any of the buttons or even to removing and replacing the battery.
Later in the day, it would start working again for no obvious reason. I began to suspect that the instability might be related to the cold temperatures in my shop (about 45º F) when I begin work in the morning. Later, as the temperature warms up to a more balmy 65º F or so, which is my normal working temperature, the DRO works OK.
To test this theory, I took the cold unit and warmed it up in front of a radiant heater – sure enough, once it warmed up it started working again. (After a few days of use, the unit seems to have settled down. Sieg believes that it may have been caused by moisture absorbed during shipping. As the moisture is driven out over time, the unit becomes stable.)
Note that this problem affected only one of the two units. The other one worked fine even with the temperature down around 45º F. Since these are probably pre- or early-production units, a glitch like this is not too surprising. Anyway, most users are likely to keep their shops above 60º F.
You might wonder how these Sieg units compare to the DRO I reviewed a while back from Zietlow Design (ZD). Remember that the ZD unit is just a readout and requires externally mounted scales that do the actual measuring.
This is an important difference in the way these units work: the ZD unit keeps track of the absolute position of the carriage as measured by the scale, whereas the Sieg units count rotations of the hand wheel relative to a starting point. I don’t think that this difference matters much, though, in practical use.
The ZD unit has a number of features not found on the Sieg DRO, including the ability to set the cross-slide to read out in either radius or diameter mode. When properly zeroed in diameter mode, this feature allows you to read the current diameter of the workpiece directly from the readout.
Perhaps the most significant difference between the two units is this: The ZD unit measures the cross-slide and carriage motion whereas the Sieg unit measures the cross-slide and compound motion. This makes the ZD unit more useful for operations where the length of various segments of a workpiece is important (as when making a shaft, for example).
On the other hand, the Sieg unit mounted on the compound, would be very handy when cutting threads, since the thread depth is measured by the compound dial. This is especially attractive when considering that the stock compound dial has a tendency to slip and lose its setting.
So I suspect that the choice between these two types of DROs will boil down to the needs and preferences of the individual purchaser.
In summary, this new accessory adds a new level of capability to the already versatile mini-lathe: It provides a quick and easy modification to get precise inch and metric readings over the full range of compound and cross-slide motion. If the pricing is attractive, I think that many mini-lathe owners will find it to be a great addition to their lathe.