Parting Operations
Parting uses a blade-like cutting tool plunged directly into the workpiece to cut off the workpiece at a specific length. It is normally used to remove the finished end of a workpiece from the bar stock that is clamped in the chuck.
Other uses include things such as cutting the head off a bolt.
Commercial Parting Tools
There is a wide variety of commercial parting tools available from tool suppliers, but most are too large to use on the 7x10. Harbor Freight sells a 5/16" parting tool (P/N 37034-0VGA, $5.99) but the top of the blade is actually about 1/16" above the center line of the 7x10.
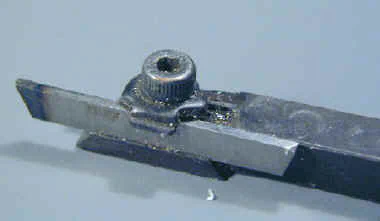
This is problematic because it is important for the top of a parting tool to be right on center. Many attempts (my own included), including sanding, turning and grinding, have been described in the 7x10 interest group to remove 1/16" from the bottom of the tool holder, but few have been successful.
The tool holder is pretty hard metal.
Even so, this little tool is tempting, because grinding a parting tool from a tool blank is a pain - since so much metal must be ground away - and parting tools get dull and break easily.
This tool, and similar larger ones, use pre-formed cutting tools. If you break off the end, you just grind a new cutting edge and go on.
I haven’t done this yet, but the best solution to using the HF 5/16" parting tool may be simply to make a custom tool holder of the correct height.
Here’s another 1/2" commercial parting tool. I plan to make a custom toolholder for it someday.
Custom Ground Parting Tools
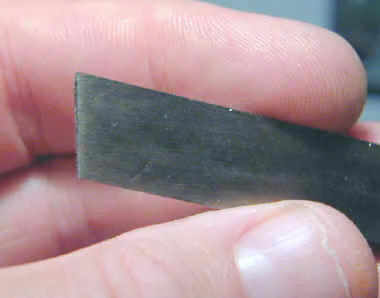
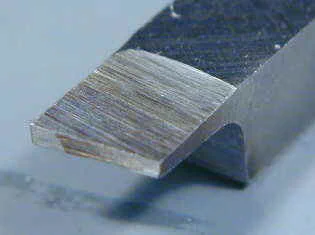
Grinding your own parting tool is not real difficult but it takes a long time and generates a lot of metal and grinder dust due to the relatively large amount of metal that you must remove from the blank. Here are some pictures of a typical home-ground tool.
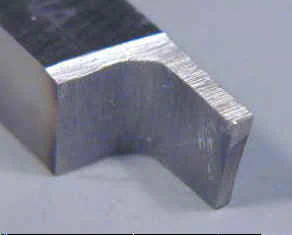
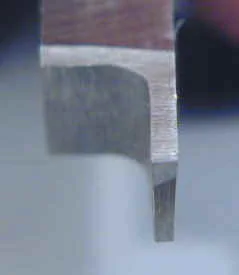
Note that the tool is tapered from top to bottom (like a narrow keystone) and from front to back to provide relief for the cutting tip. The top of the tool has been ground down by a few thousandths of an inch to align the top edge of the tool with the lathe centerline.
If you have a toolholder with adjustable tool height, this would not be necessary. Forming the parting blade near the edge of the tool allows the tool to work up close to the chuck jaws.
Chucking the Workpiece
Parting is always done close to the chuck jaws - no more than 1/2" out, and, preferably, no more than 1/4" out.
(Note: this is also relative to the diameter of the workpiece; 1/4" may be right for a 3/4" diameter workpiece, but would be too far out for a 1/8" dia. piece.)
Parting cuts impose great tangential force on the workpiece that could cause the workpiece to be forced out of the chuck if you cut too far from the chuck jaws.
Adjusting the Tool Bit
For a parting cut the top of the tool should be exactly on the center line of the lathe, or no more than .005 above the center line. If the tool is a little high it will have a tendency to ‘climb’ the work; a little low will cause a tendency to dig in.
The tip of the tool should be exactly perpendicular to the workpiece.
Speed and Feed
Make sure the leadscrew is in the neutral position so that the leadscrew is not moving. Now lock the half nut in the engaged position to keep the carriage from moving during the parting cut. Even, better, if you have made a carriage lock, use it.
Parting cuts should be made at low speed; say 200-300 RPM or even slower.
Making the Cut
With the tip of the tool just beyond the surface of the workpiece, turn on the lathe. Slowly advance the cross-slide crank until the tool starts cutting into the metal.
Keep advancing the tool until you get a steady chip curling off the workpiece and then try to maintain this cutting speed.
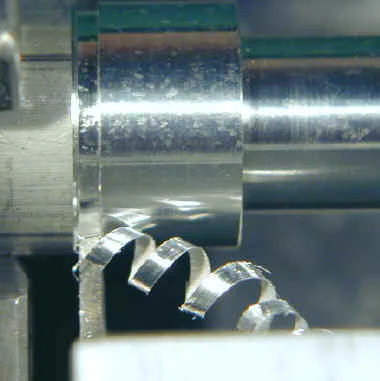
It’s a good idea to use cutting oil for a parting cut and you will find that the heat generated will most likely cause a fair amount of smoke as the cutting oil burns off.
Avoid breathing this smoke - I haven’t heard of any ill effects, but I’m sure it’s not good for your lungs. A small fan to disperse it may be a good addition to your workbench.
Chatter
Parting often causes ‘chatter’. If you have never heard this sound, you will easily recognize it when you first do. It is a pulsing, whining vibration that can shake the whole lathe and even cause it to move around on the workbench if is not bolted down.
You can stop chatter quickly by backing off the pressure on the tool. The trick is to find the right speed at which to advance the tool with minimal chatter.
Here are some tips to minimize chatter:
- Tool tip should be quite sharp
- Top of tool should be right on the lathe centerline
- Tool should be perpendicular to the workpiece
- Gibs on cross-slide and compound should be snug
- Saddle should be snug to the ways
- Use carriage lock to lock saddle to ways
- Use cutting fluid
- Maintain steady advance of cross-slide
Finishing the Parting Cut
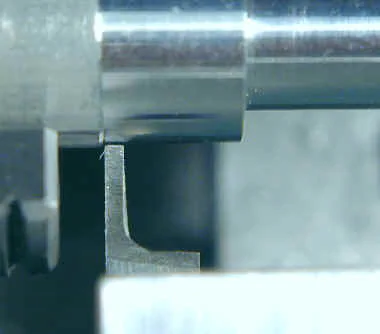
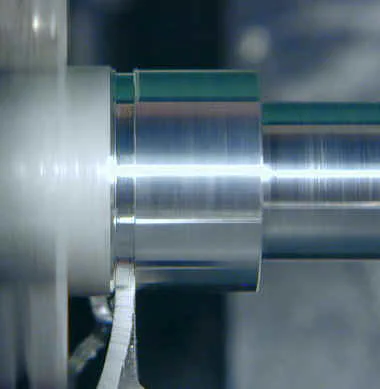
Keep advancing the tool until it reaches the center of the workpiece. As you get close, the workpiece is suspended by a thin stalk of metal.
Be careful: if the workpiece extends from the chuck more than a few times its diameter, the end of the workpiece can start to swing in a dangerous arc.
As you get near the center, you may need to slow down the chuck speed to keep things safe. If you notice the workpiece starting to wobble, stop the lathe and move the workpiece back and forth by hand to break it free.
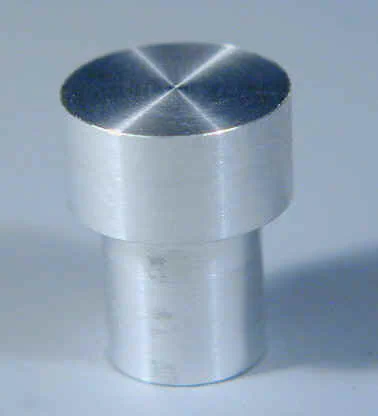
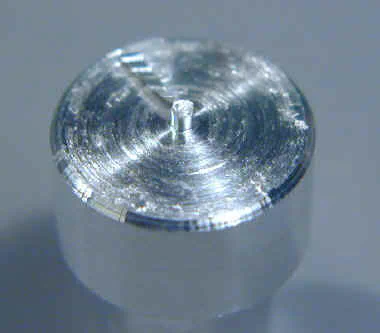
The end of the workpiece that you cut off will generally have a pretty rough finish and a little stalk of metal protruding from the end.
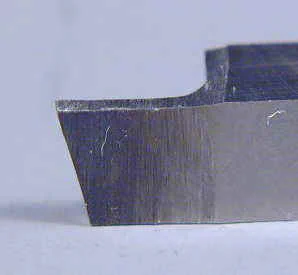
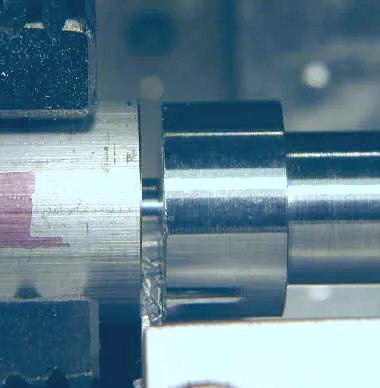
One limitation of parting tools is the diameter of the work that can be parted. The tool illustrated here is a little under 3/8" long and can part off work up to 3/4" in diameter.
In the previous picture you can see that the edge of the work is rounded because it was rubbing up against the shoulder of the cutting tool. If you make the tip of the tool much longer than about 1/2" it starts to get too limber and will easily break off.
So on a small lathe like this, the largest diameter work that you can part off is probably around 1". To cut off bigger work, you can use a small hacksaw while turning the work at low speed in the lathe.
Even better, if you have a metal-cutting bandsaw, use it to cut off the work. I nearly always use the bandsaw for work larger than 1/2" diameter.
The final step is to mount this piece in the chuck and make a facing cut to clean up the end. One problem with this step is that the chuck jaws can mar the finished workpiece.
If you look carefully at the next picture you can actually see the imprint of the chuck jaws. To avoid this, you could wrap the workpiece in a thin strip of emory paper, or similar protective material, before clamping it.