New Lathe and Mill
One motivation for building the new shop was to have enough room for a slighter larger lathe and mill.
While the mini-lathe and mini-mill meet most of my needs, projects come along from time to time which are just too large for these little machines.
Since I don’t have any friends nearby with larger machines, I decided to get some of my own.
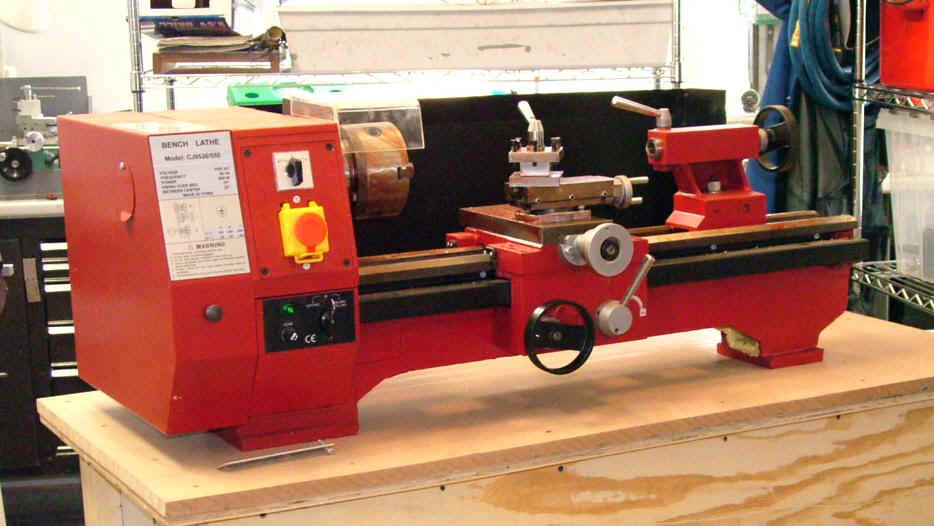
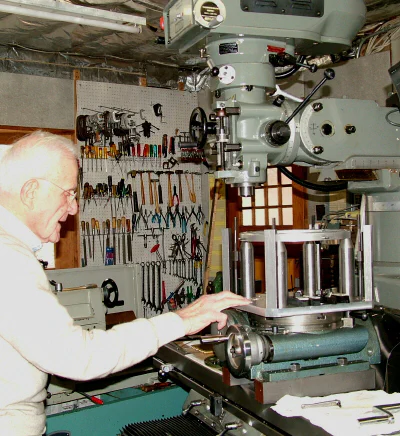
So it is that I set out to acquire a new C6 lathe and X3 mill from Sieg.
Of course I’ll be reporting on these in detail later on, but at the moment, I have not yet cleaned off the packing grease.
While the interior of the new shop has been finished since early January, much of the stuff that had been in the garage had to be temporarily stored in the shop while the garage and a new outdoor storage shed were being finished.
Also, I needed to make some benches and devise a way to move the new machines from the garage to the shop.
How to Move These Suckers
These new units weigh-in at about 250 lbs. each (and that’s after the red grease is removed!), so you can’t just heft them up onto a bench like you would a mini lathe.
(Note: turns out, they weigh over 300 lbs. Getting them into the garage was easy enough: they were delivered on a lift-gate truck that lowered them down onto my driveway.
From there, the truck driver used a pallet jack to roll them into the garage.
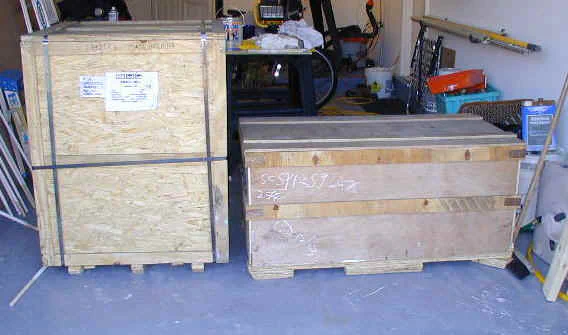
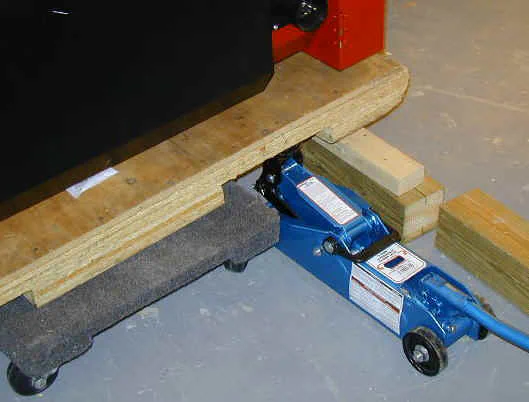
I knew that it would be a while before I could find time to unpack them, build benches and move them into the shop, so I bought a pair of furniture dolleys from (where else?) Harbor Freight.
At $14.99, these would be a bargain, but I got them on sale at the local HF for $11.99. I could not even buy the casters for that price. These are sturdy little units and had no trouble handling the weight of the machines.
A hydraulic jack and some chunks of 2x3, 2x4 and 4x4 come in handy to work the machines up onto the dolleys. Now I can roll the machines around out of the way, while I work on the benches, until I can get them into the shop.
I started thinking and planning back in December about how I would move them from the garage to the shop and get them up onto their benches. Actually, the problem is a little more complicated than that.
The last 6’ at the back end of my garage is a raised area, about 5" higher than the rest of the floor. From there, there’s another step up of about 1" to the door sill that leads from the garage into the new shop, followed by a drop of about 6" to the floor of the shop.
I needed a way to get the machines over these obstacles, and then up to the bench top.
Now my wife pointed out that I could just get a couple of furniture movers, or other strong guys, to do the moving for me. But what would be the challenge in that?
Hey, we’re here to solve problems, not do things the easy way, right? In any case, I knew that I would probably move them several times before I got everything the way I wanted it.
This turned out to be prescient, since the first attempt at a bench for the lathe was not sturdy enough and I had to move the lathe back down to the garage floor.
Having read about how others tackled this sort of problem, I first considered a shop crane. Harbor Freight sells several versions, including a folding model (SKU 35915) for $199.99.
While it looked like it could do the lifting to the bench top, it would be of little or no help in getting over the floor obstacles. Besides, I didn’t want to spend a few hundred dollars on a tool that might get used only once - or once a year - but would take up storage space the rest of the time.
I also considered scissor tables, but they had all the same issues as the shop crane, and would take up even more storage space.
I wanted a solution that would be readily available if at any time in the future I needed to move the lathe or mill (or some other heavy tool) onto a new bench.
Ideally, the solution would also be modest in cost and would take up little storage space. So my list of criteria was like this:
- Relatively low cost (ideally under $100)
- Available for re-use in the future if needed
- Does not take much space to store
- Can move the machines over the raised floor as well as onto the bench
- The Unspoken Criterion* (see footnote)
(*Footnote: My wife pointed out that her solution met all of my criteria. Well, not really, because I would have to pay the movers every time I moved the machines, which would violate criterion #1. However, just be clear about this, I found it necessary to disclose Criterion #5 (The Unspoken Criterion), which is: Must provide a rationale for buying additional cool tools (such as winches). Secretly, I have always wanted a winch, but before now, never had a plausible excuse to buy one.)
I eventually concluded that a ramp, with a little help from a winch, might meet my needs. It seemed to solve all of the problems including how to get over the raised floor area: I would simply run the ramp from the floor of the garage, through the door, and up to the top of the bench in the shop.
It promised to be a potentially fun project in its own right; plus the winch might be useful for other jobs around my suburban ranch when I was done with the immediate problem at hand.
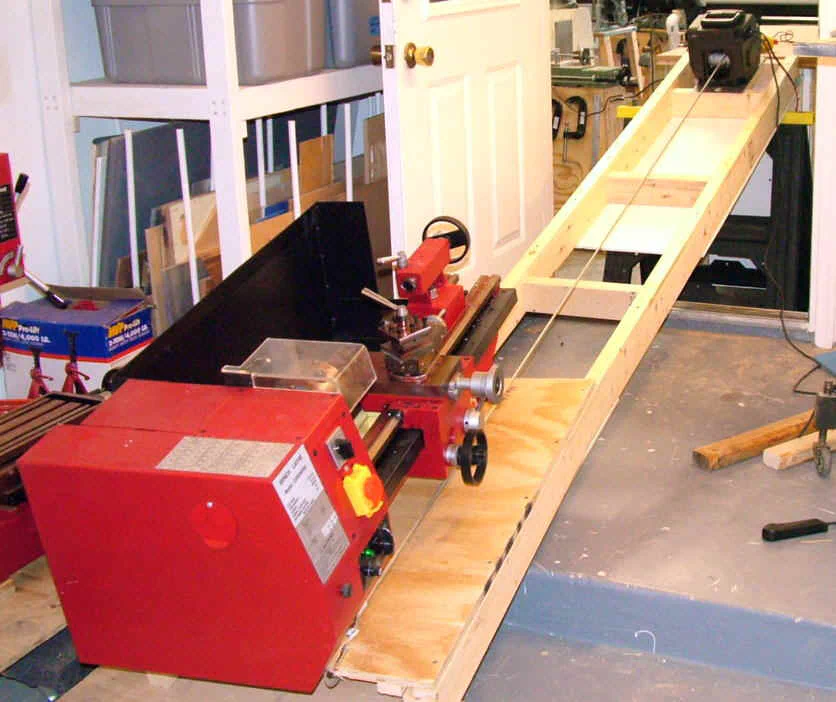
Naturally, as with most projects of this type, the devil is in the details. For one thing, I planned to make the ramp from a pair of 10-foot long 2x4’s but was not really sure if they would be strong enough for the job.
Intuitively, it seemed like they would, but I’ve been down this kind of a path before and things that are “intuitive” sometimes don’t work out in practice.
An engineer, of course, would probably just look up the strengths of 2x4’s in a book and be done with it. Not me. I had to try it.
My standard approach to any shop problem is to think on paper before I tackle the real work at hand.
I use spiral-bound notebooks for this, and do a lot of writing, drawing and thinking during down-time such as while sitting in doctor’s waiting rooms, airports and rush-hour traffic (OK, just kidding about that last one.)
I like to write out my thoughts about what I’m trying to do and then pose questions to myself about what’s wrong with the design.
Over the years, this has proven to be a productive way to explore solutions before I start cutting wood or metal. I always work in pencil (.5 mm mechanical is my choice) and make rough three-dimensional drawings with dimensions.
Sooner or later, though, it’s time to get to work. Except when tackling really simple problems, some of the potential solutions do not usually become apparent until you begin work and get a real feeling for how the parts fit together and interact.
That turned out to be true in this case. Some time in the next few months, I hope to write a detailed Premium Content article with all the dimensions, details and things I learned along the way.
Which Winch?
One thing that I appreciate about Harbor Freight is that they often have multiple items to choose from within a particular class. Searching for keyword “winch” on their website, I got 15 entries.
Two of these turned out to be winch accessories, but that still left 13 potential solutions to choose from.
Price, of course, is often the factor that quickly narrows down the choices - especially in a case like this where great strength or power are not fundamental requirements.
At the low end is a hand-powered winch (SKU 30905), rated for 1000 lbs., for $15.99. I bought one at my local HF store for $13.99 on sale. It’s interesting how simple things progress, sometimes.
The cable for the winch is included, but the free end (i.e. the end without the hook) is not connected to the spindle of the winch. You must do that yourself. Due to the stiffness of the steel cable, this apparently simple task ended up consuming several hours, and volumes of profanity. Eventually I concluded that the metric bolt that clamps the cable down was too short for the job.
The bolt has a square shoulder that fits into a square hole on the winch frame. I found a similar, but longer, SAE bolt in my junk box and ground the square shoulder down a tad to fit the metric hole.
Also, being frustrated and careless, ground off the end of my finger. After a little more swearing and twisting I finally got the thing together.
The manual winch works ok, but I did not attempt to use it to haul the lathe up the ramp. One problem with it is that there is no way to unwind the cable with a load engaged.
To unwind it, you must depress a small lever that disengages the ratchet lock.
Of course you would not (and probably could not, due to the tension on the line) disengage this with a load under tension, or the load would go crashing to the floor while the winch handle spins madly out of control, breaking your arm in the process.
Before I got that far I found a power winch from HF which turned out to be just right for the job. You can see it at the far end of the ramp in the photo above.
It is SKU 43331, a 12 volt winch rated at 2000 lb. load - more than enough for this project.
I picked it up at my local HF store for $39.99. Powering it turned out to be simple: I used a 12V 6-amp battery charger that I already had on hand.
Some products from HF are really poorly made (ask me about their wooden garden cart!) but this winch has impressed me. The cables plug into to the winch with keyed-plugs that can only go in the right socket the right way - one for the power cable and another for the control switch.
The control switch, at the end of a 10ft cable, is a simple push-button toggle that turns the winch on or off.
Also provided, which turned out to be vital for this operation, is a friction clutch that lets you release the load gradually and safely, keeping it under control at all times.
It even has a convenient folding carrying handle that has proved very useful, since I’m constantly moving the winch.
I added a base plate so that I could quickly and conveniently mount the winch wherever I needed it. This, and other details will be described in a future Premium Content article.
What to do for a Bench?
I considered buying a “roll-away” shop bench from Harbor Freight, but was concerned that it might not be able to handle the weight of these machines plus all of the heavy chucks and accessories.
Also, since space in the new shop is still at a premium, I decided that custom-built benches would be the way to go. This approach would let me tailor the size of the bench to each machine.
I’ve made a number of benches and shelves out of 2x3’s 2x4’s and plywood over the years - generally with good results, so I had some idea of how to tackle this project.
My first attempt at the lathe bench turned out OK - sort of - but was a little wobbly with the lathe on top, and was a little too high for the size of the lathe.
So at the moment, I’m working on a lower and sturdier version of the bench. Once I get it right, I’ll publish detailed plans. Stay tuned…
Bench Construction
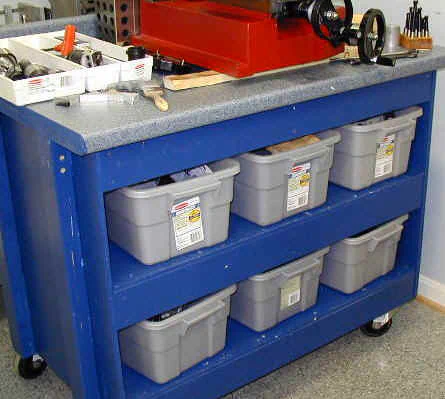
I finished the revised bench over the weekend. This bench is pretty heavy and rugged - I think it will work. There’s a tiny bit of wobble, due to the casters, but not enough that I’m worried about it.
With the lathe in place, the bench can easily be rolled around. Did I mention that everything in my shop is on wheels?
The frame is 22"x47"x28" with the top surface a little larger (24"x54"). I made the top larger because I like to leave an edge extending out from the frame.
This provides a convenient place to clamp things, such as shop lamps. The edge turned out to be immediately useful, since I had to clamp a short length of 2x4 to the bench top so that I had something to lever against to move the lathe around on the bench top. The bench top is made from 3/4" MDF (Medium Density Fiberboard) on top of 1/2" plywood.
The casters add 5" of height, which, together with the thickness of the top, bring the bench top height to 34 1/4".
I’m 5" 6" tall, and this brings the lathe to a convenient working height for me. Craftperson’s of normal height may prefer a higher bench top.
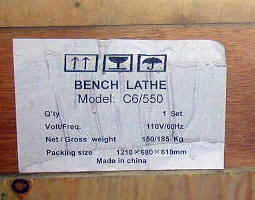
I was wrong about the weight of the lathe. I thought that it was about 250lbs. but it apparently is closer to 300 or 330. There are actually two models of the C6 lathe: 400 and 550, representing the distance between centers in mm. This translates to approximately 16 and 21 inches, respectively.
The Sieg website lists the net weight of the 550 model (the one I have) as 130kg, but the box it was shipped in listed the net weight as 150kg. That comes out to either 287 or 331 lbs. depending on which is correct.
I checked the user manual, hoping to find a weight specification there that would reduce the ambiguity, but none was found.
Anyway, at about 300 lbs. just moving this lathe an inch or two on the bench top is not a trivial matter. This exercise was not made any easier by the fact that I fractured my left hand back in December and then sliced the top off of my left thumb a few days ago.
In my prime, moving the lathe would have been simple! After I got it situated on the new bench top, I decided that it would be prudent to bolt it down. As on most, if not all lathes, the tailstock end is significantly lighter than the headstock end.
After lining the lathe up on the bench and marking through the bolt holes where the bolts should go, I pushed the tailstock end to one side in order to drill the bolt hole through the bench top.
That was easy enough, but then I could not get the hole in the lathe bed lined up with the hole in the benchtop.
I shoved the end back and forth with my (fully functional) right hand while wiggling the bolt in the hole with my left hand, hoping that the bolt would drop into place - or at least that I would feel when it started to line up with the hole in the bench top.
After tiring myself out with that approach, I tried mounting a small flashlight on the shelf below the top of the bench, hoping to see the light come up through the bolt hole in the lathe.
No luck there, either. Now, this sort of thing would be trivial with a mini-lathe, but is not with a 300 lb. chunk of iron.
As I often do when brute force fails, I decided to measure the X and Y offsets to the hole and then simply position the lathe at the right place. This is analogous to: “When all else fails, read the instructions”.
That too, turned out to be more difficult than anticipated, since you just can’t get it where you want it by shoving. My last effort before giving up for the night, was to mount a nut into a short length of 2x4, clamped to the bench top, so that I could use a 6" by 3/8" bolt to precisely position the end of the lathe.
That might work, but it only moves in one direction at a time, and you must remount the 2x4 to go from the X-dimension to the Y-dimension.
Smarter men than myself are no doubt chuckling as they read this, since there is probably a simple and obvious solution that eludes me.
That’s all for now. Thanks for stopping by.
Links to pages about moving heavy machinery
Richard Kinch’s experiences:
- Solo Moving and Hoisting an 800-Pound Mill-Drill.
- Moving and Hoisting an 1000-Pound Clausing 8540 Horizontal Milling Machine.
- Moving and Hoisting a 2400-Pound Bridgeport Milling Machine.
Bob Powell’s shop:
Miscellaneous:
- Series of photos and text file of moving a large CNC mill into a basement
- Tom Gloger: moving a 1500lb 1904 lathe into and out of a basement
- Surfin’ Dude’s shop page - moving assorted shop machinery.
- (1/16/09) Moving really heavy stuff: Make your own Stonehenge at home