Spring-Loaded Mini Mill Spindle Lock
Those of you who already own a mini-mill are intimately familiar with the spindle lock. Back in the old days before there was a lot of information about the mini-mill on the web, this mundane-looking tool would sometimes baffle new owners who could not figure out what it was used for.
It’s sole function in life – and it’s an important one – is to lock the spindle so that it can’t turn while you are changing tools. This is not a safety feature, it’s necessary in order to unscrew the drawbar from the tool holder.


For those of you who may not be familiar with the mini-mill, the tool holder is held tightly into the spindle taper by means of a drawbar. To remove the tool, you must first loosen the drawbar with a wrench, then tap on the top of the drawbar with a hammer (preferably one with a soft head, such as brass) to free the tool holder from the tapered spindle.
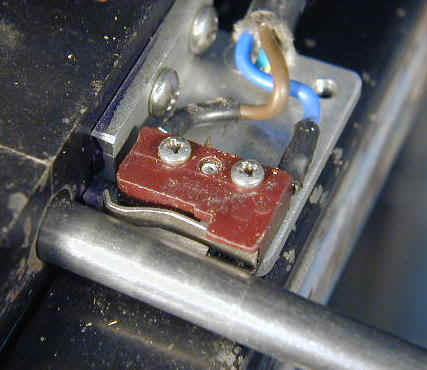
The only problem with the spindle lock, is that if you forget to remove it, and then power up the mill, you can shear off a few teeth from the drive train gears. I only did this once, early in my mini-mill career, before I rigged up an electrical interlock using a micro switch so that the motor could not be turned on while the spindle lock was in place.
This electrical solution has worked well for about five years now, but I have never published it for one simple reason: if while wiring it up, or due to an unfortunate placement of a metal chip, the wires touch the frame of the mini-mill, the power supply is history. Don’t ask me how I know this.
For those of you who lack the electrical skills, or are averse to replacing power supplies, LittleMachineShop now offers a ready-made mechanical solution to this problem that is easily installed.
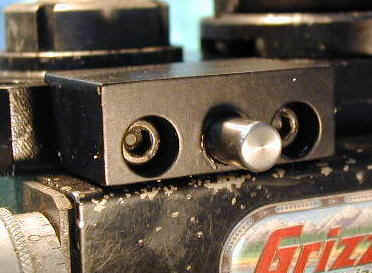
It replaces the standard spindle lock with a spring-loaded pin that is permanently mounted on the lathe. Press it in and hold it to lock the spindle, release it to unlock the spindle. There’s no way that you can accidientally leave it in place before starting the mill.
Steve Bedair made one very similar to this for his mill several years ago and published it on his web site. Unfortunately, his ISP went south and Steve lost a lot of his web pages, including that one.
Installation
Installation is pretty straightforward: you must remove the motor base/gear housing and drill and tap two 1/4-20 holes to mount the spindle lock. This should generally take about an hour to accomplish, not counting phone calls and other interruptions that inevitably occur when you’re in the middle of a project.
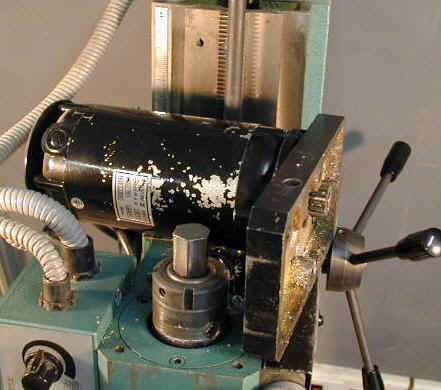
First use a 5mm hex wrench to remove the four socket head screw that hold the motor base in place. The two screws closest to the motor are easier to get to with a regular L-shaped wrench that with a T-handle wrench.

Carefully lift the motor and base off of the head and lay it on its side. It’s pretty heavy, so be careful.
Next, remove the four phillips-head screws that secure the motor to the base plate.
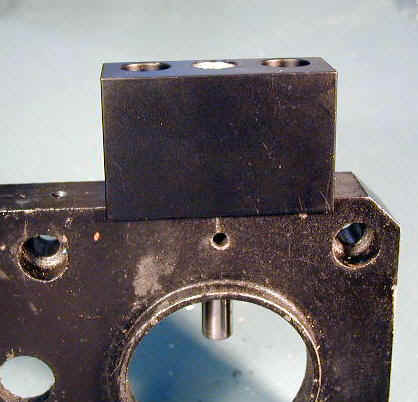
Place the motor mounting plate on a workbench and insert the steel locking pin into the hole in the side of the plate. Now place the body of the locking assembly over the pin (leave the spring out at this stage).
Align the lip of the body block with the top edge of the motor plate, align the block so that the pin is centered, then use a 1/4″ transfer punch and hammer to mark the centers for the holes to be drilled and tapped.


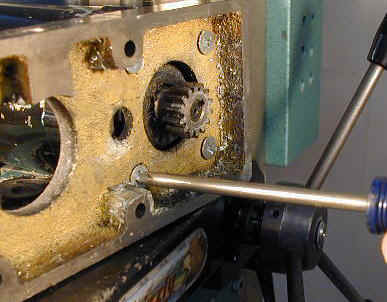
Carefully drill and tap the two 1/4-20 holes. Use a drill press, if you have one, or a hand-held power drill otherwise. Obviously, you can’t use the mill for this job! Use a #2 center drill to start the hole to ensure that it is lined up with the transfer punch mark, and start with a slow speed if using a variable speed hand drill. Use a #7 or 13/64″ tap drill for the holes.


Insert the pin into the block again, this time with the spring. Insert the two 1″ 1/4-20 hex head screws into their holes and compress the spring to align the block with the motor mount. Tighten the two bolts too complete the assembly.
Make sure that the plunger moves in and out without binding. If it binds, try loosening the bolts and adjusting. If that doesn’t work, you may need to drill out the screw holes in the block to a slightly larger size to allow some adjustment of the position of the block.
Now reverse the disassembly procedure to replace the motor mount onto the motor and onto the milling head.


Conclusion
The spindle lock kit is currently priced at 21.95 from LittleMachineShop. It’s a nice addition to any of the Sieg-made mini-mills from Grizzly, Homier, Harbor Freight, Cummins and Micro-Mark.
If you have not already sheared off one or more sets of gears, now would be a great time to take pre-emptive action to avoid this ugly scenario. Believe me, when it happens it will ruin your whole week while you wait for those new gears to arrive.
