Stereo Microscope Modifications
When acquaintances ask me what I make in my shop, I sometimes have to think for a minute, since much of what I make is enhancements to my machine tools.
Partly, that’s because working with a customized tool that is finely tuned to my needs is a real pleasure; another reason is that I simply enjoy making stuff, regardless of the end-use.
Since non-machinists don’t usually understand this, I thought that it would be good to have at least one project to talk about that they might appreciate.
Every once in a while, I do make something useful for its own sake. If you’re considering getting into machining, I thought that this article might give you some ideas of the things you can do with a mill and a lathe.
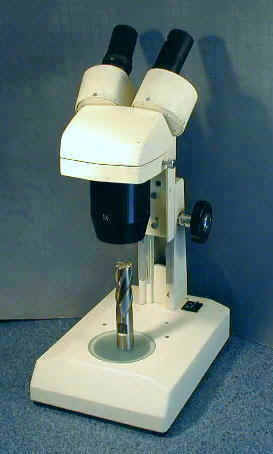
Stereo microscope from Enco, in its (almost) original configuration
When I was about eight years old, my parents gave both me and my sister microscopes for Christmas. That was back in the days when chemistry sets were a popular present.
Parents thought nothing of their kids cooking up foul-smelling compounds in a test tube over an open flame.

If you’ve ever done this, you may remember that when you heat stuff up too quickly, it sometimes splurches out: a boiling blob of noxious, toxic waste spewing across the kitchen table.
None of my friends ever lost their eyesight or any fingers doing this sort of stuff, at least as far as I know, but we sure had fun.
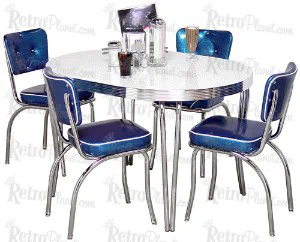
Of course, in those days, the kitchen table top was Formica (another wonder of chemistry), so you could just wipe that goop off and serve up some TV dinners. No harm done. A popular pattern for the table top was little pastel boomerangs. The seats were covered with genuine Naugahyde, impervious to everything.

Anyway, that microscope opened up a whole new fascinating world. Years later, I saved up money from my paper route (The Paper Route From Hell, I might add, but that’s another story) to buy a reasonably good quality microscope with a 1000x oil immersion objective and mechanical stage.
I ordered it from Lafayette Radio (remember them?) and every day after school I rushed home, only to find that it had not yet arrived in the mail. Finally, it came, and I was about as excited as I’ve ever been! I spent many enjoyable hours with that microscope during my high school years, but eventually sold it as my interests turned to other things - like cars!
A few years ago I decided that I would again get a microscope. I’ve always wanted my own stereo microscope, having used some very good quality ones early in my career. A few years ago I saw a promising-looking, reasonably priced stereo microscope in the Enco sale flyers (P/N 505-1939).
Since I turned 50 a few years ago, my eyesight has deteriorated for close-up work, so I thought that the stereo scope would prove handy for viewing tiny parts. It has been great for that, but the most frequent use I find for it is to see what I’m doing when I need to remove tiny splinters of metal from my fingers (ever done that?).
While certainly not a Zeiss or a Nikon, for the price, the microscope is not too bad. Especially on low power (10X) the images are crisp and clear, but on high power (30X), they are a little washed-out.
Although the microscope was decent, I soon started thinking of ways to modify it to make it better - a familiar theme. For one thing, I wasn’t real pleased with the 110V light that came with it.
It was not bright enough and provided little contrast. The other thing that annoyed me was that the microscope did not raise up high enough to look at a lot of things that interested me - such as the tip of a 1" end mill.
So, I got to thinking about how to solve these problems, and here’s where I ended up. This is the microscope as it is now, with a 5 1/2" riser platform, a moveable sample table, and an adjustable high-intensity lamp - with plenty of room to look at the tip of an end mill.
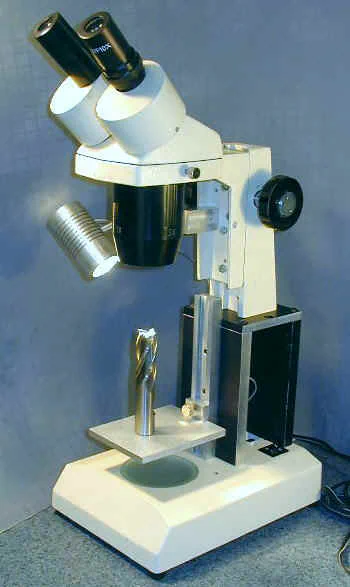
Microscope with riser, adjustable table and light
The Riser Platform
The riser platform was made from some black anodized scrap aluminum, 1/2" thick, that I picked up at a local junkyard. To make the riser, all I had to do was layout some screw holes, cut and mill the pieces to size and assemble it.
Someday in the future, I may get around to re-anodizing it so that the machined edges match the black surface of the rest of it.
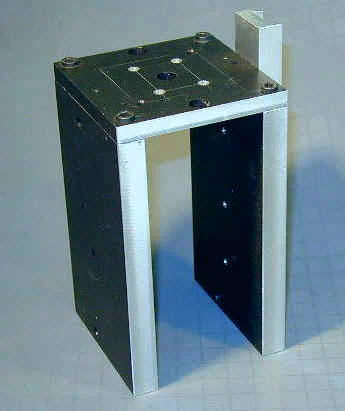
The riser platform with dovetail slide attached
There were quite a few holes in the scrap metal from whatever its original application had been. They detract a little from the appearance, but are of no other consequence.
Table and Dovetail Slide
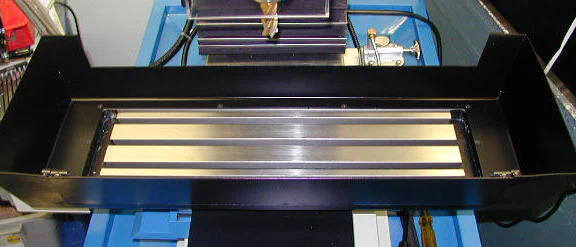
Adjustable-height table
The table was cut from another piece of conveniently-sized scrap. I mounted a male dovetail to the back side of the table to keep the table parallel and square with the optical plane as the table is moved up and down to a convenient working height.
I made a knurled brass cap for a standard cap 8-32 cap screw to lock the table in place. The tip of the cap screw presses against a Teflon plug to lock the table in place without gouging into the back of the female dovetail.
![]()
Locking screw with knurled brass cap
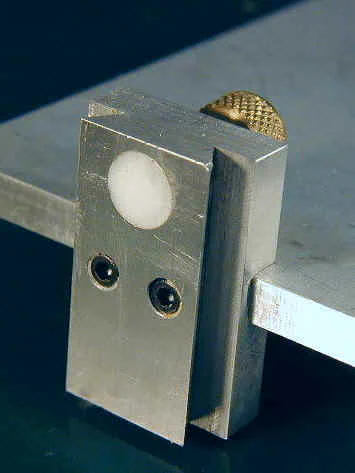
Teflon plug to lock table in place
High-Intensity Lamp
The lamp is a standard 20 watt, 12 volt reflector lamp, model MR11, with a diameter and length both of about 1 3/8". I power it with a 1-amp, 12 V power supply that was originally from some other piece of equipment.
While you can find these lamps at the big box hardware stores, you almost certainly won’t find a socket for one, as the sockets are always built into some sort of lighting fixture. Therefore, I had to make my own socket from Teflon and brass, with 0-80 (.056" dia.) stainless steel screws to retain the wires.
Teflon is used for the socket due its high temperature resistance. It also serves to protect the insulation on the wires from melting.
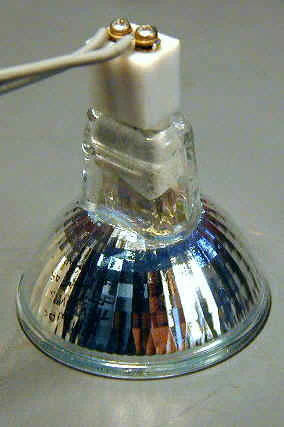
Custom socket made from Teflon and brass.
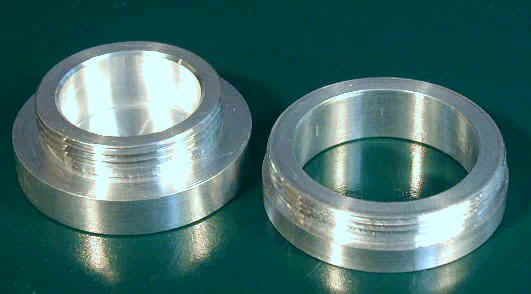
After operating for 5 minutes or more, the lamp gets very hot, so I decided to put cooling fins on the housing. Not only do they look cool, in the stylistic sense, but, in theory at least, they should help cool the housing through convection and increased surface area.
In practice, the housing still gets pretty hot, but it may be a little better than the first one I made, which had no fins. The fins were cut on the lathe using a hand-ground cutoff-type tool.
My mini-lathe has dial indicators mounted on both the X- and Y- axes which made it easy to space the grooves evenly and cut them to a consistent depth (without, I might add, cutting the housing in half by accident!)
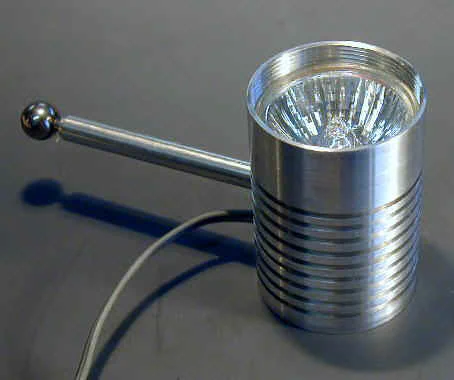
Lamp housing with cooling fins
Threaded front and rear end-caps screw into place to retain the lamp and to close off the rear of the housing. Naturally, the threads, both internal and external, were cut on the mini-lathe.
This is one situation where a tap and die won’t do the job.
Teflon was used again to fabricate a small bushing to protect the wire from abrasion where it passes through the side of the housing. The support arm is seated in a 1/4" dia hole milled to provide a flat mating surface.
In the center of the flat, a through-hole for a 4-40 cap screw is drilled and the cap screw holds the arm securely in place.
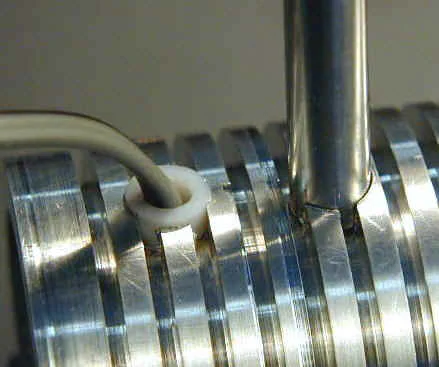
Teflon bushing protects wire
At the other end of the support arm, a 3/8" dia stainless steel ball is drilled and reamed to press-fit onto a 1/8" dia shaft of drill rod which joins the ball to the arm.
A similar ball arrangement is mounted to the side of the microscope. The two balls are gripped by a pair of brass plates, allowing the lamp considerable freedom of motion to adjust it for the best lighting angle.
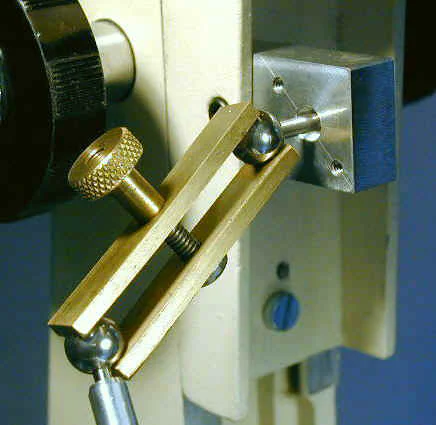
Flexible ball joint supports the lamp
Conclusion
Well, that pretty much wraps it up for now. I hope that this article gave you some good ideas for things you can do with a lathe and mill. Be advised, though, that this type of work takes time.
We live in an age where we have an over-abundance of manufactured goods available to us, so many of us aren’t used to taking the time to make something ourselves.
However, for those so inclined, this type of work can bring great personal satisfaction - both in making a good tool even better, and in the enjoyment of the work itself.