Mini Lathe Setup
I have had my Harbor Freight 7x10 mini-lathe for over two years now and have been pretty happy with it. I am an inventor and experimenter and I use the lathe mainly for making special parts for devices that I am experimenting with.
Most of these parts are fairly small and short, so the 7x10 has sufficient capacity for most of my needs. Because of the short bed, though, the 7x10 can’t drill into the end of a workpiece longer than about 4" if the diameter is greater than 3/4" and will not pass through the spindle.
This has been a limitation on several projects, and has led me to move up to the Grizzly 7x12.
Despite its 7x12 designation, the 7x12 actually is nearly 4" longer than the 7x10. This provides extra room to move the tailstock out of the way when it is not in use and allows for drilling and turning longer stock.
Additionally, the Grizzly 7x12 has a better power supply than the HF 7x10 (or at least the older model that I have). The 7x12 has very low speed with excellent torque right out of the box, obviating the need for the low-speed mod most of us have made to the 7x10.
The power supply also has an interlock that requires you to reset the speed to zero before restarting, thus preventing the lathe from starting up at high speed.
This feature also prevents blowing fuses by accidentally switching from forward to reverse while the lathe is running. The overall fit and finish of the Grizzly is a little better than the HF 7x10.
Other than that, the lathes are pretty similar and most of the parts and accessories are interchangeable.
What to do While You’re Waiting
While you’re waiting for your lathe to arrive, there are few items you should gather up so you will be ready to go when it arrives:
For cleanup and setup:
- Kerosene - available in 1 gallon cans at Home Depot and similar stores
- A few 2" and 3" ‘chip brushes" - cheap throw-away brushes with natural bristles
- Newspaper or cardboard to go under the lathe during cleanup process
- Disposable plastic pail for cleaning parts in kerosene
- 7mm open-end wrench and 2mm hex wrench to adjust gibs - most other tools are included with the lathe
- T-Handle hex-wrench set
- White lithium grease
For your first projects:
- 5/16 Tool Blanks
- Bench grinder for shaping tools
- Dial caliper
- Safety glasses (I use heavy plastic reading glasses)
- Stock: aluminum, brass, steel in various diameters
- Drill chuck and arbor for tailstock
- Center drills
- Live center (comes with Harbor Freight 7x10, but not Grizzly 7x12)
- Inch and number drill sets
- Assortment of taps 4-40, 6-32, 8-32, 10-32, 1/4-20, 3/8-16 etc.
If you are not familiar with lathe operations, please read the safety tips and operations page.
Receiving and Unpacking the 7x12
I ordered the 7x12 from the Grizzly web site on 9/15/01 - the last day of the summer sale. Ordering from the web entitles you to a free gift based on the dollar amount of your order.
Grizzly has a wide selection of gifts, and some of them are pretty decent, making the web ordering process a good way to go.
Because of its larger size, the 7x12 weighs more than the 7x10 and must be delivered by truck freight rather than UPS (the 7x10 just squeaks under the limit of UPS requirements).
This adds a little complexity and time to the delivery process since the lathe will first get shipped to trucking terminal near your delivery address; then the trucking dispatcher will call you to schedule delivery.
In my case, there was some concern that the large truck could not get into and out of my residential court, so I had to schedule a ‘straight truck’ which added a few more days to the process.
As it turned out, the truck that arrived was a small semi-trailer and it had no trouble turning around in my court.
It seems that UPS will now ship items heavier than 70lbs. The most recent 7x12 mini-lathes that I have received were shipped by UPS.
The driver will unload the lathe from the truck to the ground, but generally will not move it from there so you will need a hand truck, wagon, or a strong friend to help you move the lathe into your shop.
Fortunately, my shop is in my garage, so it was a short haul up the driveway into the shop, which was accomplished quite easily with the help of a cheap luggage cart that I used to use to haul computers around back when I did that as part of my job.

A great advantage of the mini-lathe is that it can easily be moved by one person. Larger lathes generally require a fork-lift, shop crane or some other means, plus 2-3 people to move them.
The following photos illustrate proper and improper technique for moving heavy objects.
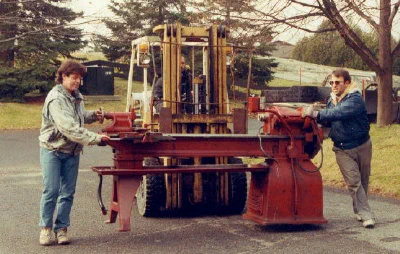 Proper technique
 Improper technique!
Yes, it is a bomb!
When I received my HF 7x10, it was packed in a wooden crate and had suffered some minor damage in transit. The Grizzly 7x12 is packed in a molded styrofoam shell inside a cardboard box.
From reports I have seen on the 7x10 interest group, this packing method seems to do a better job of protecting the lathe. Nevertheless, one corner of the chip tray was bent - a common occurrence from what I have heard.
This was not a big deal to me, since I will mount the lathe directly to my bench and will not use the chip tray. I’m sure that Grizzly will replace it under warranty if I ask them to.
When you open the box, it looks like this:
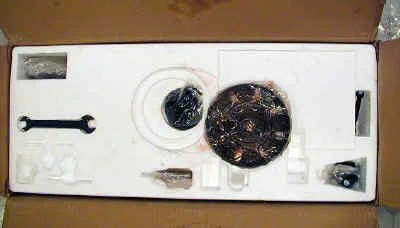
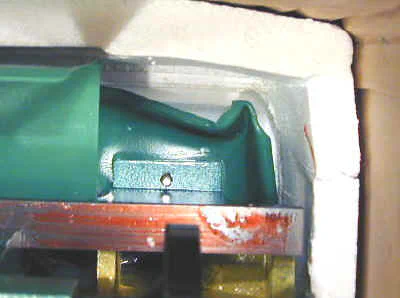
The large round object is the faceplate covered with red packing grease and wrapped in plastic. It had migrated from the molded slot in the styrofoam to the left, but this did not cause any problems.
Other accessories are tucked in molded slots.
Removing the top layer of the styrofoam packing reveals (drum roll…) the lathe.
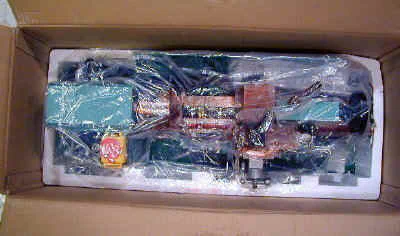
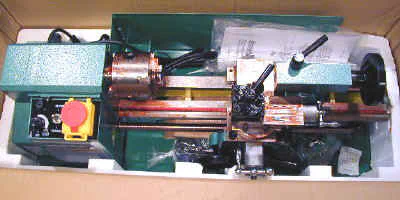
Like the faceplate, the lathe is covered in red grease and wrapped in plastic. Removing the plastic sheet gives a better view of the lathe and grease.
Here’s a picture showing the damaged corner of the chip tray:
The damage was not evident from examining the box when it was delivered, but a close look shows an accordion-like crushed corner:

Cleaning up the Lathe
Kerosene is my preferred solvent for cleaning up the red gunk that covers the lathe. It does a great job of dissolving the stuff and is fairly safe to work with indoors.
It’s best to work with it in a well ventilated area and avoid sparks or flame including possible sparks from nearby motors (such as when testing the lathe!) or pilot lights from furnaces, etc.
A little goes a long way and a quart would probably be more than enough to clean up the lathe.
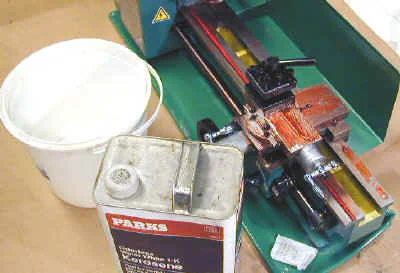
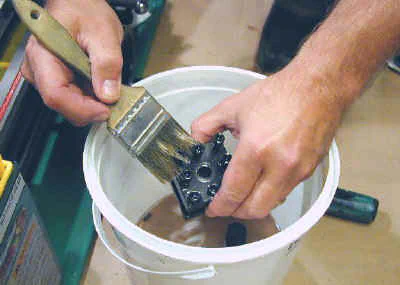
I pour about a pint into a plastic pail and clean small parts right in the pail. I use 2" or 3" ‘chip brushes’ dipped in the pail to paint kerosene onto the larger lathe parts such as the bed and the chuck and then use rags to wipe of the red grease and kerosene.
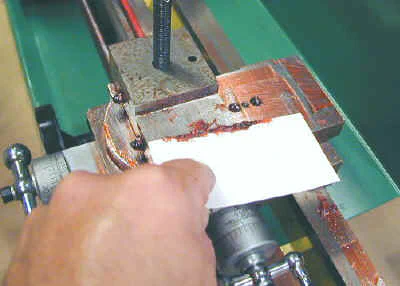
I used some old business cards to scrape off the thick layer of grease before going at it with the kerosene.
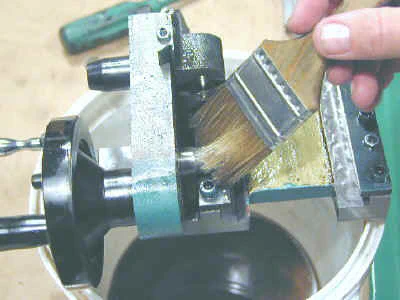
Use a card, brush and rag to clean off most of the grease from the chuck. To thoroughly clean the chuck, remove it from the spindle and use a brush to clean it up in the kerosene bucket.
The retaining nuts on my chuck were very tight, so I inserted the chuck key and grasped it tightly to keep the chuck from rotating while I applied pressure to loosen the chuck retaining nuts.
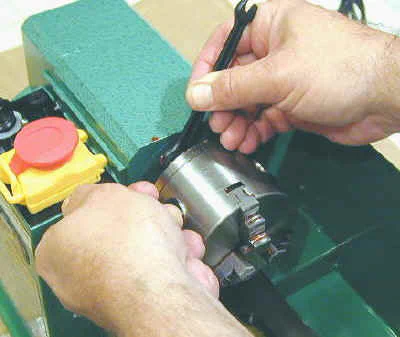
When removing the chuck nuts, be sure to keep your other hand in place under the chuck so that the chuck does not drop onto the ways and ding them. Unlike some expensive lathes, the ways on this one are not hardened.
Some owners place a rag, board or piece of corrugated cardboard on the ways to protect them when removing the chuck.
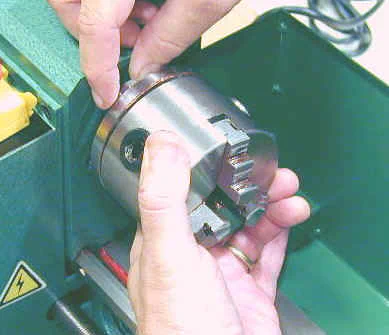
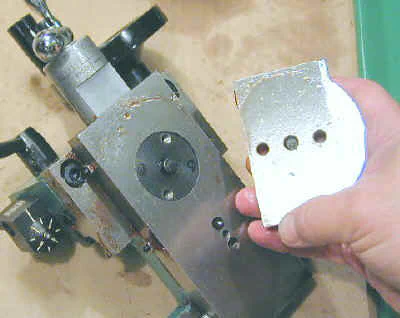
You will want to clean up the scroll and inner parts of the chuck, and this requires removing the chuck jaws. Note that the jaws must be reinstalled in a specific sequence.
When you remove them for the first time, lay them out on your workbench next to the slot they came from. Now note that each jaw is numbered - 1, 2, 3.
Although not essential, it’s a good idea mark the slots so that you always reinsert each jaw into the same slot it came in from the factory. This will ensure consistency. I use a center punch to punch 1, 2, and 3 dots next to the slots.
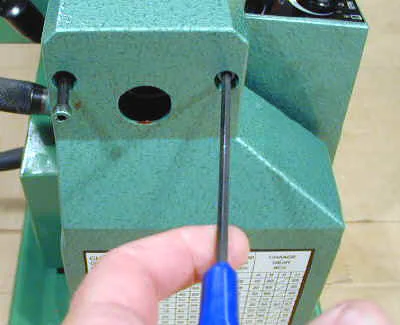
Use a 4mm hex wrench to remove the two cap screws that hold the gear train cover in place. Then lift the cover off to expose the gear train for cleaning.
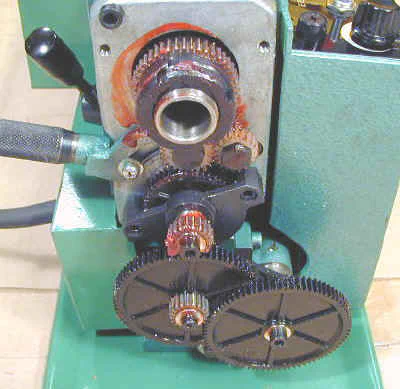
Clean up the gear train using a brush and rag. To do a more thorough job you can remove the gears and clean them up with the brush in the kerosene bucket.
After reassembling, apply a light coat of white lithium grease to the gear teeth. This will keep them running smoothly and will make them quieter when using the power feed.
Optional Cleaning
The following step is optional at this time, especially if you are anxious to try out the lathe in action, but to do a thorough cleanup job, I recommend removing the saddle from the bed.
First, remove the pillow block from the end of the leadscrew using a 6mm hex wrench:
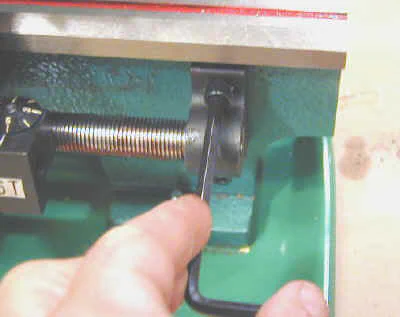
Then use the handwheel to move the carriage to the right until it runs off the end of the rack. Grasp the carriage firmly and slide it off the end of the bed - be careful, it’s pretty heavy.
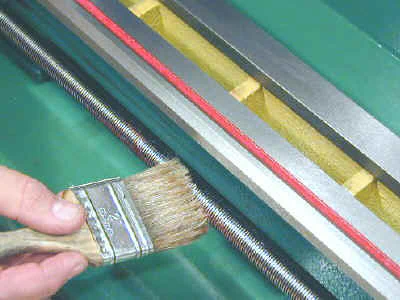
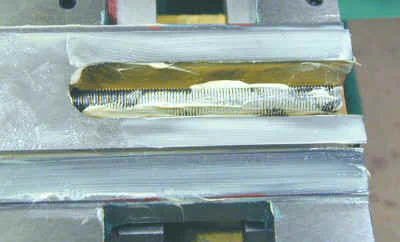
Now you can get better access to the leadscrew to clean the gunk from the screw threads:
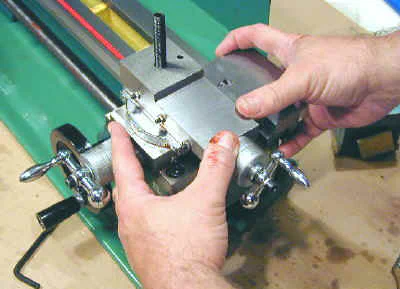
This will also enable you to clean up the underside of the carriage assembly:
If you want to do a really thorough job, this is a good time to take apart the compound and cross slide, clean them thoroughly, lube them with white lithium grease and adjust the gibs.
Or you can leave this task for another day. But here are the steps to follow:
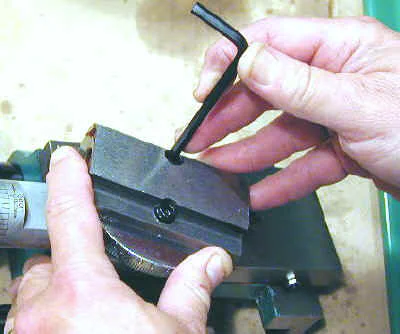
Crank the compound slide all the way back until you feel it disengage from the compound lead screw, then slide it by hand off the end of the dovetail. Watch out for the sharp edges of the dovetail - they can slice your fingers!
Watch out for the gib strips - they are held in place by the dovetail and can fall out once the slide is removed. If they fall out, just put them pack in position with the small indentations matching the tips of the adjustment screws and hold them in place as you slide the slide back onto the dovetail.
Now you can access the two 6mm hex head bolts that hold lock the cross slide at a specific angle. Remove these two screws and lift the compound slide off of the cross slide.
Now turn the cross-slide handle until the cross-slide disengages from the leadscrew, then slide it by hand the rest of the way off of the dovetails.
Use a brush, rag and kerosene to clean up all of these parts

Now apply a liberal coating of white lithium grease (available in small tubes at Sears hardware department) to the dovetails and leadscrews.
Reassembly is just a reversal of the above steps. When you reinstall the carriage on the ways, make sure that the pinion gear is pushed towards the front of the apron or it will hang up on the end of the ways and prevent the carriage from sliding back in place.
Slide the carriage to the left until you feel the rack and pinion engage. Then reinstall the pillow block on the end of the leadscrew and you’re ready to go.
Bench Mounting
Unless you have a need to move your lathe frequently, I highly recommend bolting it down to a sturdy workbench. This will keep it from wandering around during heavy cuts or when you really need to whang down on the chuck key.
I believe it also helps to reduce chatter by making the whole setup more rigid.
I mounted mine by cutting holes for the rubber feet in a piece of 1/2" MDF, retapping the bolt holes 1/4-20 and then bolting the lathe and MDF to my lathe bench.
The MDF fills in the space under the lathe which I found, through many frustrating incidents, is a perfect hiding place for taps, drills and other small parts that you critically need for the next step of your work.
Retaining the rubber feet may help to keep the bed from being twisted slightly if the top of your bench (or the bottom of the lathe) is not perfectly aligned.
I think it may also help reduce vibration and noise a little. That’s my 2 on that subject - and worth every penny!
I got my workbench from Sears for around $110 on sale and augmented it with a pre-fab Formica counter top from Home Depot and some casters so I can move it when needed.
At one time, both the mini-lathe and mini-mill shared the same benchtop, but I later got a separate bench of the same type for the mill. This was a big improvement in terms of convenience.
Adjusting Your Mini Lathe
Check out the Tuning Page for additional adjustments you may need to make