HF Digital Caliper
Harbor Freight has introduced an electronic digital 6" caliper that breaks the price barrier for the home machinist. Until now, units like this typically sold for $50-60, but currently HF is offering this model for $39.99 and it has been on sale for $19.99 for the last few weeks.
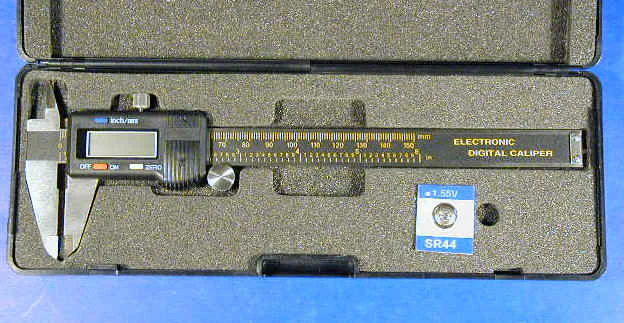
At that price I couldn’t pass it up and I’m happy to report that it looks like a good quality tool and an excellent value. As is usual in my experience with HF, the order took quite a while to arrive. I placed the order on July 30 and it arrived on August 12.
A useful fact to be aware of is that you can often purchase HF products at a price lower than that currently promoted on the web site if you have a recent sale catalog advertising a lower price.
On the web site, click on the Order from Printed Catalog link and fill in the complete item number, including the suffix, from the sale catalog. For example, the item number 47257-3HWC still brings up the 19.
99 price as of 8/12 while the web site price now shows 39.99. If you have an HF store in your locale, they will generally honor the lower sale price from a recent catalog as well, but be sure to call to make sure they have the item in stock before you make the trip.
The construction of the caliper is based on an all-stainless-steel measuring frame that, other than the readout, is essentially the same as other caliper designs, including jaws for taking inside measurements and a depth gage.
A knurled thumbwheel and locking screw are also provided. The front face of the frame is covered by a black scale with yellow numerals that provides a rough readout to the nearest tenth of an inch or millimeter.
The readout module is in a plastic housing with a 4-1/2 digit LCD display. The 1/2 digit reads out to the nearest 0.0005". A measurement of exactly one inch would display as 1.000. The display has good contrast and the digits are about 3/8" tall, making it easy to read even if your eyes aren’t as good as they once were (ask me about it).
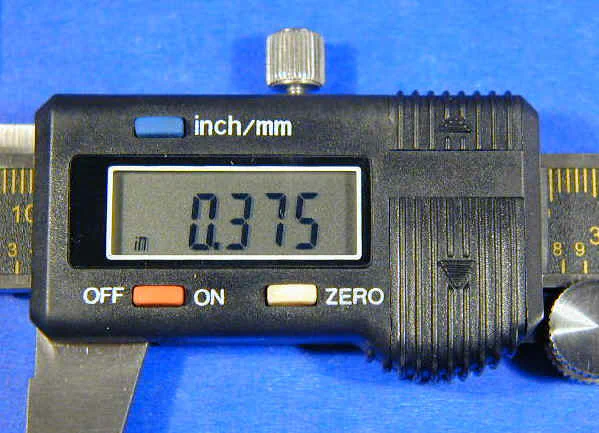
Three soft-touch rubber pushbuttons are mounted on the front of the housing:
- Blue: inch/mm
- Read: on/off
- Yellow: zero
A great feature of this tool is that you can toggle the blue button to switch instantly between inch and metric readings. In addition to the obvious utility of being able to read directly in either system you can also use this as a handy calculator to convert a measurement from one system to the other.
The on/off button is pretty self explanatory. The readout automatically powers itself off after a few minutes of no activity. (Update 08/13/02) Well…
at least that’s what it says on the HF website. I left mine on overnight the first night and the display was still on the following morning. As anyone who has owned a wristwatch with one will know, LCD displays consume very little power anyway, so this is presumably not a big problem.
Time will tell. (End of update)
(Update 06/24/03)
I liked this tool so well that I bought a second one. On the new one, the automatic power off works correctly. On my original one it still does not shut off automatically but, as I anticipated, the display draws so little power that it is still running on the original battery after nearly a year.
On the new one, it even powers on automatically if you slide the gauge to make a measurement.
(End of update)
The zero button resets the display to zero at the current position of the caliper jaws. Normally you would set the zero by first making sure that the jaw faces were free from any dust or grit, then closing the jaws and setting the zero.
There may be situations where it would be useful to set the zero point relative to a previous reading, but no such use comes immediately to mind. It seems to me that it would be easy to accidentally hit the zero button and then have to go through the process of re-zeroing with the jaws closed.
To prevent this, if it becomes a problem, it looks like you could just take a single-edge razor blade and trim off the top of the zero button so that it is flush with the surface of the readout housing.
Like the other import dial calipers, of which I have bought several, this one comes in a plastic case with protective foam padding. Also in the case is a button-style battery.
I found no instructions packed with the caliper so I assumed that the battery needed to be installed before use. It turned out to be a spare, as there was already a battery installed.
The battery is accessed by sliding a small cover located on the lower front part of the readout assembly.
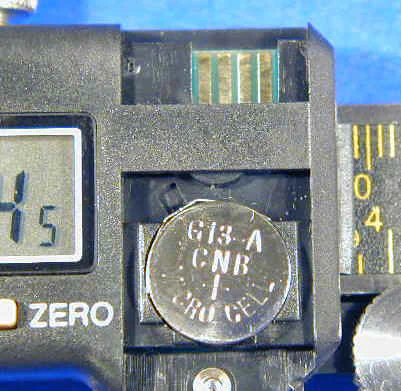
Another sliding cover above the battery cover encloses an edge connector which can transfer the readout of the caliper to a printer or other compatible device. If you are interested in this feature, there was a good discussion about it on the 7x10 group. (note this discussion can be found in the range of messages from 61144 to about 61500)
Derf Henderson has already adapted one of these calipers as a Z-axis readout for the mini-mill.
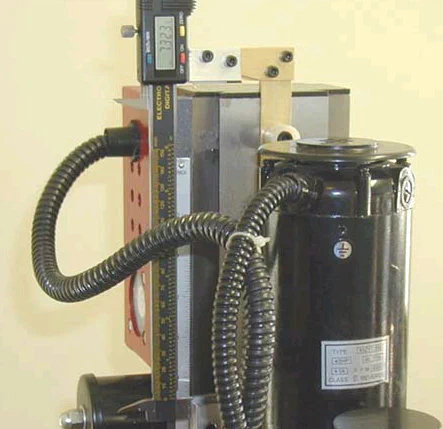
Although I’ve had pretty good luck with the import dial calipers, they seem to have a lifetime of about a year under the conditions in my shop. The dial is driven by a tiny rack and pinion and grit and swarf can easily get jammed in the rack and jam the caliper.
The digital caliper uses some kind of linear encoder rather than a rack and pinion, so I would expect it to be immune to this particular failure mode.
Hopefully it will have a long and useful life.
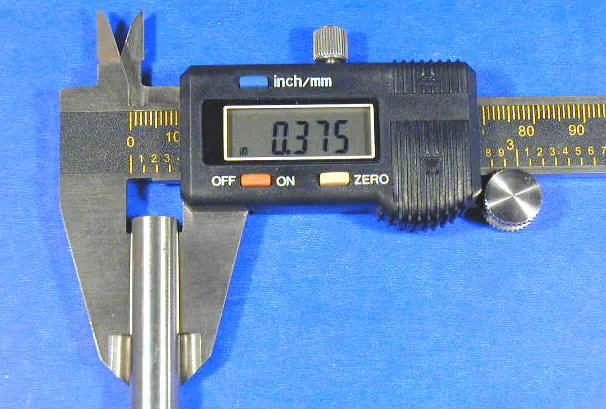
Another interesting discussion thread on the 7x group had to do with measurement accuracy of calipers.
Out of curiosity I took several measurements with the HF digital calipers and compared them with readings taken with two different inexpensive $15 dial calipers and checked with my good quality Mitutuyo micrometer.
All of the readings that I took on a variety of round and flat stock agreed to within .001". Getting consistent readings depends as much, if not more, on proper technique than on the quality of the measuring tool. Here are some pointers:
- Make sure the measuring jaws are clean and free from any dust or grit
- Check the zero setting periodically, especially if you are working to close tolerances
- Use the thin tips of the jaws for most measurements.
The wider portion of the jaws is useful for measuring discontinuous surfaces such as drill bits or screw diameters, but will have a tendency to cause the reading to shift when withdrawn from smooth stock.
-
Use the thumbwheel to gently advance the jaws until they close on the work. Use only enough pressure to ensure a snug reading.
-
Use the locking screw to keep the reading from changing as the jaws are withdrawn from the work.
-
Lift the jaws straight off of the work being careful to keep the caliper perpendicular to the workpiece. Twisting the caliper slightly to either side will change the reading.
-
When measuring inside diameters, rotate the caliper slowly around a small arc while applying gentle pressure to the thumbscrew. This will enable the jaws to settle in to the true diameter of the workpiece.
Watch the readout and stop when it reaches a maximum reading.