5-Inch 3-Jaw Chuck
On this page
The first I heard of this 5" chuck was from Fozzyber of the 7x group. He found it on sale at J&L and his reports convinced me to take a look at it.
He also posted a bunch of pictures to the 7x Photos page including this one, which I think really makes the point:
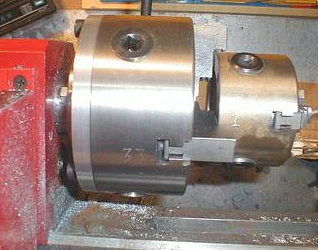
5" chuck shown beside stock 3" chuck.
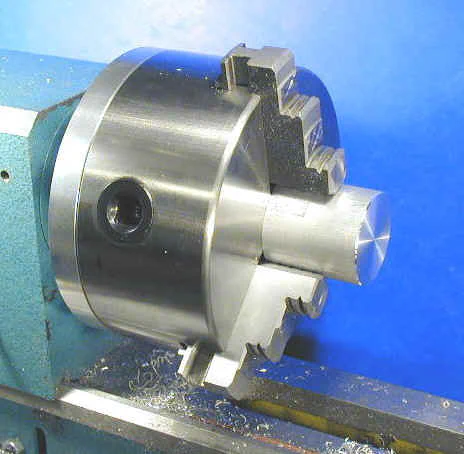
5-inch 3-jaw chuck mounted on a back plate.
J&L Industrial is offering this chuck (P/N PCC-05000-E) for $84.53. It was on sale for a while at $63.35. The one I purchased from J&L sports the familiar blue planet logo seen on many of the inexpensive import chucks.
Since I own several of these, I’m confident that this one will serve me as well as the others have. Enco also offers a 5" 3-jaw chuck P/N BE270-4074 for $67.95 and on sale for 60.95. It may be the same chuck, but I have not confirmed this. In the Enco sale flyer it looks like it has the blue planet logo.
At 5kg, It is somewhat massive for this little lathe, and for a long time my web site stated that a 4" chuck was the largest that could effectively be used on the 7x minilathes.
Having now tried the 5" chuck, I’m confident that it can be used safely and without damaging the lathe if appropriate precautions are observed. Due to the extra mass, I would advise bringing it up to speed more gradually than you might with the 3" chuck, and be aware that it will take longer to slow down after the speed is reset to zero.
Because it is significantly bigger and heavier than the stock 3" chuck, and because the jaws protrude further from the chuck body, it is inherently more dangerous.
Catch a finger on this chuck when it’s spinning at 800 RPM and you may do some serious damage to your hand. For this reason I can’t recommend it to beginning users of the lathe.
Stick with the 3" until you are very sure about your abilities, then cautiously move up to a 4" or 5" chuck. In any case, you will need a fair amount of experience to make a back plate to mount the chuck.
For experienced users, though, it has the advantage of being able to handle larger stock. This means that there will be fewer times when you need to switch to a 4-jaw chuck just to gain the extra capacity.
I have reproduced below the comparative chuck capacity info from the Chucks page. The through-hole is over an inch in diameter (about 1 1/8") but the largest stock that will fit through the lathe spindle is 3/4".
| Chuck | Through-hole | Using Inside Jaws | Using Outside Jaws |
|---|---|---|---|
| 3" 3-Jaw | 5/8" (.625) | 1.15 | 2.75 |
| 4" 3-Jaw | ~7/8" (.850) | 1.60 | 3.75 |
| 3" 4-Jaw | ~7/8" (.850) | 2.0 | 4.0 |
| 4" 4-Jaw | ~1" (.990) | 2.75 | 5.0 |
| 5" 3-Jaw | ~1 1/8 (1.135) | 2.0 | 5.25 |
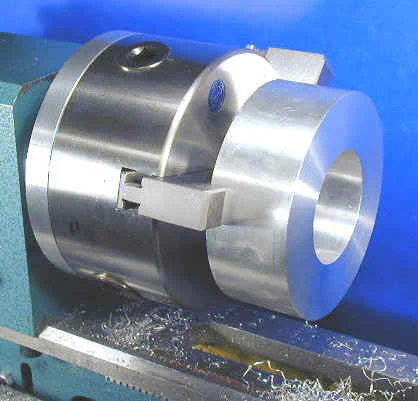
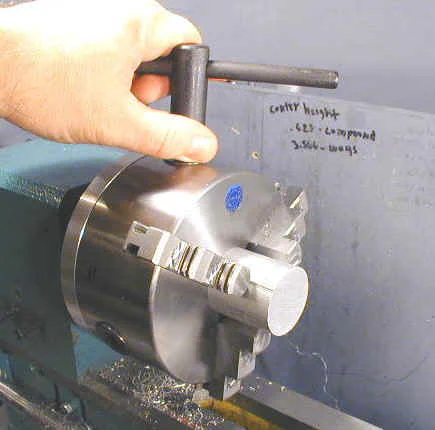
Holding a 4" diameter workpiece in the outside jaws
Accessories
The chuck comes packed in a cardboard box with a stryrofoam insert. All of the parts are coated with packing grease and wrapped in plastic to prevent rust during shipment and storage.
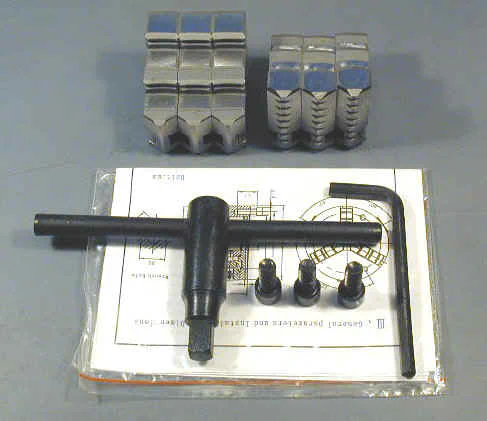
Included with the lathe are a (large) chuck key, inside and outside jaws, 3 hex-head bolts for mounting the chuck to the back plate, a hex wrench for the bolts and a manual that contains all the specifications and dimensions for the lathe.
Also included was a test sheet showing the actual accuracy parameters for this chuck, as measured by the factory Q/C process.
Compared to the one that comes with the stock 3" chuck, the chuck key is pretty massive. It is heavy enough that if you let go of it, it will swing the chuck around and hit the ways.
Moral: always keep a grip on it and remove it immediately when you are done adjusting the chuck.
Mounting
If you decide to buy one of these chucks, you will probably need to make your own back plate to adapt it to fit on the spindle plate. LMS offers a ready-made adaptor plate for the 4" chucks but I have not yet seen one for the 5" chucks.
My chuck back plate page will guide you through the process of making one, though, and is an interesting exercise in many machining operations.
One challenge you will face, due to the large diameter of the back plate, is getting the toolpost back far enough to reach the outside edge of the plate. See the back plate page for more on this.
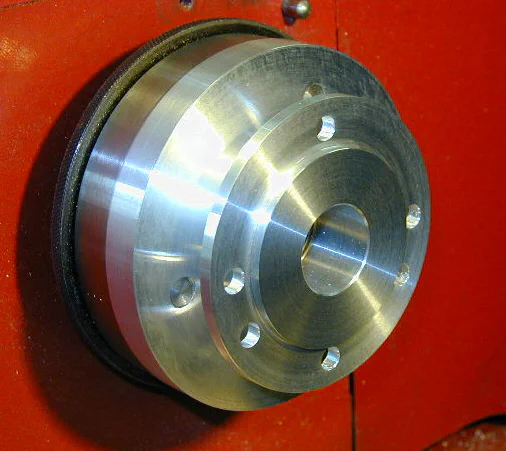
I followed those procedures to make a 5" back plate but did not machine a raised boss to mate with the recess in the back of the chuck.
Instead, first because the only suitable material I had on hand was 1/2" thick aluminum plate and second, because I wanted to be able to adjust the position of the chuck on the plate to minimize runout, I left the chuck-side of the back plate flat.
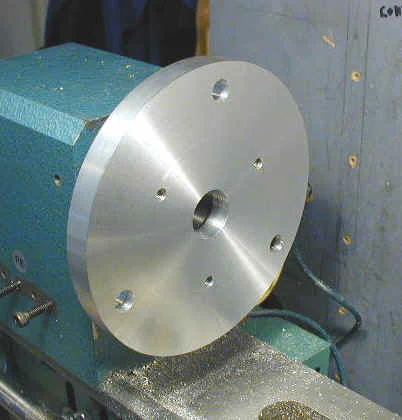
I mounted the chuck on the back plate and just snugged up the bolts enough to keep it from moving when the chuck was rotated. Then I used a dial test indicator to measure the runout and tapped the high side of the chuck gently with a plastic-faced dead blow hammer to move it closer to center until I had less than .
001" runout, at which point I tightened up the mounting bolts. This is probably about as good as you can get it, since the jaws will probably not close any more accurately than that on subsequent openings and closings.
Still, that’s pretty darn good for a $60 chuck on a $300 lathe.
The goal of zero runout really doesn’t make a difference for much of the work you do on the lathe. As long as you don’t remove the workpiece between operations, with careful work all of the turning you do will be concentric with the workpiece center to within the runout of the spindle, which is typically about .
0005 on the minilathes. If you need to remove the workpiece and turn the opposite end concentric with the original end, a 4-jaw chuck is a better choice.
There has been a fair amount of discussion on the 7x group of adjustable back plates that let you remove most of the runout inherent in mounting the chuck. Rick Kruger was an early innovator of this design and others, including B. Flint, have come up with their own ideas.
With careful adjustments you can reduce the runout to less than .001". Keep in mind, though, that this is probably better than the repetitive accuracy of the chuck jaws - even if you adjust the runout to .0001 on a test piece, there’s no guarantee that you will get the same accuracy when you replace the test piece with your workpiece. Even so, having the ability to adjust the backplate is a very nice feature.
Conclusion
For the experienced user who has a desire to easily mount workpieces that are too large for the stock 3" chuck, the 5" chuck looks like a great solution.
I have not used mine enough to say for sure that it will not cause any problems down the road, but my initial impression is that the minilathe is robust enough to handle the extra mass.
For a $60-80 chuck, the quality is excellent. Sure, for $200-300 there are better quality chucks out there, but this chuck is an excellent match to the price range and precision limits of the 7x minilathe.
I prefer the self-centering convenience of a 3-jaw chuck for most of my work, and use a 3-jaw chuck unless I need the precise centering capability or odd-work-shape-holding feature of a 4-jaw. For the last few years, the 4" 3-jaw has been my standard chuck and it’s likely that the 5" will now inherit that role.