Fun with the 4x6 Bandsaw
There I was, in my shop, with some free time over the holidays, thinking I’ll finish up installing the DROs on the Sieg Super X3 mill.
All I need is a few mounting brackets and I’ll be done. Then, whang!, the bandsaw stops working. Strange noises soon led me to suspect the gearbox, and a process of elimination confirmed it.
The gearbox is filled with nasty-looking heavy, foamy brown oil, that looks a lot like the final residue from boiling down a whale (don’t ask me how I know this).
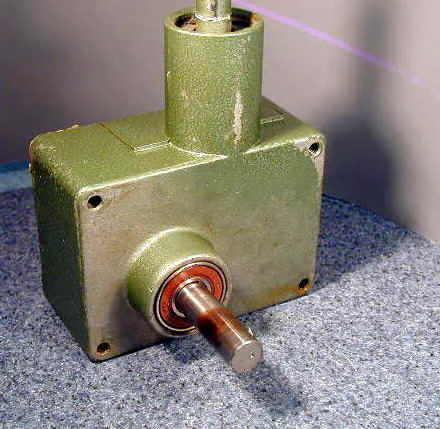
So I decided to remove the gearbox from the bandsaw to more easily drain the oil-like-stuff and work on the repairs. It quickly became apparent that this would not be a simple repair job: the bearings and oil seal on the shaft are press-fitted into the gearbox casting, with no obvious way to remove them.
Since my bandsaw is over six years old, to “save time” I decided to bite the bullet and buy a new bandsaw from HF. I was in luck, or so I thought, since they had one in stock; I got in the truck and headed south.
It’s about a 90 min. round trip from my house the nearest HF. I got back home and began assembling it, only to soon discover that the casting was damaged.
The upper part of the vertical casting, including the cast-in handle and the handwheel for the blade tightening handscrew, were smashed.
Called HF. Had just enough time to get back down there before they closed, but the only other one they had was the floor display - and we all know how well-cared-for those are!
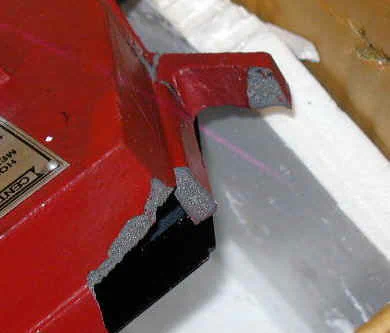
For a brief moment, I considered just salvaging the gear box from the new bandsaw and mounting it on my old bandsaw, but this thought quickly evaporated when I saw that the gearbox on the new bandsaw is not a separate unit: it is cast right into the frame.
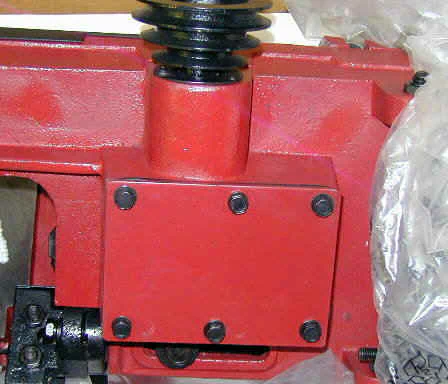
So, fate seemed to have forced me to tackle the job of repairing the gearbox on the old bandsaw. Looking for help, I posted a few messages and some pictures on the mini-lathe and bandsaw Yahoo groups.
I got some good advice, but had already begun my own plan of attack.
The bearings on the blade guides started to go bad, so I set out to replace them. That reminded me that I still had not replaced the bearings in the gearbox, so it seemed like a good time to do them, too.
In removing the gearbox, I realized that I had left out an important step in my earlier article: how to remove the lower blade pulley.
On my bandsaw the lower pulley was very tight on its shaft, so I used a 3-jaw gear puller to remove it. The gear pullers are available at very reasonable prices from Harbor Freight, and I have both the 2-jaw (P/N 40966) and 3-jaw (P/N 32184) styles, both of which come in sets of 3 sizes. I use them only a few times a year, but when I need them, they can quickly solve a problem for which there’s no other simple solution.
Keep the arms of the gear puller as close as possible to the center of the pulley, to avoid breaking the pulley arms. A little Liquid Wrench on the shaft may help.
I used a ratcheting box wrench so that I didn’t have to continually remove the wrench and shift positions. A ratcheting socket wrench would have worked just as well.
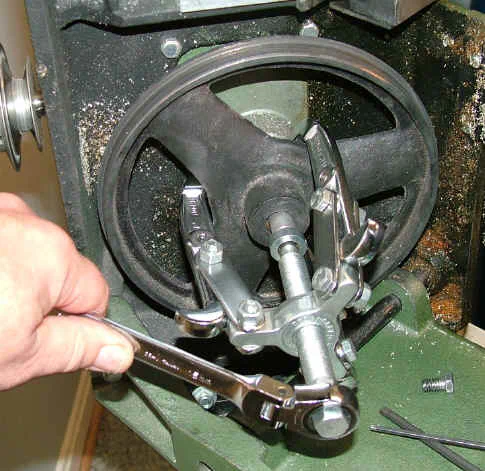
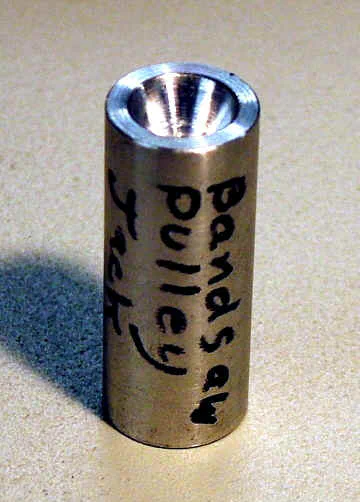
With the screw on the gear puller advanced all the way inward, the pulley still was not off the shaft, so I had to make a jacking plug .590" dia x 1.5" long to complete the job. One end of the plug is flat; the other end has a conical cavity made by a #5 center drill. The conical end of the gear puller shaft mates with the cavity.
The main problem with this repair is in removing the oil seal, bearings and worm-screw assembly. I concluded that the simplest approach would be to drill a hole in the gearbox housing opposite the end of the worm-screw, through which a driver pin could be inserted to drive out the shaft.
Ideally, the driving force would be applied as a steady pressures - as from an arbor press. I have a small arbor press, but it did not have enough clearance for this job, so I was compelled to use a hammer instead.
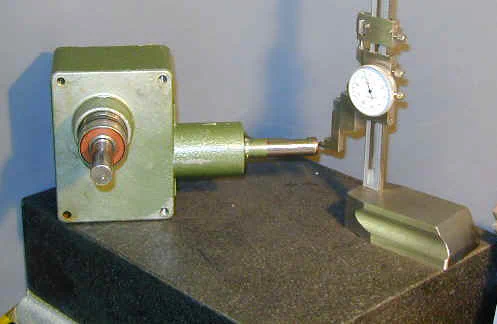
In order to accurately position the hole, I placed the housing on the surface plate and used a height gage to transfer the height of the shaft from each side of the housing to the place where the hole would be drilled.
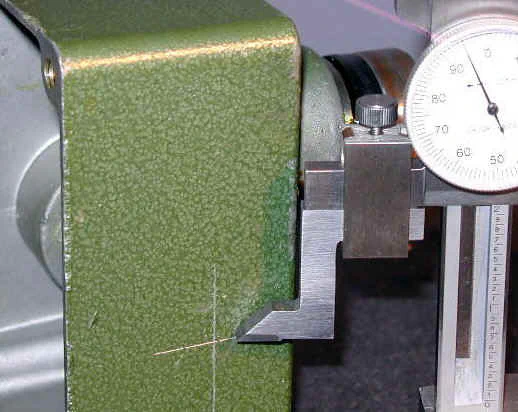
I first attempted to drill the hole by hand-holding the housing on my drill press table. Even though I started with small drill bits, and worked my way up to larger ones, it quickly became apparent that the bits were grabbing the work and would probably tear it from my grip and send the housing flying across the shop (no doubt seeking out the nearest window!) So I decided to move the operation over to the Sieg X3 and clamp it down for safety.
However, the shaft extends from the lower side of the casting. On the drill press, I just positioned the shaft to fit through the hole in the table. Also, the side of the housing opposite where I was drilling the hole was not entirely flat, so just getting set up took about 10 minutes.
That done, drilling the hole was simple - and safe! In retrospect, though, it would have been a lot simpler just to clamp it to the drill press table.
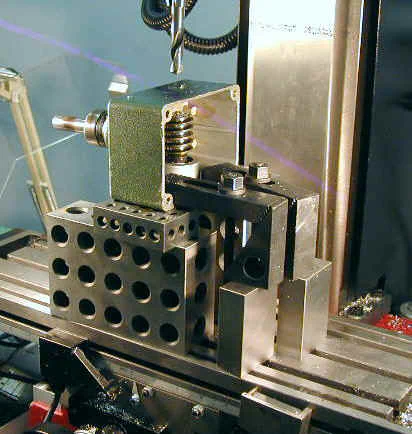
I drilled a 1/2" diameter hole and used a short piece of 7/16" dia. aluminum rod as a driver. Since the worm screw was engaged with the pinion gear, before driving out the shaft with the worm screw, I had to remove the gear.
(Note: 2/13/09 Thinking about this later, I don’t think it was necessary to remove the toothed gear, since it was free to turn, it should just rotate as I drove out the worm gear.
Probably safer to remove it though, to avoid breaking gear teeth) After removing a C-ring, I found that I could not fit a gear puller into the tight space of the gear box, so I drove the other shaft out to get the gear out.
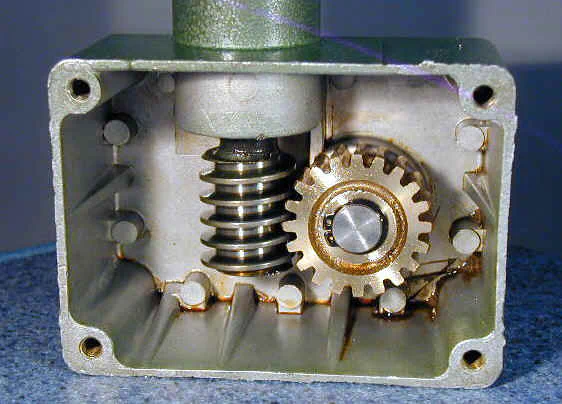
(Update 1/5/08) I forgot to mention that there’s an inner retaining ring (i.e. it expands into a groove) at the outside end of the worm gear shaft. A pair of fine-tipped needle-nose pliers, or something similar, will be needed to compress the ring to remove it.
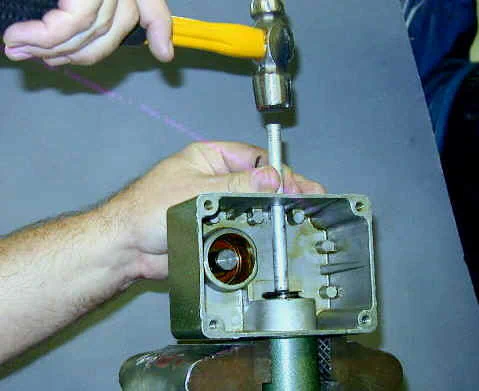
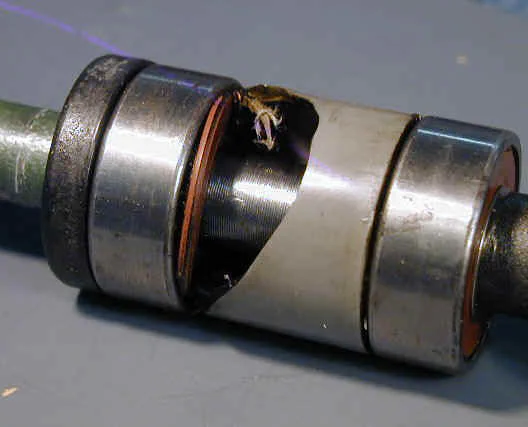
With a little more work, I removed the bearings from the shaft. This turned out to be more difficult than I expected since there was no easy way to support the bearing to drive out the shaft.
I considered using a gear puller to remove the bearing, but was afraid that the bearing would be ruined because the gear puller would exert all of its force on the outer edge of the bearing.
I milled a “bearing support” - just a small piece of 1/8" aluminum plate with a “U” milled into it for the bearing shaft. This enabled me to support the bearing in my large machine vise.
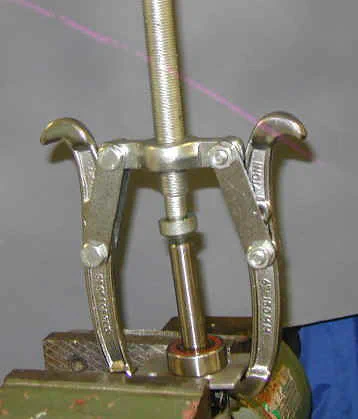
(Update 1/2/09) There are four bearings: 2 on each shaft.
The metric specification for them is 15x35x13 ZZ. (ID x OD x thickness, all in mm. ZZ indicates rubber seals on both sides.) I found replacements on eBay for about $2.50 each (2009 price) from seller jjdini3, USA Bearings and Belts.
Item title: (10) 6200-2RS New Single Row Bearings,(10) 6202-ZZ 15x35x11 Premium Quality Bearings 6202Z
These are the same size as the bearings on the upper pulley, so you may want to order some extras.
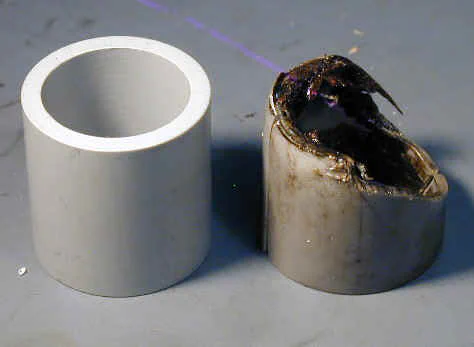
Next job was to make a replacement spacer. A quick scan of the junk bins revealed that a piece of 1 1/2" (1.3" actual dia.) plastic electrical conduit was just the thing I needed. A few minutes with a hacksaw and the lathe and I had a nice-looking replacement spacer.
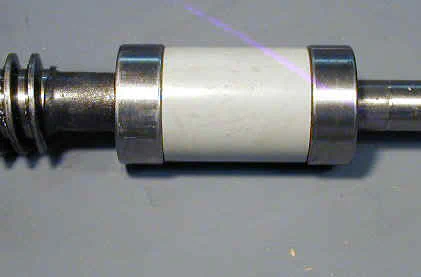
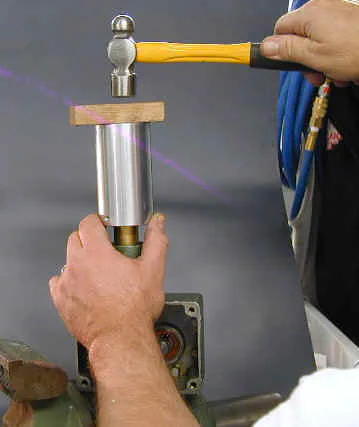
I reassembled the gearbox, using some conveniently-sized pieces of aluminum scrap to drive the bearings and shaft back into the gearbox housing. I had to repeat this step more than once, as the spacer I had fabricated was too long.
Due to the damage to the original spacer, there was no way to tell what its original length had been, so I just took my best estimate.
Unfortunately, I forgot to record the length that I finally used, for the benefit of others who may be faced with this repair. _(Update 1/2/09) Had the gearbox apart again and got a chance to measure it: it is 32.
7 mm long, 33.5 mm OD. Length is probably not critical; 32 +/- 1mm should be ok._
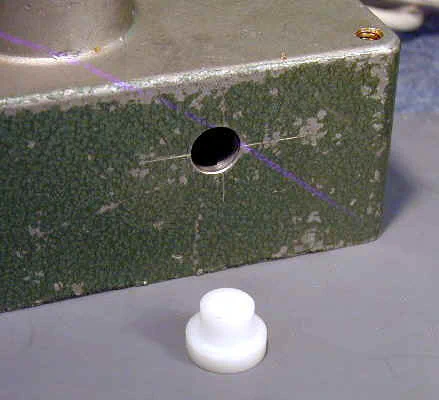
The last step was to turn a plug from Delrin to close off the access hole that I had drilled into the housing. This was a pretty simple task, and I made the plug just a thou or two over the hole diameter to get a snug press fit.
I was prepared to have to glue the plug in place with epoxy, but that proved unnecessary - the press fit was sufficient.
I had saved the original gearbox oil in a small container and now poured it back into the gearbox and replaced the gearbox cover. A quick test with the motor running assured me that I was back in business.
Obviously, before reassembling the gearbox would have been a great time to replace all of the bearings and the gearbox oil.
However, I did not know of any local source where I could quickly obtain either, so I decided to move ahead and save those tasks for another day. Now that I know how to take the gearbox apart and put it back together, this does not seem so intimidating.
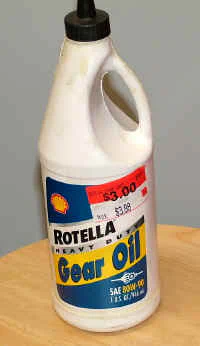
Since I had the gearbox open again, I decided it was time to replace the oil. The manual specifies “140 weight gear oil”. The closest thing I could find (at Wal-Mart no less!) was SAE 80W-90 gear oil.
I decided, based on no scientific principles whatever, that it would do the job; at least until I could find the heavier oil. It was on sale for $3.00, which probably means that they no longer plan to stock it.
Fortunately, the oil can be changed without removing the gearbox: all you have to do is remove the four bolts that hold the gearbox cover on, remove the old oil, then add the new oil.
The tricky part is getting the old oil out, since there’s no drain plug. When I did it, I had the gearbox off of the saw, saw I just poured to old oil out.
With the gearbox in place, I think the easiest way to remove it may be to use a kitchen baster (like a giant eye-dropper), available in grocery stores or wherever fine kitchenware is sold for a buck or two.
To avoid leaks, it’s a good idea to thoroughly clean up the rubber gasket and lid of the gearbox before replacing it.