Mini-Mill Layout Accessories
Laying Out a Workpiece
Layout is the process of measuring and marking a workpiece with finely scribed lines that guide you during the cutting process. When working with the mill, you will generally need to measure much more accurately that you might be accustomed to in other shop work.
In this business, 0.010 or ten one-thousandths of an inch, is considered to be a pretty rough measurement. Most work must be accurately laid out to within +/- .005 or better, with .001 being the goal for high quality work.
To achieve this level of accuracy you need both the proper tools and proper techniques. Working carefully you can probably achieve measurements accurate to about +/- .005 using a good quality stainless steel machinists rule and a surface gauge.
Height Gauge – Can Wait
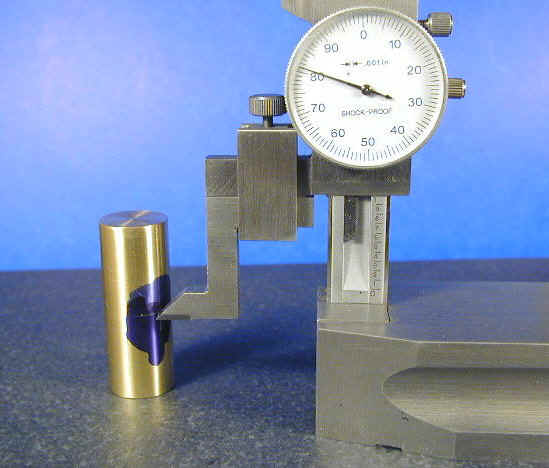
A height gauge is much like a dial or digital caliper mounted on a flat, heavy base and with a carbide scriber tip in place of one of the jaws. It is always used on a surface plate which serves as a flat baseline for the measurements.
The dial head and attached scriber can be slid up and down along the scale and then locked in place. A fine-adjusting thumb-wheel is then used to make the final setting and the head locked in place by a second locking screw.
The one I used is a 6″ model from Grizzly, SKU G9618, $39.95 (09/02). They are available in other heights such as 8″ and 12″. For the work that I do, 6″ has been more than adequate. Go to the Grizzly web site and search for “height gauge”.
It is used to scribe accurately dimensioned lines on a workpiece which has been prepared by brushing it with layout dye. The height gauge is set to a desired height, say 1.000″ and then slid along the surface plate to scribe a line on the workpiece.
You could then scribe a second line at 2.000″ by resetting the height gauge and repeating the process. The height gauge can also be used to determine the dimensions of a workpiece in much the same way as you would with a caliper.
While not essential when you are starting out, a height gauge is a tremendous time saver when laying out work for the milling machine. It is also handy for lathe work, such as marking a workpiece to be faced to an exact length.
Layout Dye – Must Have
Layout dye is a fast-drying colored liquid, usually a very deep blue, that is brushed onto a workpiece to prepare it for laying out guide lines. When scribed with a sharp marking tool such as a scriber, surface gauge or height gauge, the dye surface is penetrated leaving a shiny metallic line on the workpiece along the scribe mark.
Dykem is probably the best know brand name for layout dye. I keep mine in a plastic bottle specially made for layout dye with a squeeze bulb and brush built into the cap. You only want a thin layer that will dry quickly, so squeegee off the excess dye from the brush on the side of the bottle before applying.
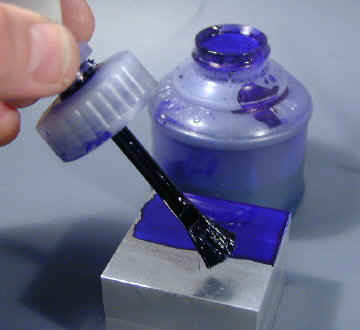
A pint of this dye will last for quite a while. For most hobbyists working with small parts, a quart would probably last for many years, so don’t buy a big bottle if you aren’t sure that you need it. You may also want to buy a bottle of dye remover, which is useful for removing the dye from your workpiece when you are done with the machining operations.
Some machinists use felt tip markers instead of layout dye. I prefer the dye for most work, but occassionally use a felt tip marker to mark small lines or when I’m too impatient to wait the two minutes or so that it takes for the layout dye to dry.
Surface Gauge – Must Have
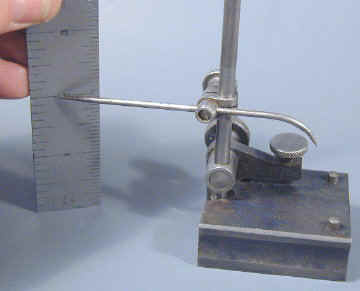
A surface gauge is a handy little tool for scribing layout lines on a workpiece, or for transferring measurements from a rule to a workpiece. It consists of a case-hardened and flat ground steel base and an adjustable vertical arm that holds a sharp steel scribe.
A fine adjustment screw is provided for setting the height very accurately. Usually they come with both a short and a long vertical arm. They can be purchased for around $15 in the usual sale flyers.
Some have ground and hardened pins (visible in the photo on the right end of the base) that can be pressed down so that they exend below the base. These are used to run the gauge along the finished edge of a workpiece to scribe a line at a specified distance from the edge.
The top of the vertical arm is usually turned into a small sphere above an recessed neck. When not in use, the sharp tip of the curved arm of the scriber is tucked into this recess so that you don’t jab yourself with the point.
Surface Plate – Can Wait
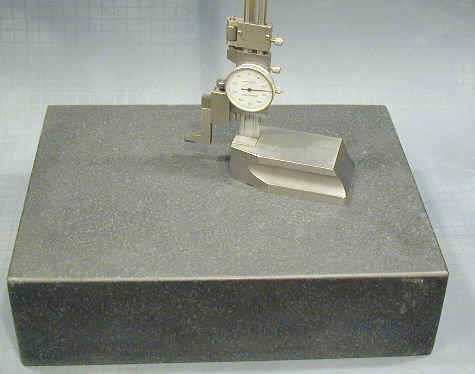
Basically just a thick slab of granite precision ground on the top surface, a surface plate is used in conjunction with a height gage and other layout tools to provide a reference surface from which the measurements can be made.
Even the low-end ones are typically flat to 0.0001 across the surface. Once you are familiar with the basic milling operations, a surface plate together with a height gauge will help you to do precise layout work.
For home shop use, 9x12x3 is a convenient size and can be purchased for under $20 from the usual suppliers. See the Grizzly SKU G9648, for example. Be aware that these are heavy items – especially in the larger sizes – and the shipping costs can be steep.
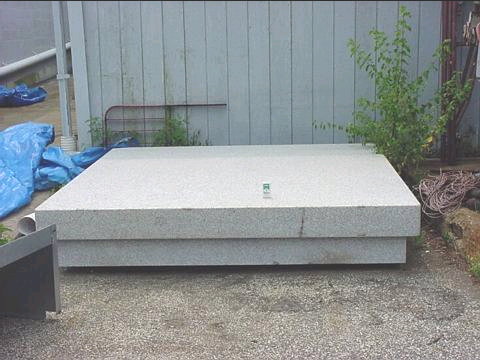
Surface plates are available in a wide range of sizes from 6x8x2″ on the small end to large industrial sizes weighing several tons. The best ones are made of pink granite and cost $1,000 or more. Here’s a big one that Dave Mucha found at Fazzio’s in NJ:
