Mini-mill Features
Here’s a stylized diagram showing the main components of a vertical mill in a side-view:

Cast iron is the main ingredient in the mini-mill. It provides both strength and weight (about 90lb), and weight is desirable in a mill since it helps reduce chatter and undesired movement - the more mass the better.
The castings on my Grizzly model are of good quality and were relatively free from sand, grit and rough edges that are often found on low cost machinery of this type.
Head and Spindle
The head of the mini-mill is essentially identical to the headstock of the 7x10 and 7x12 mini-lathe. A separate casting mounts the head to the column, but inside the head contains the same spindle and gear arrangement as the mini-lathe.
A HI/LO speed lever on the left side of the head shifts the internal gears to set the upper speed range at about 2500RPM instead of the LO range of 1200 RPM.
Of course, the torque is cut in half in HI range.

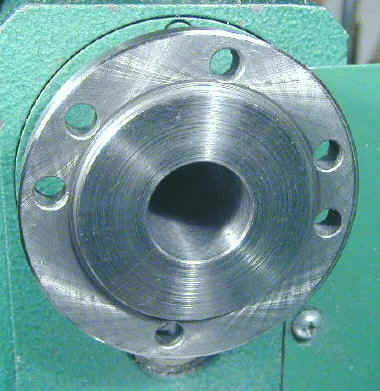
The spindle recess is precision ground to a #3 Morse taper. Two collets, 1/2" and 3/8" are provided with the mill for holding tools with those shank diameters.
Since tools of several cutting diameters are available with common shank diameters, these two collets can accommodate a wide range of cutting tool diameters.

Collets and Drawbar

Cutting tools are held in place in the spindle by a collet or, alternatively, by an end mill adaptor. The Grizzly mill comes with a 3/8" and 1/2" collet as shown in the photo (colored tape was my addition).
The collet has a Morse #3 taper matching the spindle and has slots in the sides so that it clamps down on the shank of the end mill as the collet is drawn into the spindle taper by the drawbar.
The drawbar passes through the spindle from above and threads into the top of the collet. The spindle is then locked in place by means of a locking pin while the drawbar is tightened using an 18mm wrench.
A plastic cap covers the top of the drawbar and the spindle nut to keep these parts covered when they are rotating.

The spindle locking pin is the other major cause of stripped gears: turn on the power to the motor while it is still in place and you have a good chance of shearing a few teeth off of the motor or drive gears. Steve Bedair devised a spring-loaded locking pin that can save you this pain.
To remove a tool from the spindle, insert the locking pin into the spindle and use the 18mm wrench to loosen the drawbar a few turns. Then rap the top of the drawbar sharply with a small hammer to unseat the collet or end-mill adapter from the Morse taper.
I made a little brass hammer on the lathe for this purpose. Sometimes it takes more than one whack, but if you really have to wail on it, you are probably tightening the drawbar too tightly.

Motor and Electronics
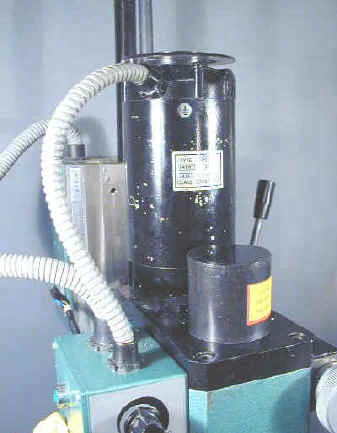
Rising up about 8 inches from the top of the head, a 110V DC motor powers the mini-mill. Though the specs say it is 4/5 HP, it is probably closer to 1/2 HP, but has plenty of power for the size of the mill.
I have never had a problem with the motor bogging down using cutters within the capabilities of the mill. Unlike on the mini-lathe, no reversing switch is provided, but it is rarely, if ever, needed on a mill.


A continuously variable electronic speed control determines the motor speed. A control panel mounted on the left side of the head has the following features:
- Green Power-on pilot light (left side)
- Emergency power cutoff button (left side)
- Speed control knob (0-1100 RPM in LO range, 0-2500 RPM in HI range)
- On/Off toggle switch
- Fuse holder

In practice, the motor is controlled by the black knob. When turned to its full counterclockwise position, a switch integral to the potentiometer cuts off power to the motor.
As a safety feature, the motor will not start unless this switch is first turned off. This ensures that the motor does not start up at full speed when the silver toggle switch is turned on.
The speed must always be advanced by turning the knob from zero to the desired speed. Since the knob can turn the motor off entirely, the silver toggle switch is really redundant; I never use it.
The emergency power cutoff button seems like a good idea, but the mechanics of it are a little odd. A snap-lock cover can close down over the button, holding it in the OFF position.
The cover must be open during normal operation since the button is ON when not depressed. During an emergency, I guess you are supposed to press and hold the button until the mill cuts off.
This resets a relay controlled by the speed knob so that the mill will not start back up when the button is released - you must reset the speed knob to zero to restart.
Personally, I think a simple toggle switch might be more effective here. Oh, well, the big red button at least looks cool.
Mounted at the top of the column is another electrical box that contains the power supply circuit board and a small cooling fan. The power supply is similar to that of the 7x10 mini-lathe and probably identical to the power supply of the Grizzly 7x12 mini-lathe.
It is more advanced than that of the 7x10, though, in that it has overload protection, fan cooling and mandatory return to zero RPM when restarting. Three relays are mounted on the board.
The board also contains a separate 12V DC power supply and transformer - presumably to supply these relays with power. The fan has its own outboard 12V DC power supply.


Cast Iron Base
The whole thing rests on a cast iron base about 9x12". Four mounting holes provide for bolting the base to the workbench using 3/8" bolts. I highly recommend this - in fact will say that *it is dangerous to operate the mill without bolting it down.

If you mount the mill directly to a workbench, there is very little clearance between the surface of the bench and the Y-axis handwheel. Steve Bedair came up with the idea of mounting the mill on a few thicknesses of plywood to work around this.
I adapted Steve’s idea for my mill, but used 2 thicknesses of 3/4" of MDF instead of plywood.
Table and Hand Wheels
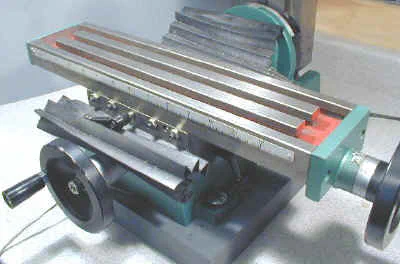
The table is also cast iron, ground to a smooth and flat surface with T-slots for holding T-shaped clamping nuts. A heavy metal plate is bolted to each end of the table.
The table can be moved side-to-side (X-axis) and front-to-back (Y-axis) by means of heavy cast iron handwheels mounted on the right side of the table (X-axis) and front of the base (Y-axis).
Each handwheel has a calibrated scale that, in principle at least, allows you to move the table a precise distance.

A pair of rubber accordion-style chip guards cover the Y-axis dovetails. These flex as the table is moved front/back and keep chips from jamming up the dovetails and leadscrew threads.

X,Y and Z Axis Graduations
The X and Y axis leadscrews are 16 threads per inch (TPI). Thus, turning the handwheel one full turn moves the table 1/16" (.0625) and turning the handwheel 16 full turns moves the table 1 inch, exactly.
Unfortunately, this choice of pitch, as opposed to, say 10 TPI, leads to confusing divisions on the graduated dials attached to the handwheels.

If you examine these dials, you will see that they are divided into increments of .001", but the numbering scheme is confusing, at best.
The “2” actually represents 10 thousandths, since there are 10 divisions of .001 from the “0” to the “2”. Following this logic, the “12” represents 60 thousandths (.060) and one complete revolution is 62.5 thousandths (.0625) or 1/16".
So why did they mark them “2” through “12” rather than “1” through “6”, or even better “10” through “60”? Go figure. Hmmm… come to think of it, I guess I could add my own numbers, or just multiply by 5.
One redeeming factor is that multiples of 1/16" are fairly easy to count off since each full revolution is 1/16". Need to move the table by 5/16"?
Just count off five full revolutions making sure that you begin and end on the same division of the dial.
The dials can be zeroed independently of the handle movement to facilitate this.
I take advantage of this fact when advancing the Y-axis feed on successive passes over a workpiece. For example, if the end mill is 1/2" diameter, I advance the Y-axis handwheel 7 turns between passes, or 7/16".
This gives me 1/16" overlap on each pass. For convenience in counting revolutions I start and end with the hand wheel crank at the bottom of its swing.
Just when you thought things were getting clear, you take a look at the Z-axis dial. Sorry, on this dial, each division represents .002", and one full revolution is 30 divisions or .
060". The numbers represent divisions, not thousandths.

As confusing as this may seem, it is less of an issue in actual use since you are typically working to scribed marks on the workpiece and/or using a dial indicator to achieve precise measurements.
Rick Kruger, for one, has outfitted his mini-mill with digital readouts (DROs) on all 3 axes. Nice going, Rick!
 Rick Kruger’s DRO-equipped mini-mill
On my mill, I have a 1" dial indicator mounted on the Z-axis and a 2" mounted on the Y-axis. I will probably add a DRO on the X axis when time permits.
Z-Axis Drive Mechanism
A source of much consternation among mini-mill owners is the Z-axis drive mechanism. It consists of a rack and pinion arrangement for coarse adjustment which can also be driven by a worm gear for fine adjustment.
The coarse adjustment lets you quickly and easily move the head up and down the column for changing tools and drilling operations, while the fine adjustment is used to lower the head a few thousandths at a time to control the depth of cut.
One problem is that the fine-feed mechanism has a great deal of backlash, but this can be worked around. A more serious problem is the potential for the head to shift downward during a cutting operation.
More about these issues below.
Rack and Pinion Feed
A rack extends down the front of the mill column. The head rides up and down along this rack, aided by the the gas cylinder or torsion arm.

A 3-arm handwheel, much like that on a drill-press, is mounted on the right side of the head and drives the pinion that engages the rack. The 2nd photo below shows the pinion withdrawn from the head casting and the black metal housing which encloses the worm drive.


The 3-arm wheel is mounted on a shaft such that it can move in and out along the shaft. A pair of castellated cogs (like a castellated nut, or the top of a medieval castle tower) engage the fine feed when the wheel is pushed in, and disengage it when the wheel is pulled out.
The little graphic on the side of the head illustrates this:


Worm-Drive Feed
A flexible coupling connects the Z-axis adjusting handwheel to the pinion through a worm gear to provide fine adjustment or, ‘fine-tuning’ as the label on the side of the mill indicates.


Backlash
The fine adjustment has lots of backlash that can’t easily be removed. The flexible coupling is the source of some of the backlash, but my experiments indicate that the majority is not there, but in the worm drive itself.
Additional backlash exists in the rack and pinion. The net result is that there may be a full-turn or more of backlash in the Z-axis handwheel when changing direction of head movement.
I was able to reduce this somewhat by loosening the mounting bolts for the worm drive assembly and twisting it a little to take up slack before retightening it.
Now, that being said, it’s easy in practice to work around this. As in any situation with backlash, if you move past the desired target point, then reverse direction to take up the backlash before making a calibrated movement, you can offset the effect.
Additionally, I have mounted a dial indicator on my column and always use it when precise Z-axis motion is needed.
Gib Screws and Gib Lock
The sides of the column form a dovetail slide which mates with the back side of the head casting. An adjustable gib strip and four adjusting screws with lock nuts enable the dovetail to be adjusted to remove excess play between the head and the column.
These screws should be as snug as possible, while still allowing free movement of the head.


A locking lever presses the gib strip tightly against the dovetail to lock the headstock in a fixed position for cutting operations. The gib strip has a diamond-shaped cross-section; you can see the top end of it just above the topmost gib adjusting screw.
Here are some important precautions for avoiding ‘head creep’:
- Make sure Z-axis gib screws are adjusted and locked for a very snug fit
- Engage the fine-feed and lower the head a few thous to remove backlash
- Firmly tighten the Z-axis gib locking lever
If you forget to perform these steps, vibration from the cutting operation will very likely cause the head to slip down the column a small amount, causing the cutting tool to dig into the workpiece.
This is most likely to occur when using larger diameter cutting tools since they impose a larger force when they first contact the workpiece. At best, this may only ruin your workpiece; at worst the workpiece may be ripped free from the vise or clamps and become a dangerous projectile.
Another common result is that teeth are sheared off of one or more of the gears in the mill’s drivetrain. This can cause frustrating downtime while you order new parts and can get expensive after the mill is past the one-year warranty period.
I recently had to replace 3 gears due to this problem at a cost of $38 (I forgot to lock the gib clamp before cutting). This is my third set of gears including the originals.
Grizzly replaced the first set under warranty at no charge. Sheared gears, from this cause and another I will discuss later, are probably the biggest source of frustration among mini-mill owners.
Brett Flemming replaced the motor gear drive with a toothed-belt drive to mitigate this problem. Check it out.
Tilting Column Feature
A hollow cast iron column of rectangular cross-section is attached to the base of the mill by a large nut and compression washer. A big wrench is provided for adjusting the big nut.
Caution: when loosening this nut, make sure you have a firm grip on the top of the column - you don’t want it to fall to either side. Loosen the nut only enough to be able to move the column.
It’s a good idea to keep the head down low as well, so that there is less leverage from its weight.

The mill is designed so that the column can tilt from side to side up to 45 to allow milling at an angle to the workpiece. An angular scale on the front side of the column aids in setting a specific angle.
Talk to anyone who’s used a mill very much and you will find that they generally don’t recommend this approach. You can almost always get the same result by tilting the workpiece instead, usually by means of an angle vise.
The problem with tilting the column is that you want it as precisely perpendicular to the table as you can make it, and realigning it precisely, a procedure known as ’tramming’ takes 10-15 minutes.
If you rely merely on visually aligning the head to the zero mark on the angle scale, the mill will very likely be tilted at a slight angle not detectable to the eye.
The result is that you won’t get a nice smooth cut, as the face of the mill is actually canted slightly to one side or the other so that the cutting edge on one side is higher than on the other side.
Offsetting the Weight of the Head
On early models of the mill, including mine, a gas-filled cylinder occupies the empty space in the middle of the column. Similar to the cylinders used on car hood and trunk lids, this cylinder attaches to the headstock casting by a bracket and offsets the considerable weight of the headstock assembly so that it does not come crashing down when it is unlocked.
Of course, the cylinder also eases the job of raising the headstock assembly.

On newer models, the gas cylinder has been replaced by a torsion arm mounted on the left side of the column. I can’t say which is better, having only used the gas type, but the torsion arm apparently gets in the way sometimes and prevents the headstock from reaching its lower limit.
Steve Bedair and some other owners have modified the mounting to correct this deficiency.
 Photo credit: Chris Wood
Column Scale
On the left side of the column, an inch-scale and pointer provide a crude measure of head movement in the Z-axis. I have never really used this, other than maybe for rough measures of hole-drilling-depth.
Generally, I find I need less range, but more precision, as provided by a dial-indicator (DI). I have permanently mounted a DI on my column to meet this need.
