Mini Lathe Accessories
Aluminum Round Stock
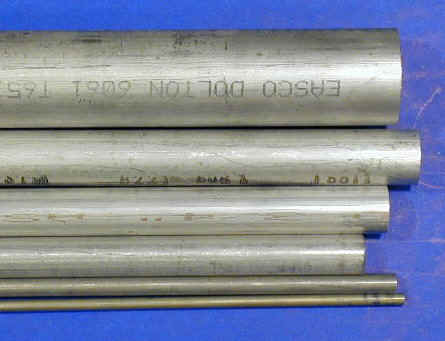
Aluminum is an excellent material to practice on since it is inexpensive, cuts easily and takes a nice finish. I use it for most of my projects unless there is some reason to use another material, such as the need for extra strength.
In practice, there are many varieties of aluminum. During the refining process aluminum is mixed with specific proportions of other metals to produce desired characteristics of strength, weight, corrosion resistance and machinability in the combined metal, which is called an alloy. Many different alloys are available to meet specific needs, but ‘6061’ alloy is a good choice for working on the minilathe.
You are unlikely to find 6061 or similar alloys at your local hardware store – the kind you find there is typically very soft and gummy and does not machine well. To get the good stuff you will need to order from an industrial supplier such as Online Metals, MetalMart or Enco.
A good starter supply would be 3′ lengths of 1/8″, 1/4″, 1/2″ and 3/4″. Some of the online metal suppliers have kits that include a wide range of stock for about $100.
From some suppliers you must specify the length that you want, and they may charge a ‘cutting fee’ to cut the material to size. Other suppliers sell stock in fixed length of 2′, 3′ or 6′. Typically I buy aluminum in 6′ lengths for diameters up to 1″.
Since the amount of metal in a rod increases with the square of the diameter, the price goes up steeply for larger diameters. To give you an idea, here are some prices from the 2003 Enco catalog for 6 foot lengths of 6061 round stock:
| Diameter | Price (2012) |
|---|---|
| 1/4″ | $6.72 |
| 3/8″ | $9.42 |
| 1/2″ | $13.74 |
| 1″ | $30.11 |
| 2″ | $98.24 |
Fortunately, when working with larger diameters, the workpieces are usually relatively short, so you don’t need as much.
For more information, see the Materials page.
Ball-end Hex Wrenches
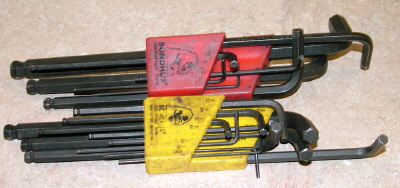
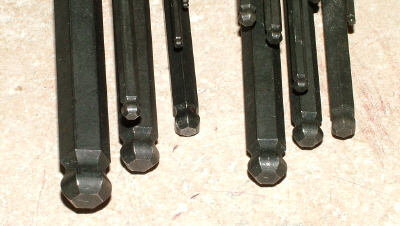
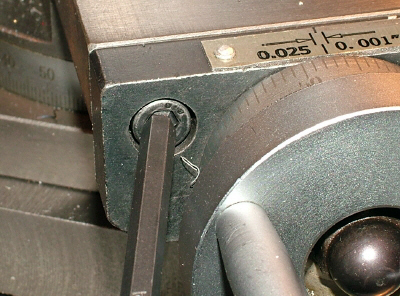
These are so handy that I should have added them to this page years ago. (but I’ve been busy!) I have an SAE and a metric set made by Bondhus. They are a huge convenience when trying to access a socket head cap screw where straight-line access is blocked.
Usually, the screw can be loosened or tightened using the greater leverage of the long handle, then rapidly spun in or out using the ball-end. The holders for mine are beat up from years of use, but the tools are as good as the day I bought ’em.
Bench Grinder
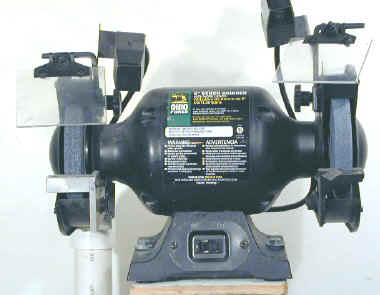
You will need a 6″ bench grinder for grinding tool bits. I bought an Ohio Forge brand from Home Depot for under $50 and it has served me well. See my grinder mods page for more info.
Brass Round Stock
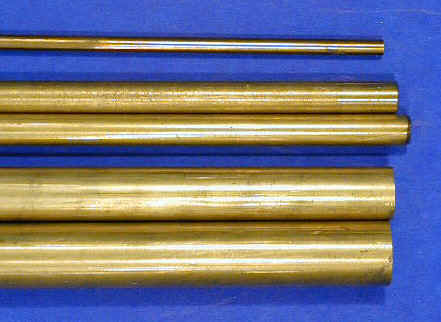
Brass is a nice material to work with, though somewhat expensive compared with aluminum or steel. It can add a nice touch of contrasting color to a project that will be displayed. The alloy most often used for home shop work is 360. You can obtain it from the typical suppliers such as Online Metals, MetalMart or Enco.
For more information, see the Materials page.
Center Drills
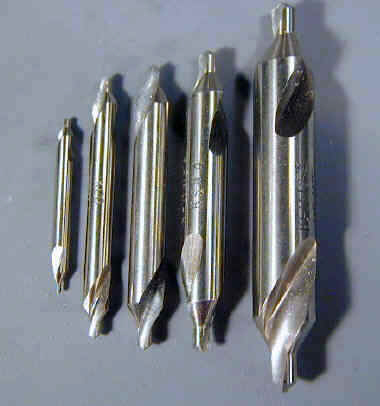
Center drills are stiff, stubby little drills used to start holes in the end of workpiece. If you try to drill a hole in a workpiece without using a center drill you will find that the drill will most likely wobble off center and not drill straight into the workpiece.
Standard drilling practice is to first make a facing cut on the end of the workpiece, then drill a starter hole using a center drill and then drill the hole to the required depth with a standard drill.
Center drills come in many sizes but you will definitely need sizes #1, #2 and #3 (good idea to get 2 of each). You can buy sets of #1-#5 on sale for under $5.00.
Chip Brushes
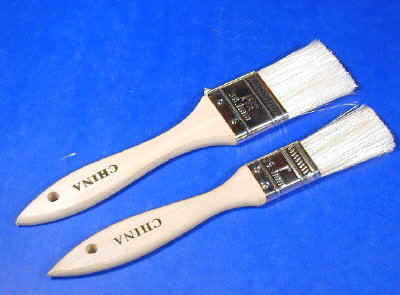
Chip brushes are inexpensive paint brushes that are handy for all kinds of uses around the shop. I’m not sure where the name originated, but I don’t think it had anything to do with removing chips; nevertheless this is one of the uses these brushes excel at.
They are also ideal for use with Kerosene or WD-40 to clean the packing grease off a new lathe or mill. Incidentally, experienced machinists will tell you always to use a brush, rather than compressed air, to clean the chips from machine tools as compressed air will drive the chips deep into the recesses of the machine.
Chip brushes and a shop vac are the preferred way to clean up chips.
You can get them from the usual industrial suppliers such as MSC, J&L and Enco and can usually find them at the big-box hardware stores in the paint section. Some, such as the ones at Home Depot, have natural bristles which I like a lot better than the synthetic bristles shown in the photo above.
The synthetic bristles tend to splay out over time and don’t do as good a job. At about $.30 to $.60 each depending on the size, they are cheap enough that you won’t feel too bad about tossing them out if they get too gunked up, but they hold up for years in most applications.
Get several in each size such as 1″, 2″ and 3″ and keep them around the shop. You can’t have too many!
Chucking Reamers
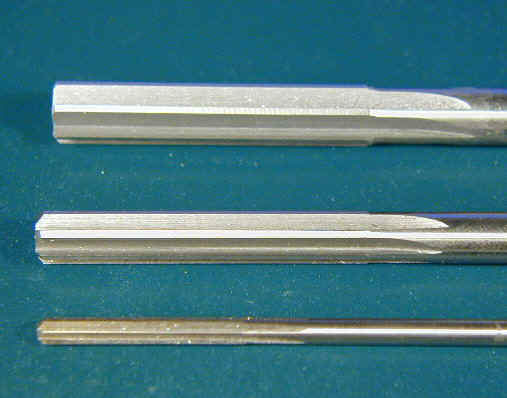
Chucking reamers are used to make the final cut on relatively small diameter holes (typically 1/2″ or less). Unlike a standard twist drill bit, a reamer will form a hole that is exactly round in cross-section and with a diameter accurate to .001″.
In use, they are clamped in the tailstock chuck or a drill press chuck and advanced into the work as in a drilling operation. They are relatively expensive so it makes sense to buy them one or a few at a time as you need them.
They are available in nominal sizes such as 1/8″, 3/16″, 1/4″, etc., and also sized .001 under the nominal size or .001 over the nominal size, for example .249 and .251.
The under size reamers are used when you want a press-fit or tight fit and the oversize reamers when you want a free or relatively tight fit, as for an axle or rotating shaft. You can buy sets that contain one undersize and one oversize reamer for each nominal size, in increments of 1/16″. These are very useful to have on hand when you need them.
Digital Caliper
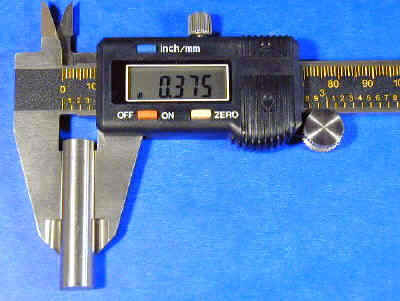
Digital calipers are used just like dial calipers for making inside and outside measurements accurate to one one thousandth of an inch but have a direct LCD digital readout. On a dial caliper you first read the major dimension to the nearest tenth of an inch from the slide and mentally add to that the minor dimension from the dial to the nearest thousandth.
This becomes second nature after a while, but still introduces opportunities to make a mistake. A digital caliper reads out the full dimension on the display, so is pretty foolproof, as long as it is properly zeroed. You can also switch between metric and inch modes as needed.
They are now available at prices that make them very attractive for home shop use. Harbor Freight has one for $39.99 on sale (08/02) for $19.95 and several purchasers have reported favorably on it. Update: I bought one for myself and am pretty happy with it. Read the review for more info.
I have several of these now, and they are one of the most frequently used tools in my shop. They have, for the most part, been accurate and reliable, but I’ve gotten at least two in which the display continually blinks on and off.
That’s supposed to indicate a low battery, but these blinked even with a fresh battery. However, HF exchanged them with no hassle for ones that work properly. Good idea to test them before you leave the store, if possible.
After a lot of experience with many digital devices (calipers, DROs, etc.) I discovered that using silver batteries eliminates the blinking display issue. There are batteries of identical size, but different electrical properties. The silver batteries are AG13 size, Ag being the chemical symbol for silver.
You can find 10 and 100 packs of these batteries on eBay (search for ‘AG13 battery’) at very favorable prices. In some cases I have ordered them from vendors in Hong Kong, and they arrived within a week or two via US mail. As a corollary, avoid batteries sold for hearing aids. I used to use them because they were easy to find locally, but they don’t have the power needed for the digitial display tools.
Drill Rod
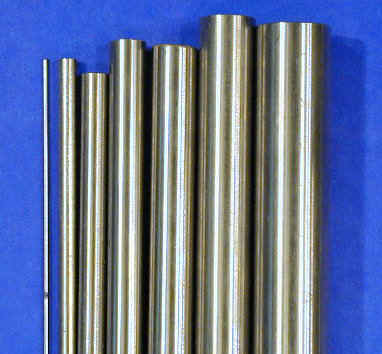
Drill rod is a steel alloy with a shiny silvery color (thus it is known in the U.K. as silver steel) and good machining properties. Unlike other raw materials, which may vary from the nominal diameter by + .010 or more, drill rod is surface ground to within about .001 of the nominal diameter.
For many applications, this means that the outside surface requires no additional finishing. While not classified as a stainless steel, drill rod is moderately resistant to rust – more, at least, than ordinary carbon steels. It is great for applications such as shafts and axles.
It is available from the usual industrial suppliers typically in 3-foot lengths. Don’t confuse this material with Drill Blanks which are short lengths of hardened high-speed steel used for making drills.
A useful property of drill rod is that it can easily be hardened by heating to a red hot state and then quenching in oil or water. Thus treated, the metal is hard enough to use for tools such as punches. Depending on the quenching method, drill rod comes in three types: air hardening, water hardening and oil hardening.
Drill Sets
Drilling is one of the most commonly performed operations on the lathe, so you will need a good collection of decent-quality drills. When you buy your lathe, don’t forget to order a tailstock chuck and arbor to hold the drills.
Poor quality drills are easy to find, but they are truly a waste of money. That’s not to say that you need to buy top-quality industrial drills as there are good quality import drills available from the usual suppliers such as MSC, J&L, Harbor Freight, Grizzly and Enco.
U.S. made drills from reputable industrial suppliers are nearly always of excellent quality, but I have purchased some U.S. made drills that were real junk. Check the fine print to make sure that the drills you buy are made from High Speed Steel (HSS) and not from softer carbon steel.
It’s not always easy to tell a good drill bit from a poor one just by looking and, of course, its even harder if all you have is a picture on a web site or in a catalog. Generally, though, the lowest priced drill sets are the ones to stay away from.
Drill bits come in several standard size ranges:
- Fractional drills; often sold in sets of 29 from 1/16″ (.0625) to 1/2″ (.500) in increments of 1/64″
- Number drills; sold in sets of 60, numbered #1 (.228″) to #60 (.040″)
- Tiny wire gauge number drills; sold in sets of 20 from #61 (.039) to #80 (.0135″)
- Letter drills – less commonly used; sold in sets of 26 from A (.234) through Z (.413)
- Metric drills – sold in 19 pc. sets from 1mm to 10mm in increments of .5mm
- Silver & Demming drills – large size (17/32 to 1″) drills with a 1/2″ diameter shank
If you are just starting out, a good choice is a set of 29 fractional drills and a set of 60 number drills. Unless you do a lot of metric work, these will meet most of your needs on the minilathe.
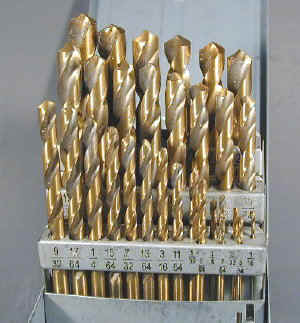
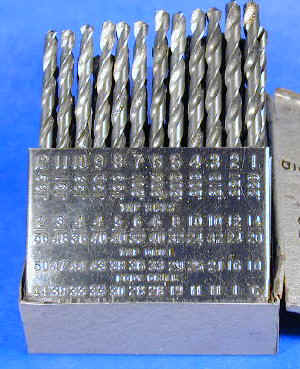
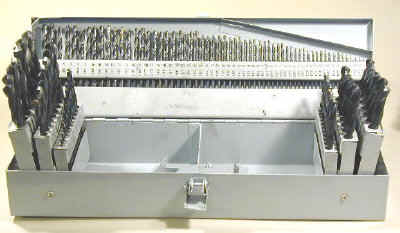
There are several other factors that you need to be aware of when selecting drills. The drills commonly used are called “jobber” drills. These are the type that we are all familiar with that you would find in your local hardware or automotive store.
They have a straight shank, the same diameter as the drill and a 119º tip. “Letter Drills”, in which the diameters are designated A – Z, are handy when you need a hole size a little larger or smaller than the nearest fractional inch diameter.
I’ve noticed that the drill bits in some of the cheaper import drill sets that I’ve purchased as “spares” (you can’t have too many!) are not perfectly straight as a good-quality drill bit would be.
When you rotate them in the chuck, you can actually see the tip trace out a small circle. Not good! I don’t know how to detect this condition before making the purchase, but when you buy a new set of drills, you might want to check for this condition before you use them and return them to the seller if they are out-of-round.
Another type that can be handy for the minilathe, especially the 7×10, are Screw Machine Drills. These look much like jobber drills but are shorter – which can be a real advantage within the short confines of the 7×10.
I bought a set when I had my 7×10 and on several occasions they enabled me to drill a hole when a jobber drill was too long. You won’t find these at a typical hardware store – order them from an industrial supplier such as J&L, MSC or Enco.

Screw machine 3/8″ diameter drill bit compared with jobber-length drill bit
Another factor to consider is the coating of the drill bits. Typically you will find three coating options:
- Uncoated bright steel
- Black Oxide
- TiN (Titanium Nitride)
Over the last few years, a number of new exotic coatings have become available. I have not tested these newer coatings, so I can’t report on any advantages, but it’s pretty safe to assume that a coated drill will outperform an uncoated one by resisting chip welding and thus staying cooler and cutting a cleaner hole.
Coated drill bits, and especially the newer TiN coated ones, shed chips more easily and are thus less likely to bind or get chips welded to the drill bit surface. Aluminum is especially subject to chip welding, and if it occurs, the welded chips can scour the hole surface and generally mess things up.
Additionally, while extremely thin, the TiN coating is very hard and is said to increase drill bit life. I have had good service from TiN coated drills and can definitely recommend them. Usually, these are better quality drills and selecting them makes it much less likely that you will end up with really poor quality drills.
A final consideration is the material that the drills are made from. Stay away from ordinary carbon steel drill bits – these are often sold in hardware stores and are suitable only for wood and soft materials.
The only practical choices for minilathe work are high speed steel (HSS) and Cobalt steel. The cobalt ones are harder and will last longer, but are also more expensive. HSS is a good choice if, like most of us, you are on a budget.
One tip to extending the life of any drill set: when drilling a hole, such as a pilot hole, for which the exact drill diameter is not critical, choose an off-size bit. This will save wear and tear on the commonly used sizes such as 1/4″ and 3/8″.
This covers just the real basics of drill selection. There are dozens, if not hundreds, of specialized drill types used in industry, but for our needs the basic jobber drills in HSS are generally adequate.
Faceplate
A faceplate is a handy accessory for turning odd-shaped work that cannot easily be held in a chuck. While the Grizzly 7×12 includes this accessory out of the box, one has not been available for the 7×10 until about December 2000.
Harbor Freight now offers a cast iron faceplate for the 7×10 as SKU 43582 for 12.99. While it’s not too difficult to make your own faceplate from steel or aluminum, at this price it’s hardly worth the effort. It will fit any of the Sieg-made 7x mini lathes.
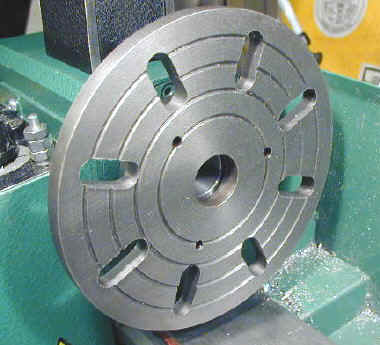
The faceplate mounts to the 7×10 spindle in the same way as the chuck, but the 6x1mm studs required are not provided. You can make your own by parting the heads off of some bolts, if you do not have a source for the studs.
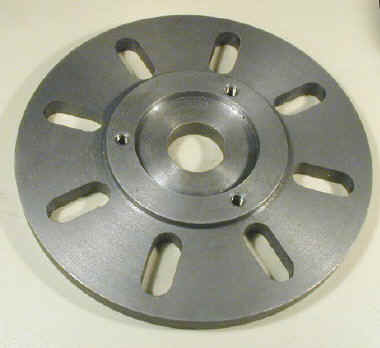
After mounting the faceplate on the spindle, it is standard practice for faceplates to take a light one-time facing cut to ensure that the face of the plate is square with the lathe. Cast iron dust is very harmful to breathe, so I strongly recommend wearing a dust mask during this operation and until you have vacuumed up the resulting dust.
When using a faceplate, always ensure that the work is securely clamped down and balanced by some offsetting piece of metal, if necessary. Work at low RPMs.
Feeler Gages
Feeler gages are sets of thin steel strips of accurate thicknesses, typically from .001 up to about .040 or so. There are typically about 20 to 40 separate strips in a set, joined together by a bolt that runs through a hole in the end of each gage.
Each gage has the thickness marked on it, in both inches and mm in the example below. All of the leaves fold up into the handle to protect them from bending (or cutting you!) when they’re not in use.
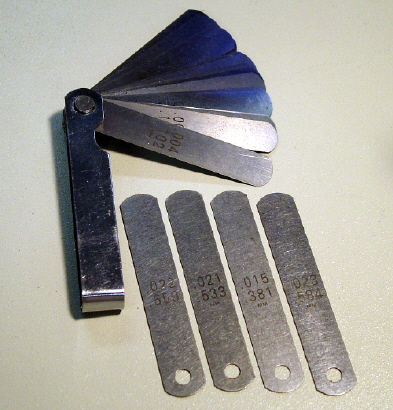
While their intended purpose is to measure the gap between two surfaces, such as the electrodes of spark plug, when removed from the set, they make nearly ideal shims for adjusting the height of cutting tools – but only until you get a Quick Change Tool Post, of course 😉
Just remove a few leaves from the set and stack them as needed under the bottom of the cutting tool until the tip of the cutting too is right on the centerline of the lathe. You can find them at automotive stores and probably in the auto parts section at Wal-Mart; also at Harbor Freight.
Follower Rest
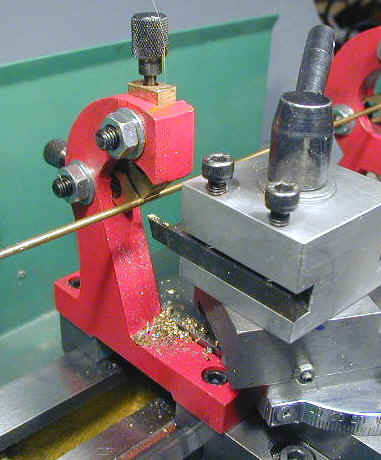
Around December 2000, Harbor Freight started selling a follower rest for the 7×10 as SKU 43580 for $16.99. It will fit any of the Sieg-made 7x mini lathes.
A follower rest is similar to a steady rest, but is attached to and travels with the carriage to provide a moving support for the work behind the cutting tool. This is very handy when trying to turn limber work which would otherwise bow out away from the tool.
If you have ever wondered about the two screw holes on the left edge of the carriage, now you know what they are for – they are the mounting holes for the follower rest.
Live Center
Centers are often used in the tailstock to support the end of a relatively long and limber workpiece. The minilathe comes with a #2 MT “dead” center.
The drawback of a “dead” center is that the center does not rotate, while the workpiece that it supports does, leading to friction and possibly overheating. By contrast, the tip of a “live” center is rotates freely in bearings, and rotates with the workpiece so that the friction is greatly reduced.
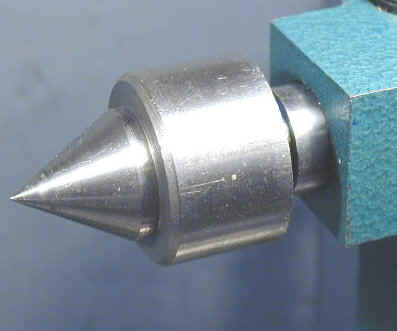
The Harbor Freight used to (and may still) come with a #2 MT “live” center but the 7×12’s that I have owned did not come with one.
You can purchase them from a variety of sources, but you will want a very small one with a #2 Morse Taper arbor to work effectively on the minilathe. A good choice is P/N 1189 from LittleMachineShop.com for $12.95 (09/03).
Medium Density Fiberboard (MDF)
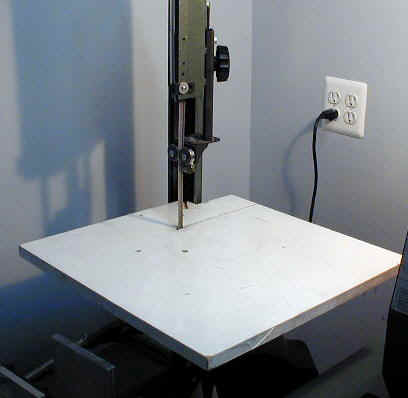
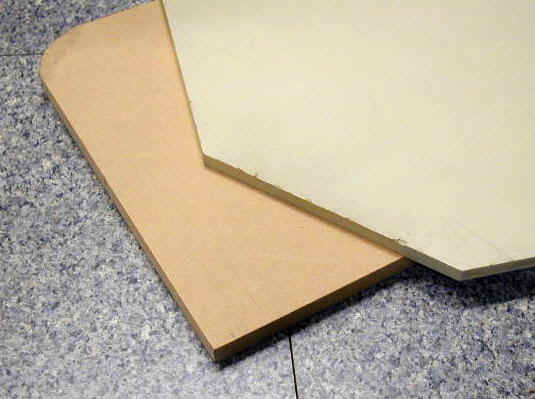
MDF is not really an accessory, I suppose, but it is a handy, inexpensive, lightweight and easily workable material to have around the shop. It is a synthetic material something like masonite, but with different properties. It is available in thicknesses up to at least 3/4″ and is smooth on both faces.
It cuts easily using a saber saw, circular saw, bandsaw, table saw or radial arm saw. One disadvantage is that it tends to absorb moisture, but this propensity can be greatly reduced by spray-painting the surfaces.
It works best for applications such as bench tops since it resists compression well. It is weaker where the edges are exposed and especially when screws must be driven into the edges, since the screws tend to separate the layers that make up the material. Drilling pilot holes for the screws will help prevent this.
You should wear a dust mask (preferably a good, industrial-quality one) when cutting MDF since the dust contains formaldehyde which can irritate your throat and lungs.
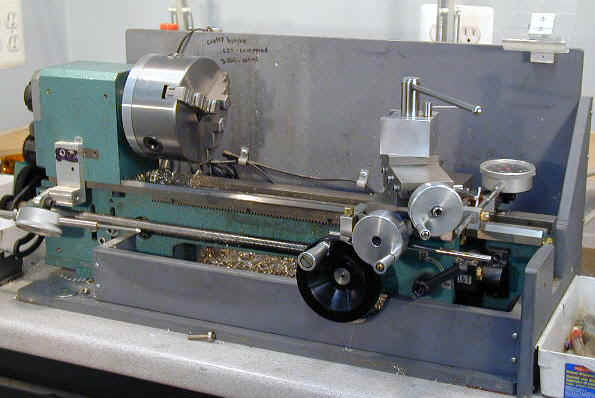
I have used it for lots of projects around the shop, including an enclosure for the mini-lathe and a base for the mini-mill. You will find it in the lumber section of your local hardware stores such as Lowes and Home Depot, in both 4×8′ sheets as well as pre-cut “hobby size” 2×2′ and 2×4′ pieces.
Milling Attachment
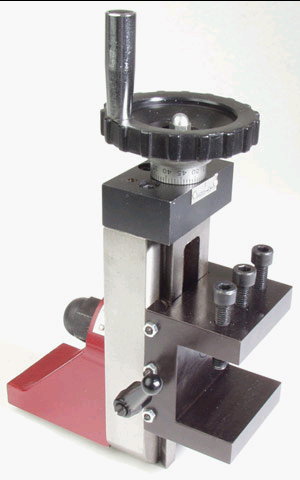
Around September 02, a milling attachment became available as a standard accessory for the mini lathe. It is currently available from Micro-Mark and LittleMachineShop.com (SKU 1681) and is most likely made by Sieg, then manufacturer of the 7x mini-lathes.
Before this accessory became available, many lathe owners made their own versions based on the one made by Varmint Al. Varmint Al’s uses a standard milling vise while the one shown below uses socket head screws to hold the workpiece between the jaws.
While by no means a substitute for mini-mill, this accessory is an inexpensive way to add limited milling capability to your mini-lathe while you save up for a mill.
Quick Grip Glue
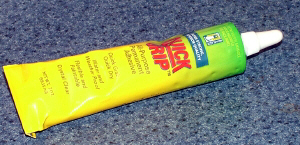
While not exactly an accessory, I find all kinds of uses for this stuff in the shop, but where I find it most valuable is for tacking assemblies in place while prototyping the design of a component or machine modification.
The glue sets rapidly and can be accelerated by pulling the glued parts apart a few times after applying the glue. Hey, it’s not my idea, that’s what the manufacturer recommends and they’re right, it really speeds up the setting time.
This glue is strong enough that I have used it numerous times for permanent installations – especially for attachments to machines where it is difficult and time consuming to drill holes in the cast iron or steel of the machine. It can be easily removed, if necessary, by soaking or flooding the part with some acetone or naptha (use these solvents with caution).
You can find it at crafts stores and in the crafts deparment at Wal-Mart for about $4 per tube. A little goes a long way.
Steady Rest
Around December 2000, Harbor Freight started selling a steady rest for the 7×10 as SKU 43579 for $24.99. It will fit any of the Sieg-made 7x mini lathes. The Grizzly 7×12 comes with this accessory, as does the ToolsNow 7×12, but it is not included by all vendors.
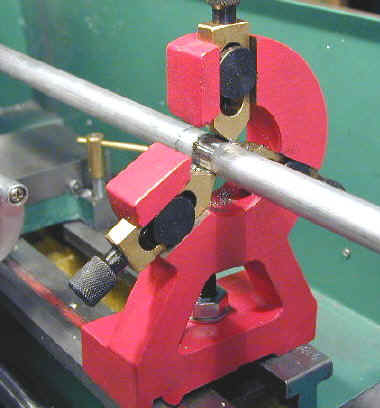
A steady rest, for the uninitiated, is clamped to a fixed point on the ways, usually near the end, and has adjustable ‘fingers’ that are adjusted so that they lightly contact the outside of a long and/or limber workpiece to keep it from wobbling or thrashing.
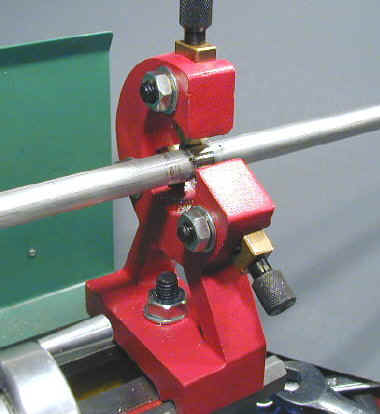
On this model, the fingers are brass and are adjusted by means of thumb screws and then locked in place by means of lock nuts. Use a few drops of oil to lubricate the contact surface between the work and the fingers to keep the work from heating up and binding.
The steady rest clamps to the ways with a clamp much like that on the tailstock, and with the same frustrating tendency to rotate to an orientation which does not fit between the ways. My tailstock fix should work here, too.
T-handle Metric Hex Wrench Set
OK, these aren’t really essential, but they are so handy and so cheap you will kick yourself if you live without them and then later try them. I use these for nearly all the hex head screws on the lathe. Sets are available on sale for under $10. When you get them you will think they are junk, but mine have held up well for years in spite of heavy use.
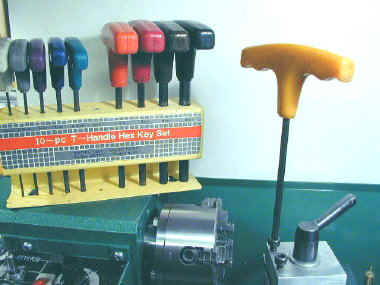
After 11 years I have never broken one in spite of a lot of use and abuse. I have touched up the tips of a few of them on a grinder; other than that, they have been 100% reliable. I use them so frequently that I bought another set of SAE and metric when they were on sale a few months ago so that I now have them at two locations in the shop.
Tailstock Chuck and Arbor
Drilling is a fundamental lathe operation and you will need a chuck and #2 Morse Taper arbor to do it. The arbor has a thread or Jacobs taper on one end – to mate with the chuck – and a #2MT on the other end to mate with the tailstock cylinder.
For quite some time, HF did not offer a chuck and arbor that fit directly in the 7×10 tailstock #2 Morse Taper. Now they do, and is SKU 42340 for $9.99 (08/03). At this price, which is about what I paid just for the arbor on my chuck, I decided to buy one just to have as a backup in case my main chuck failed one day and also to keep my web site readers informed.
It’s not a great chuck, but is adequate – especially if you are just starting out and are on a tight budget. My main dislike is that the black metal shell is stamped metal, not a ground casting as you find on a better quality chuck.
The other problem, but one that you will most likely encounter with any chuck that you buy for the 7×10, is that the arbor is too long for the tailstock spindle. It fits, but the spindle must be extended out from the tailstock casting by about an inch to seat the arbor in the taper.
Not only is this an inch of lost ram travel, but it is desirable to keep the ram extended as little as possible in order to maximize its rigidity during the drilling operation.
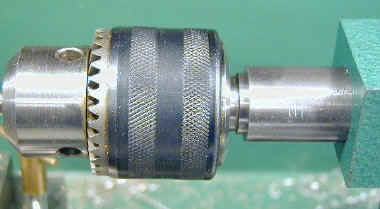
The solution to this problem is merely to cut about 3/4″ or so from the end of the arbor. This can be be done with a hacksaw or a Dremel-type tool with an abrasive cutoff wheel.
I cut mine using a cutoff blade in my radial arm saw with the arbor clamped between two pieces of wood in my heavy drill press vise. I took this cut very slowly and carefully since it generates a lot of heat and sparks.
The following photos compare the arbor on my Grizzly chuck, which also had to be cut down to size, with the arbor of the HF chuck.
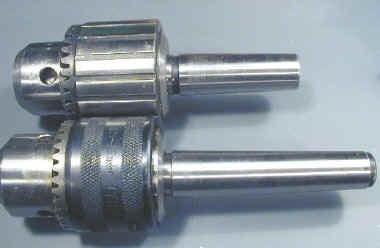
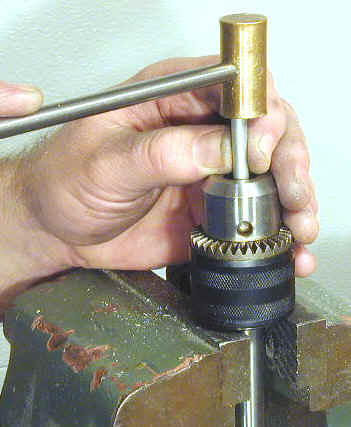
To remove the arbor, place the chuck in your bench vise with the jaws open just a little wider than the arbor diameter (not clamping the arbor). Open the jaws up and use a short piece of round stock or a drift pin to drive the arbor out of the back of the chuck.
This should only require a fairly light tap of the hammer. It’s a good idea to position a rag underneath the arbor to catch it so that it does not get dinged up by falling to the floor.
I got my 1/2″ chuck and arbor from Grizzly. The chuck is P/N G1649, $16.95 (note as of 2/01, this part number appears to be obsolete. A similar chuck is P/N G8224, $12.95) and the arbor is P/N G1434, $7.95. This chuck has a #6 Jacobs taper.
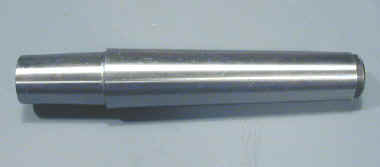
The #2MT end of the arbor will most likely have a flattened end ‘tang’ that you will need to remove – otherwise it will be too long for the tailstock cylinder. Check the 7×10 interest group and search for ‘tang’ for ideas on how to do this.
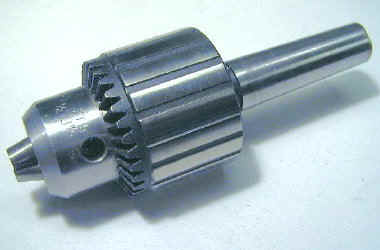
I used a fiber cutoff blade on my 10″ radial arm saw and clamped the arbor between two blocks of wood in my heavy drill press vise. Then I lowered the blade about 1/16″ on each pass until I cut through. The cutoff tool throws a lot of sparks so be sure to wear good-quality safety glasses and stay out of the line of fire.
The blade also heats up the workpiece so I used a damp rag to cool it off in between cuts. After cutting, I smoothed the end of the arbor on my disc sander.
Tool Bits
While I recommend that you learn to grind your own tool bits from Tool Blanks (see below), when you’re starting out you may want to buy a set of pre-ground High Speed Steel (HSS) tool bits.
Not only will they get you off to an immediate start, they’ll serve as good examples of the shapes you want to attain when you grind your own. Here’s a very nice set from Walden Specialties. The set includes a 60° threading tool that can be difficult to grind by hand.
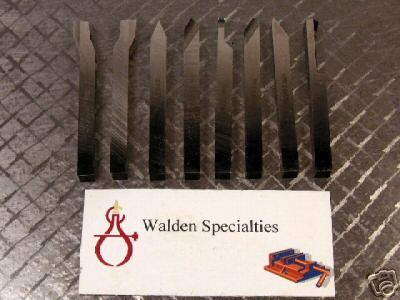
You can also find a selection at LittleMachineShop.com.
Tool Blanks
Yes, you could buy ready-made carbide tool bits, but learning to grind your own HSS tool bits is a valuable skill and part of the fun of learning to use the lathe. You will soon learn to grind special tools for parting, boring and other operations.
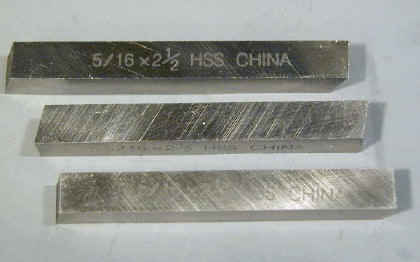
Tool blanks are available from many sources; I usually get mine from Enco (on sale for as little as 80 cents each) but have also bought them from Grizzly, J&L and other suppliers. All of the 7×10 and 7×12 lathes use 5/16″ x 2 1/2″ tool bits except for the older model Homier/Speedway which use 3/8″ x 2 1/2″ tools. (This is true for some pre-1999 7x10s as well).
Before ordering, it’s a good idea to check the height from the lower surface of the tool holder (where the tool sits) to the tip of a center in the headstock or tailstock. Be sure that the tool blanks you order are a little smaller (on each side) than this distance.
Transfer Punch Set
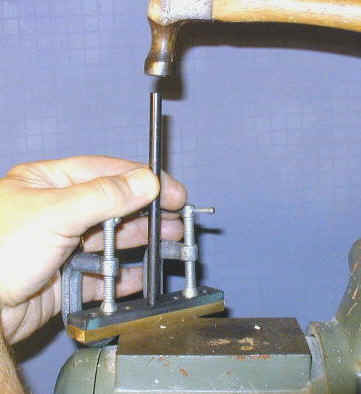
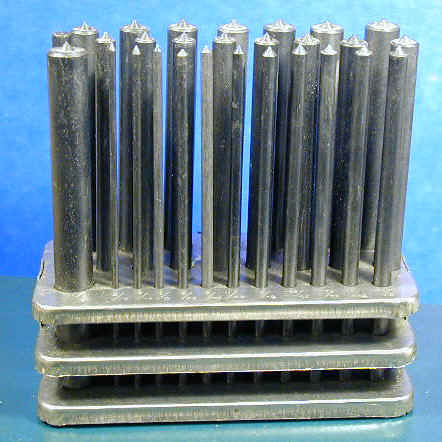
Transfer punches come in sets sized like twist drills. Import sets are available for under $10 and are fine for hobbyist use since they are used infrequently. They are hardened steel with a pointed tip and are used to ‘transfer’ the location of a hole in one workpiece to a mating surface in another workpiece.
A punch is selected that just fits within the original hole and is struck lightly with a hammer to make a punch mark that will be at the center point of the hole. They are also handy as for determining the inside diameters of small holes.
Quick Change Toolpost
A quick change tool post (QCTP) is an accessory that I strongly recommend: get one as soon as your budget allows. Why? It will save you hours of time and lower your blood pressure by several points since you’ll no longer have to stack shims under the tool bit to get it to match the height of the lathe centerline.
With a QCTP, each cutting tool has its own dedicated holder. Each holder has a locking height adjustment. A few quick trials and adjustments and you lock the tool height to the perfect setting. You won’t need to adjust it until you sharpen the tool, which may lower the tip by a few thousandths.
But that’s not all: switching tools between operations is a snap; 15 seconds or less, and the new tool that’s in place will be at the right height. The only downside to a QCTP is the relatively high price (about $100 for a set as of Jan. 2009), and you’ll soon find that you want lots of toolholders. The more the better!
If you have a mill, you can make your own toolholders to trade time for money. If you’re really hardcore, consider making your own QCTP and all the toolholders you want from the plans in my Premium Content pages.
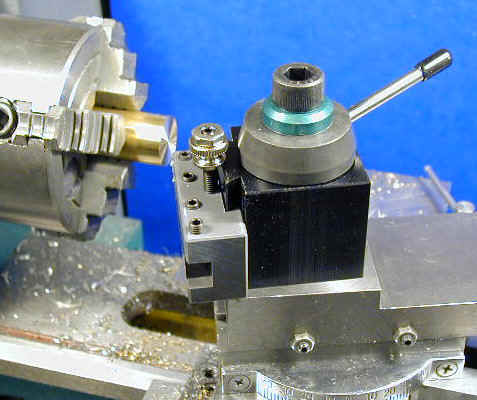
The one in the photo was made by TS Engineering, but they are no longer selling them as of 2009. LittleMachineShop.com has several other varieties to choose from, including models to fit lathes such as the Taig, Sherline, Atlas, C4 and others.
Wet/Dry Sandpaper
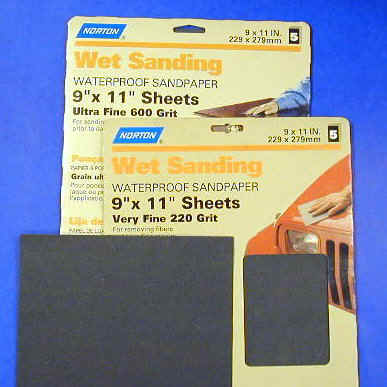
Wet / Dry sandpaper is very handy for putting a very fine shiny finish on metal workpieces in the lathe. In that application it is generally used dry, but when used wet on a flat backing surface it does a great job of smoothing flat metal workpieces from milling operations.
You will need a variety of grits such as 220, 320, 400 and 600 and can sometimes find assortment packs that contain such a variety. You can find it in the paint section of most hardware and automotive stores.
White Lithium Grease
White lithium grease is useful for lubricating just about any of the moving parts of the lathe. (Use light oil on the ways, though, not grease). I buy it at Sears’ tool department in small tubes. Two of these tubes should last you a year or more.
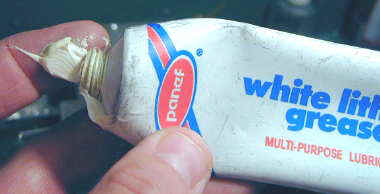
I tend to use regular motor oil (e.g. 10W-30) for most of the lubrication on the lathe and mill nowadays. The lithium grease is still handy for certain applications, though.